C425 Conversion – Part4
May 14, 2021
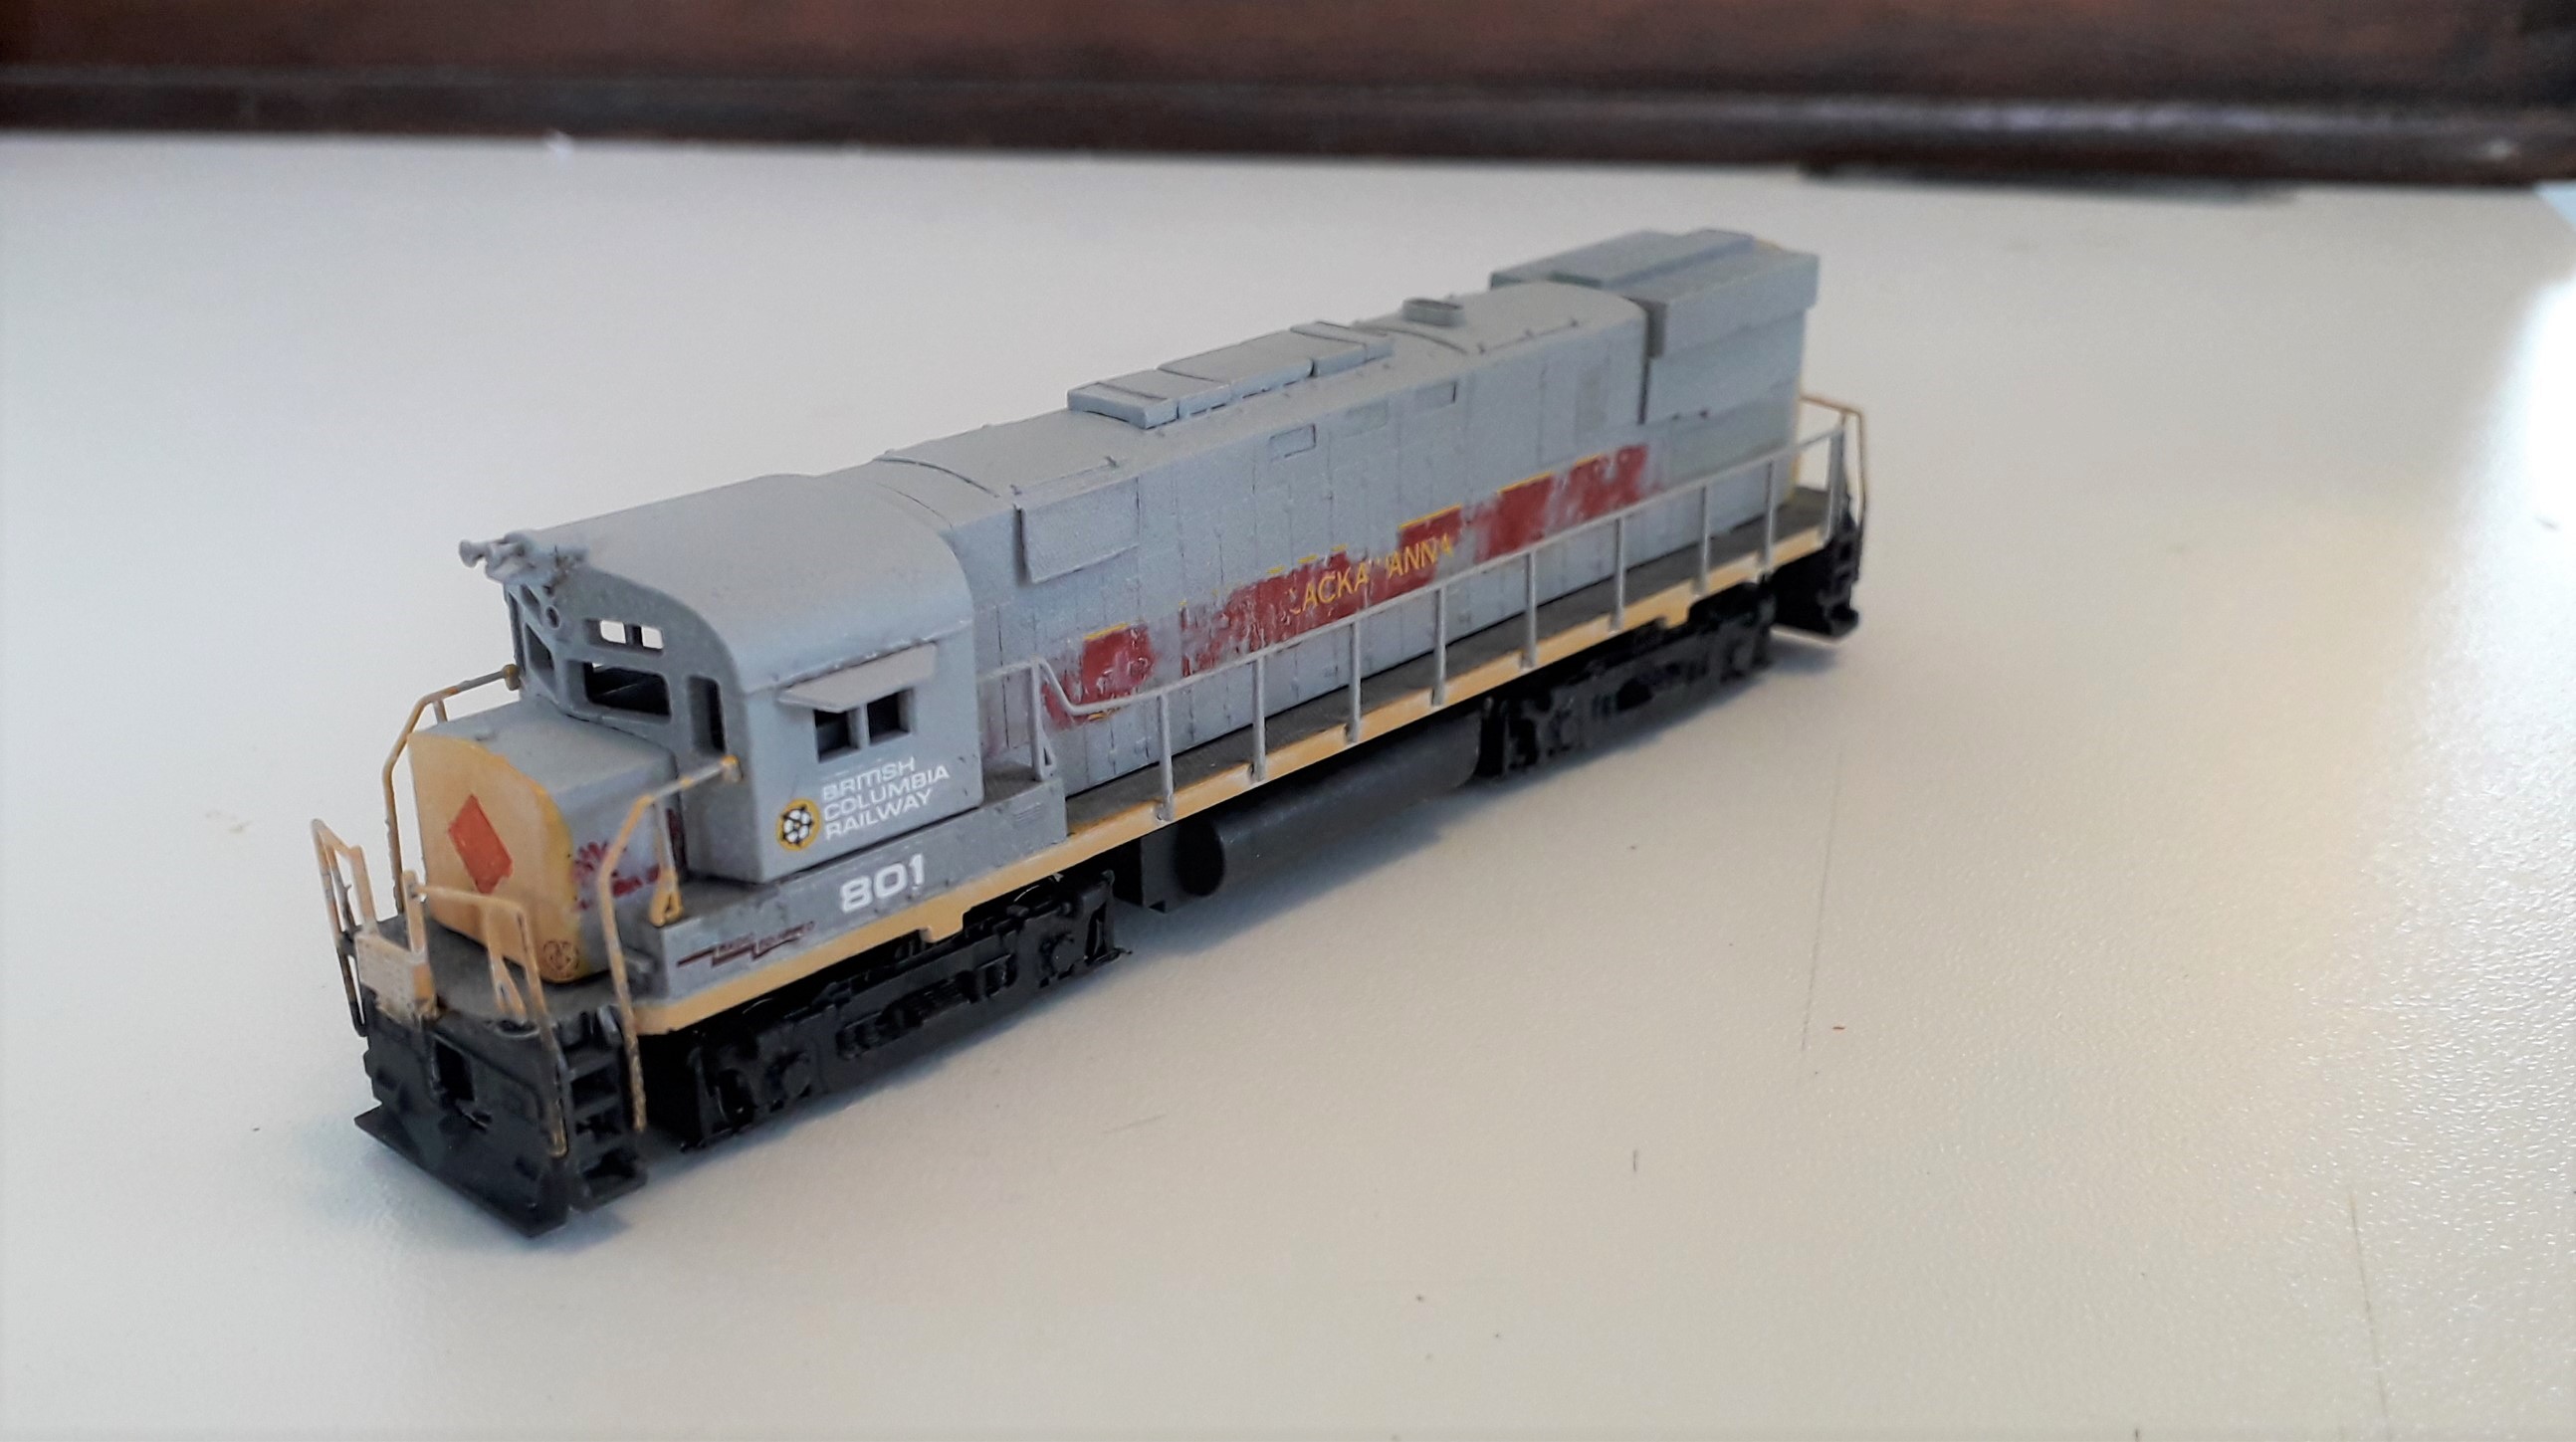
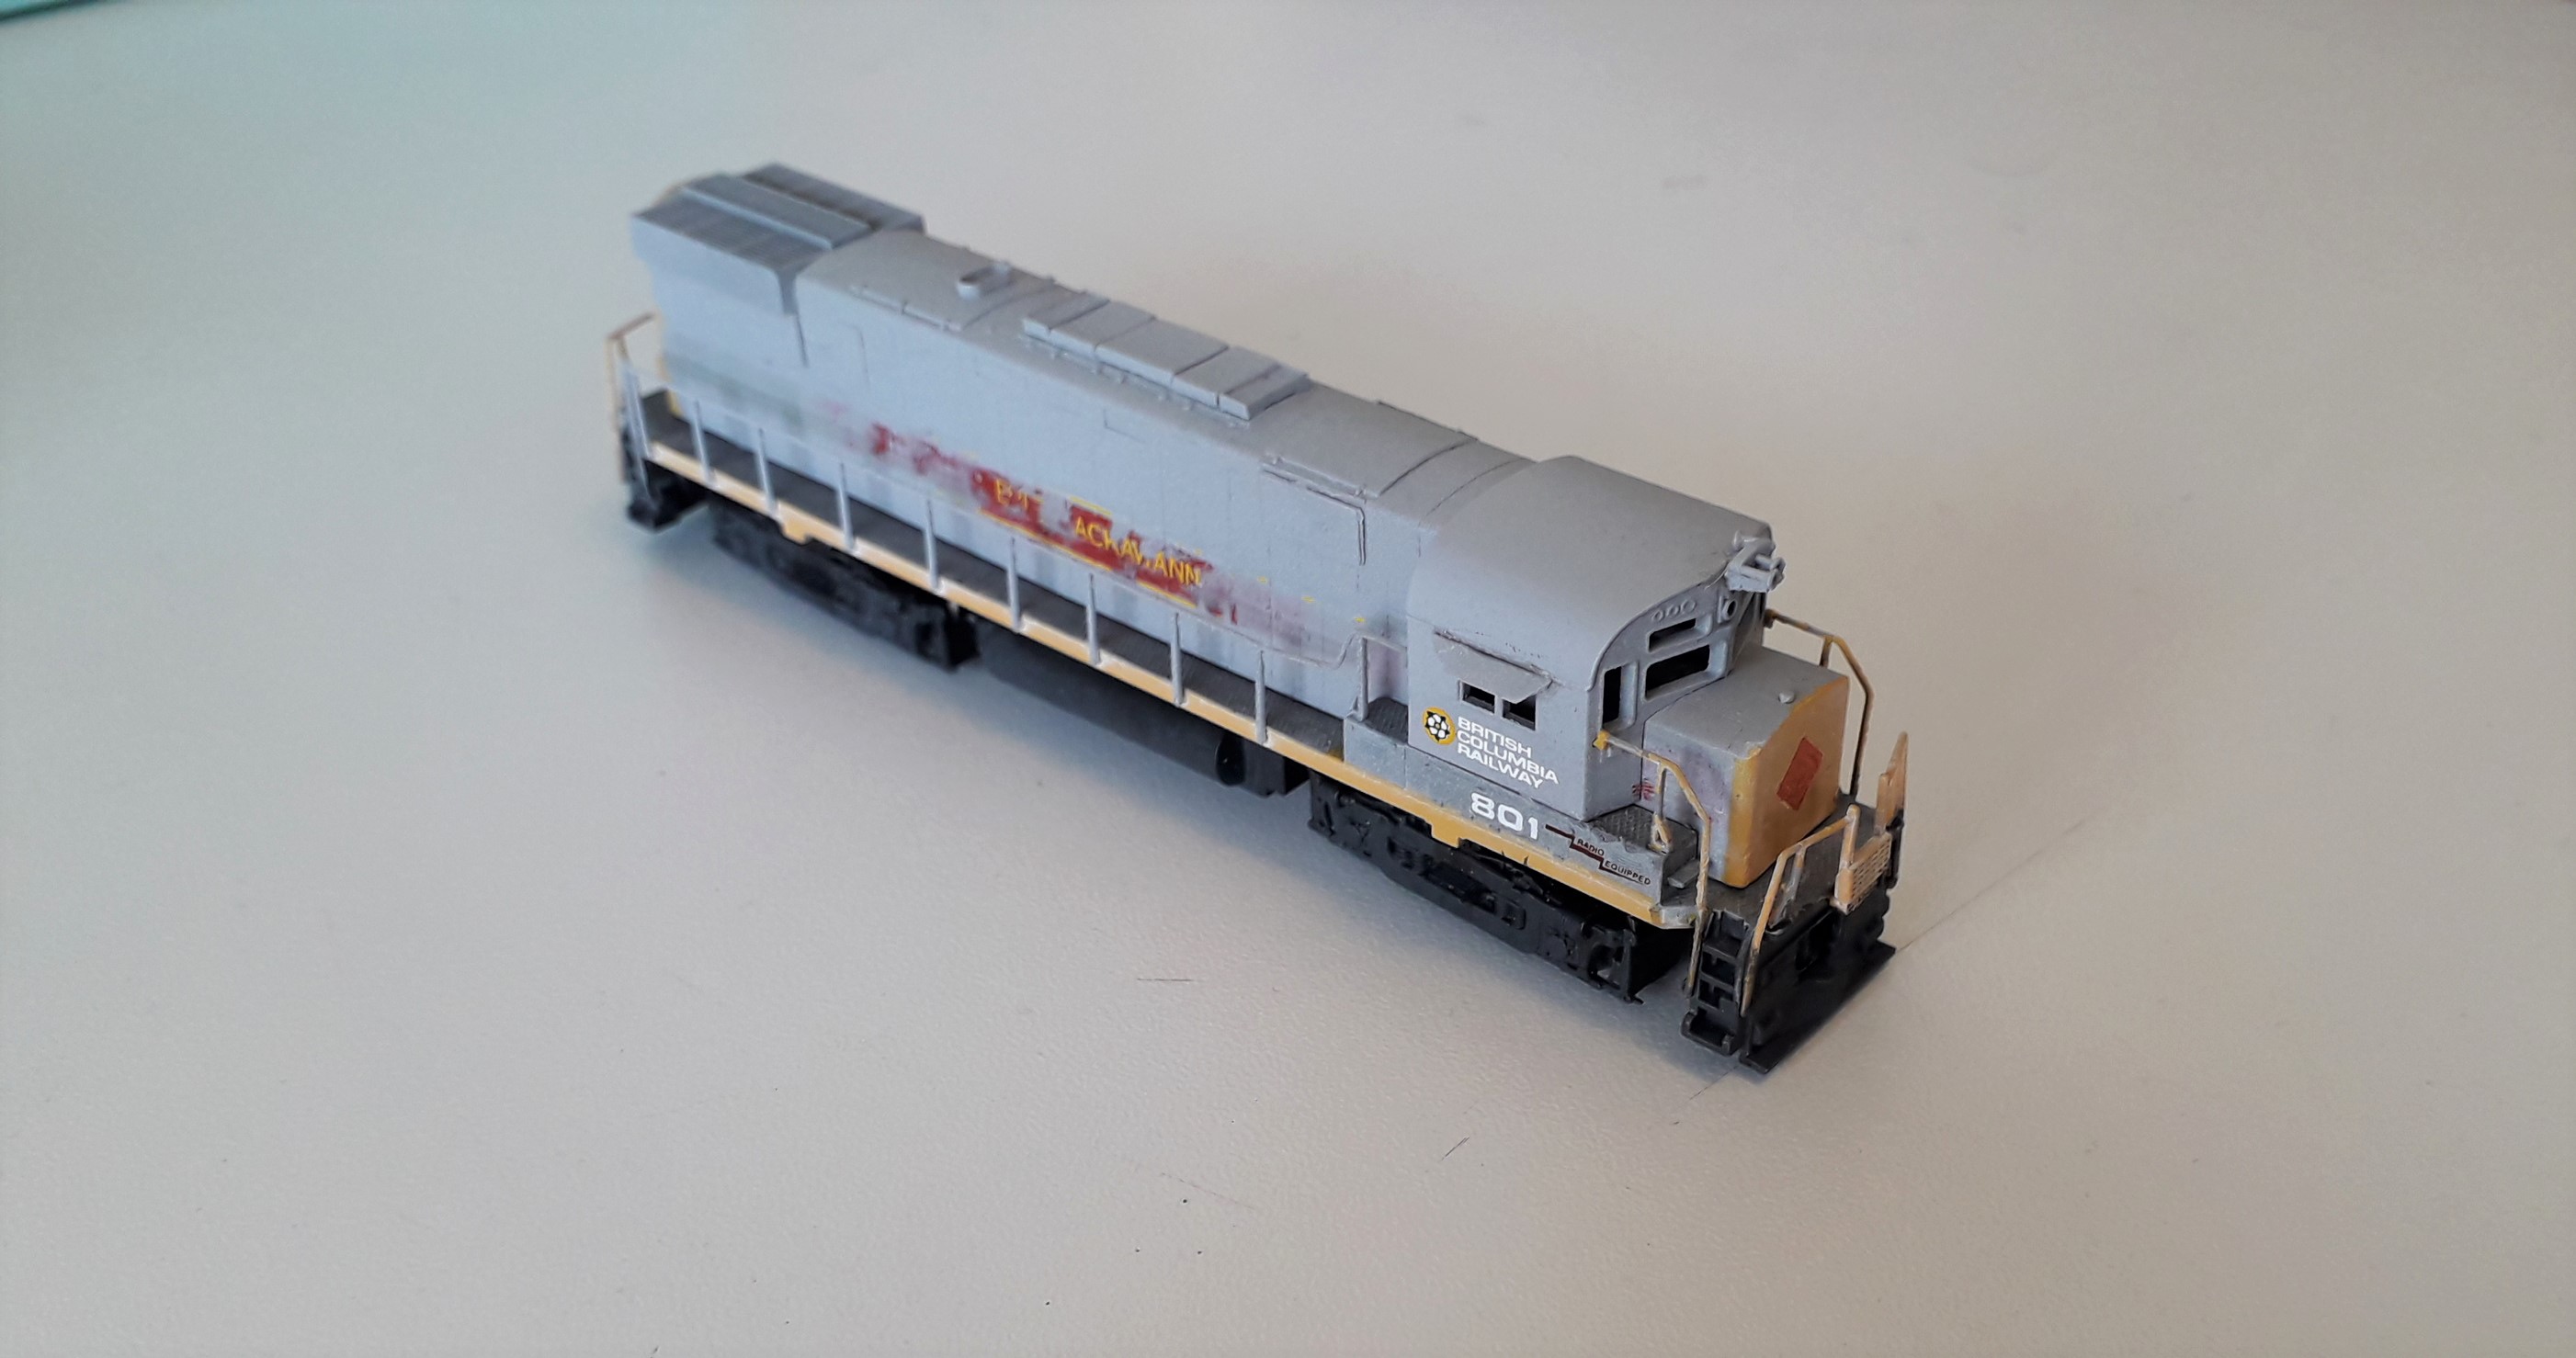
Some offcuts of Erie Lackawanna Microscale decals recently arrived as part of a shipment from overseas so 801 has progressed a bit further.
When I left the project in February I had applied the BCR lettering and had painted remnants of the EL maroon band on the long hood.
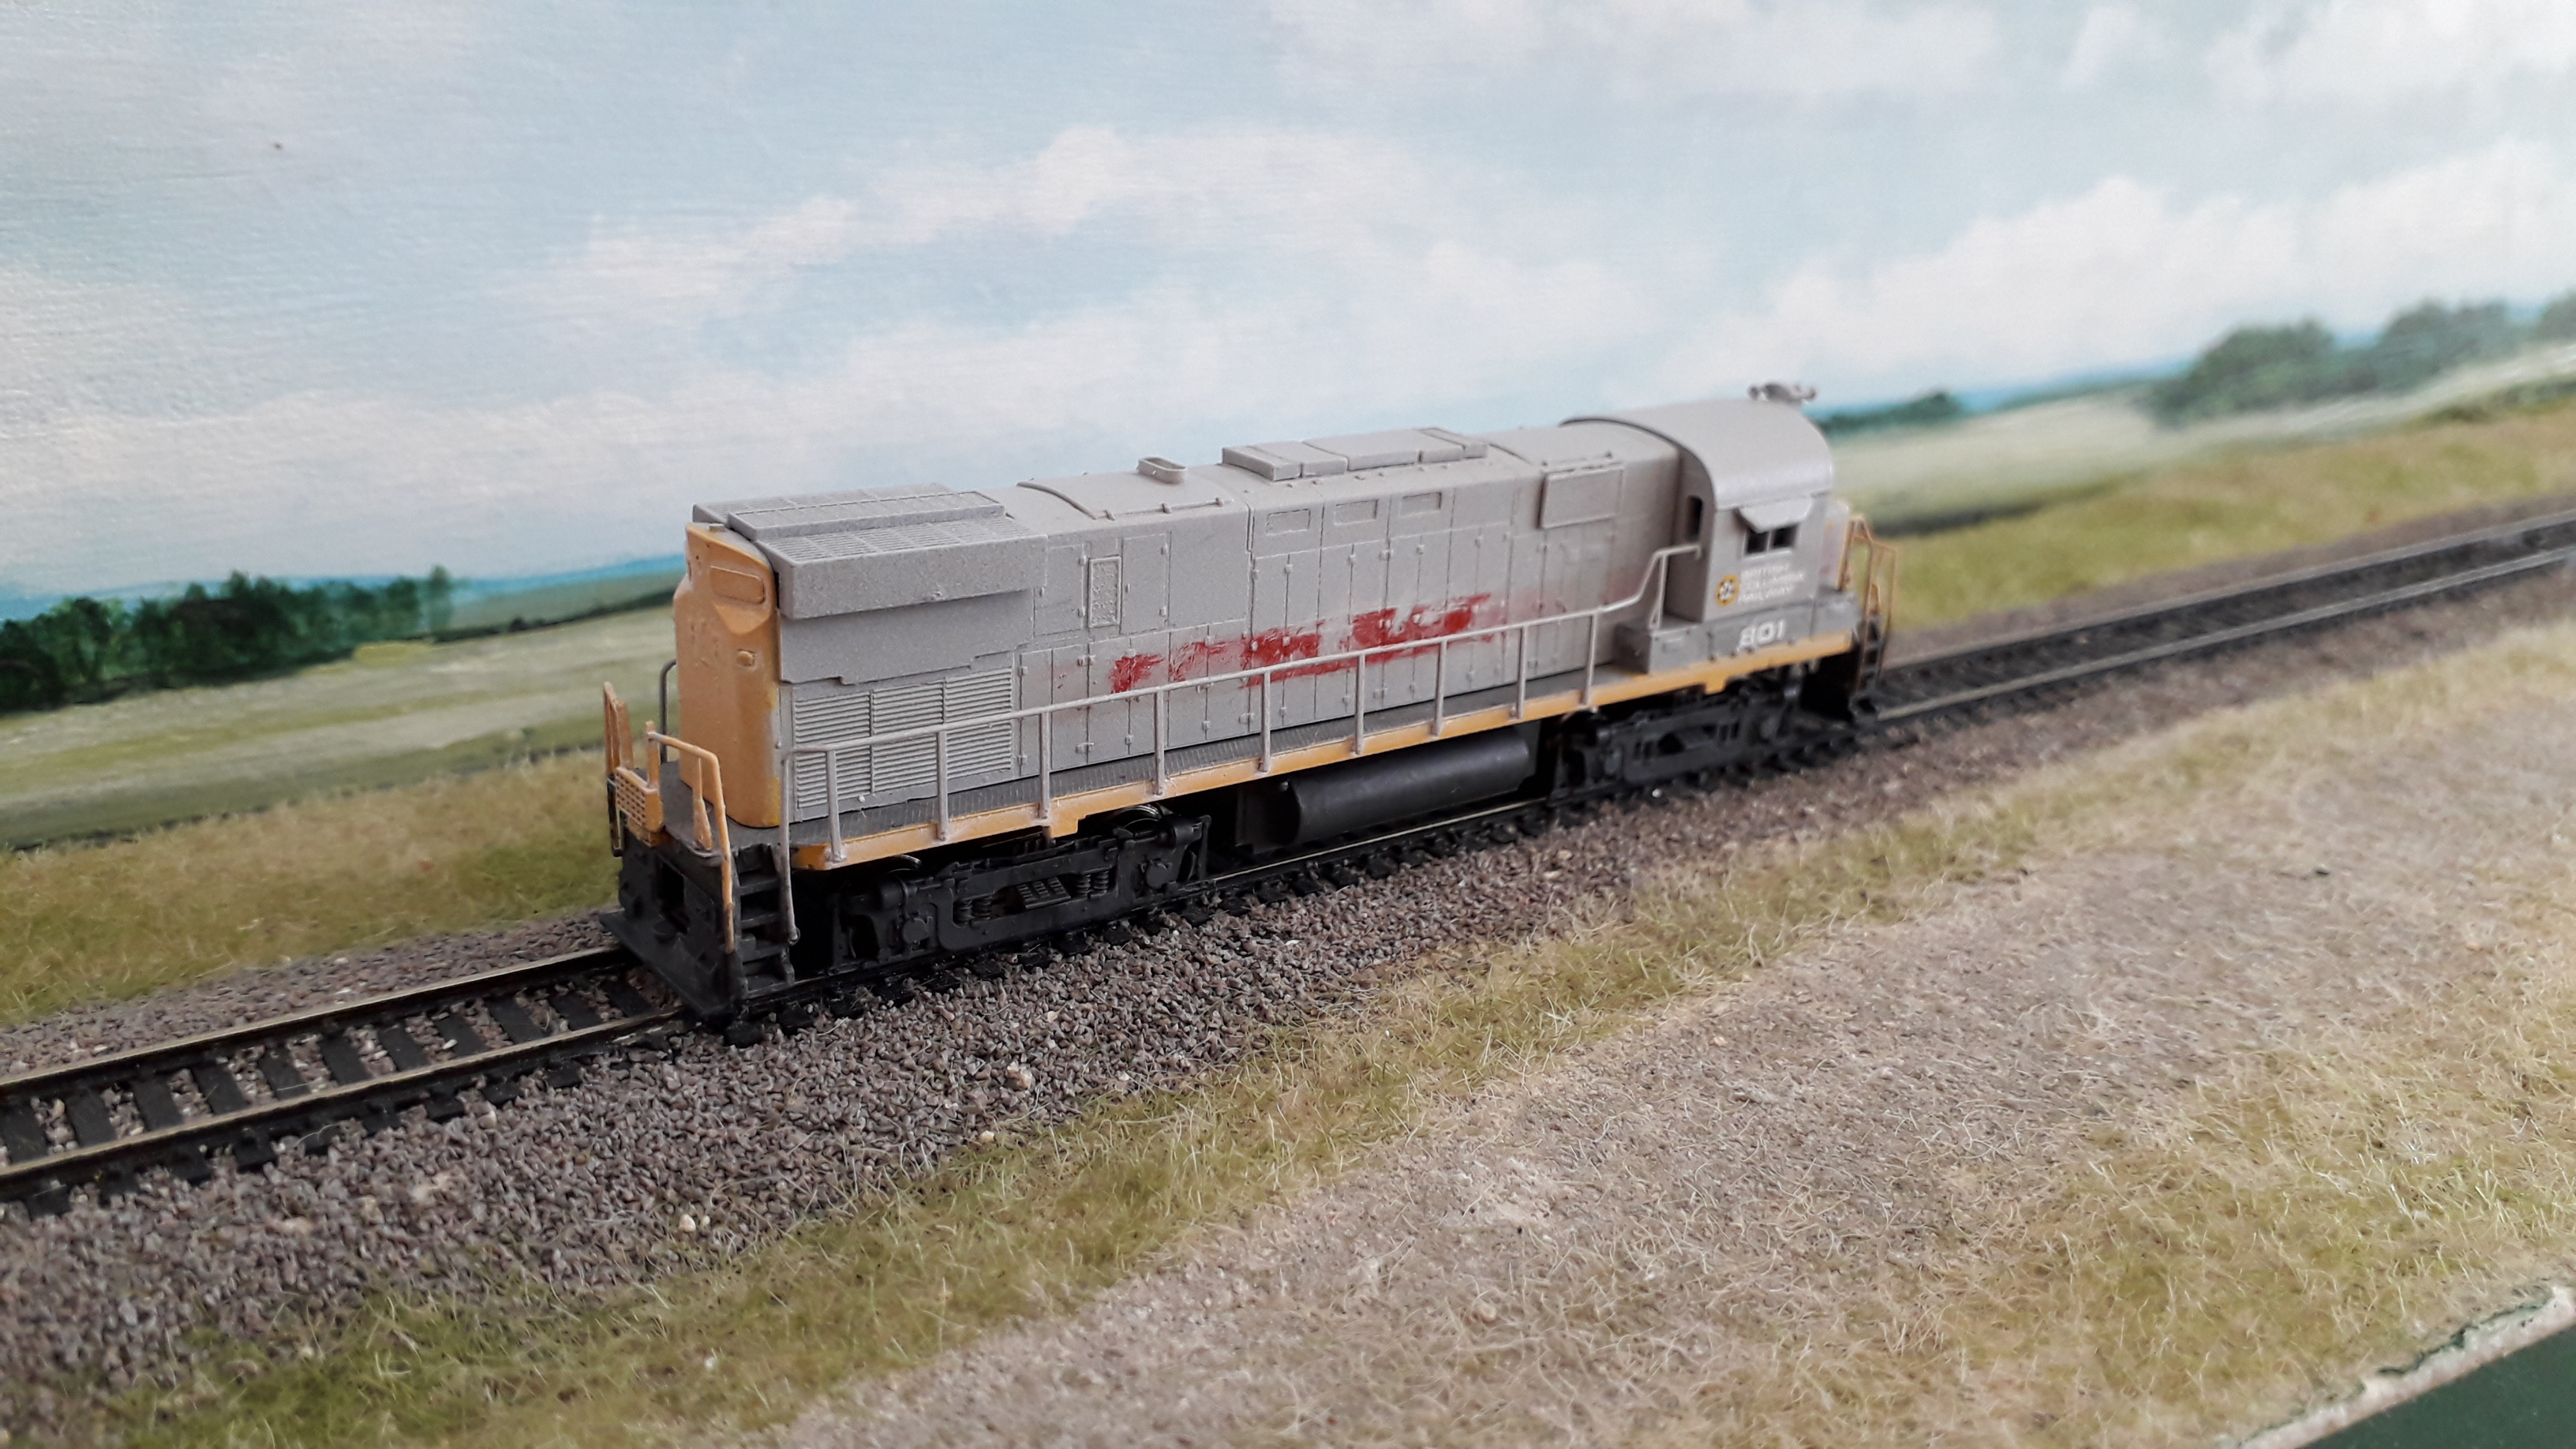
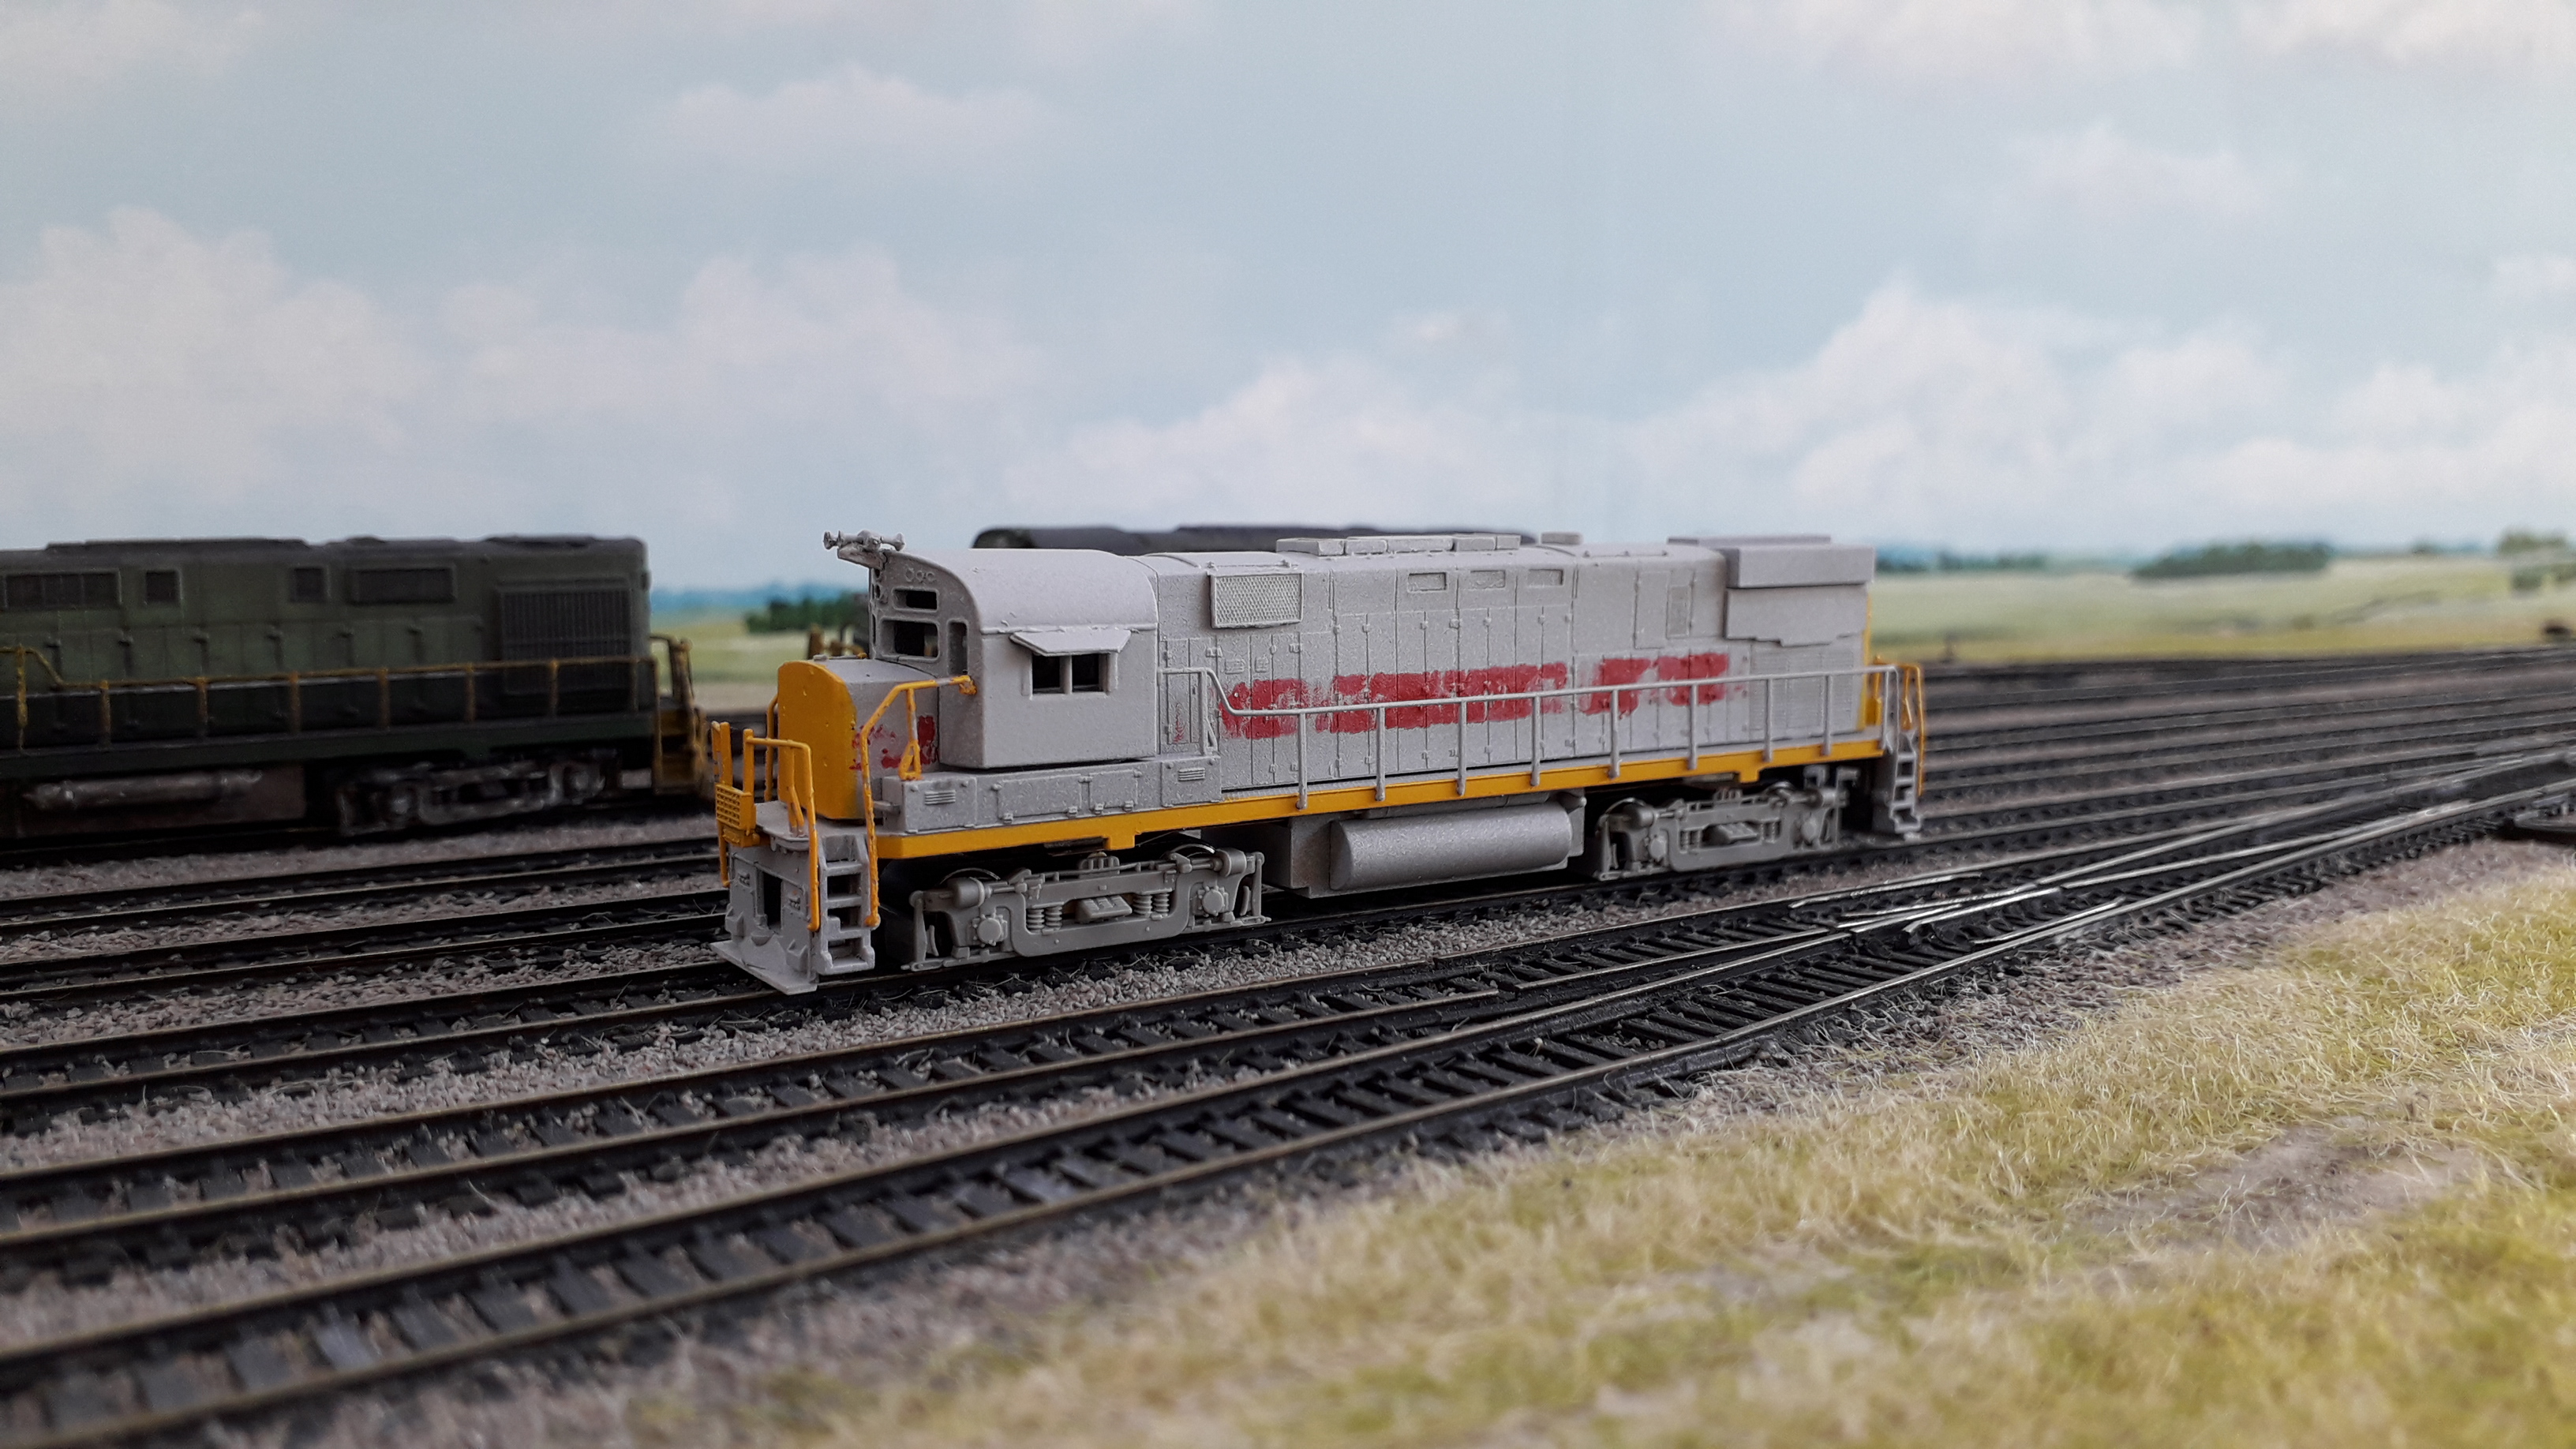
Finishing 801 to match prototype photos from 1978 required a delicate process of both applying the EL lettering and lining and then carefully removing bits of it to match the faded paint-peeled effect of the prototype.
The first step was to apply lining and EL lettering to the long hood. I didn’t apply lining the full length of the hood as most of it would be removed later. Ex EL units also had remnant EL markings on the nose and cab battery boxes and the Microscale decal set includes these.
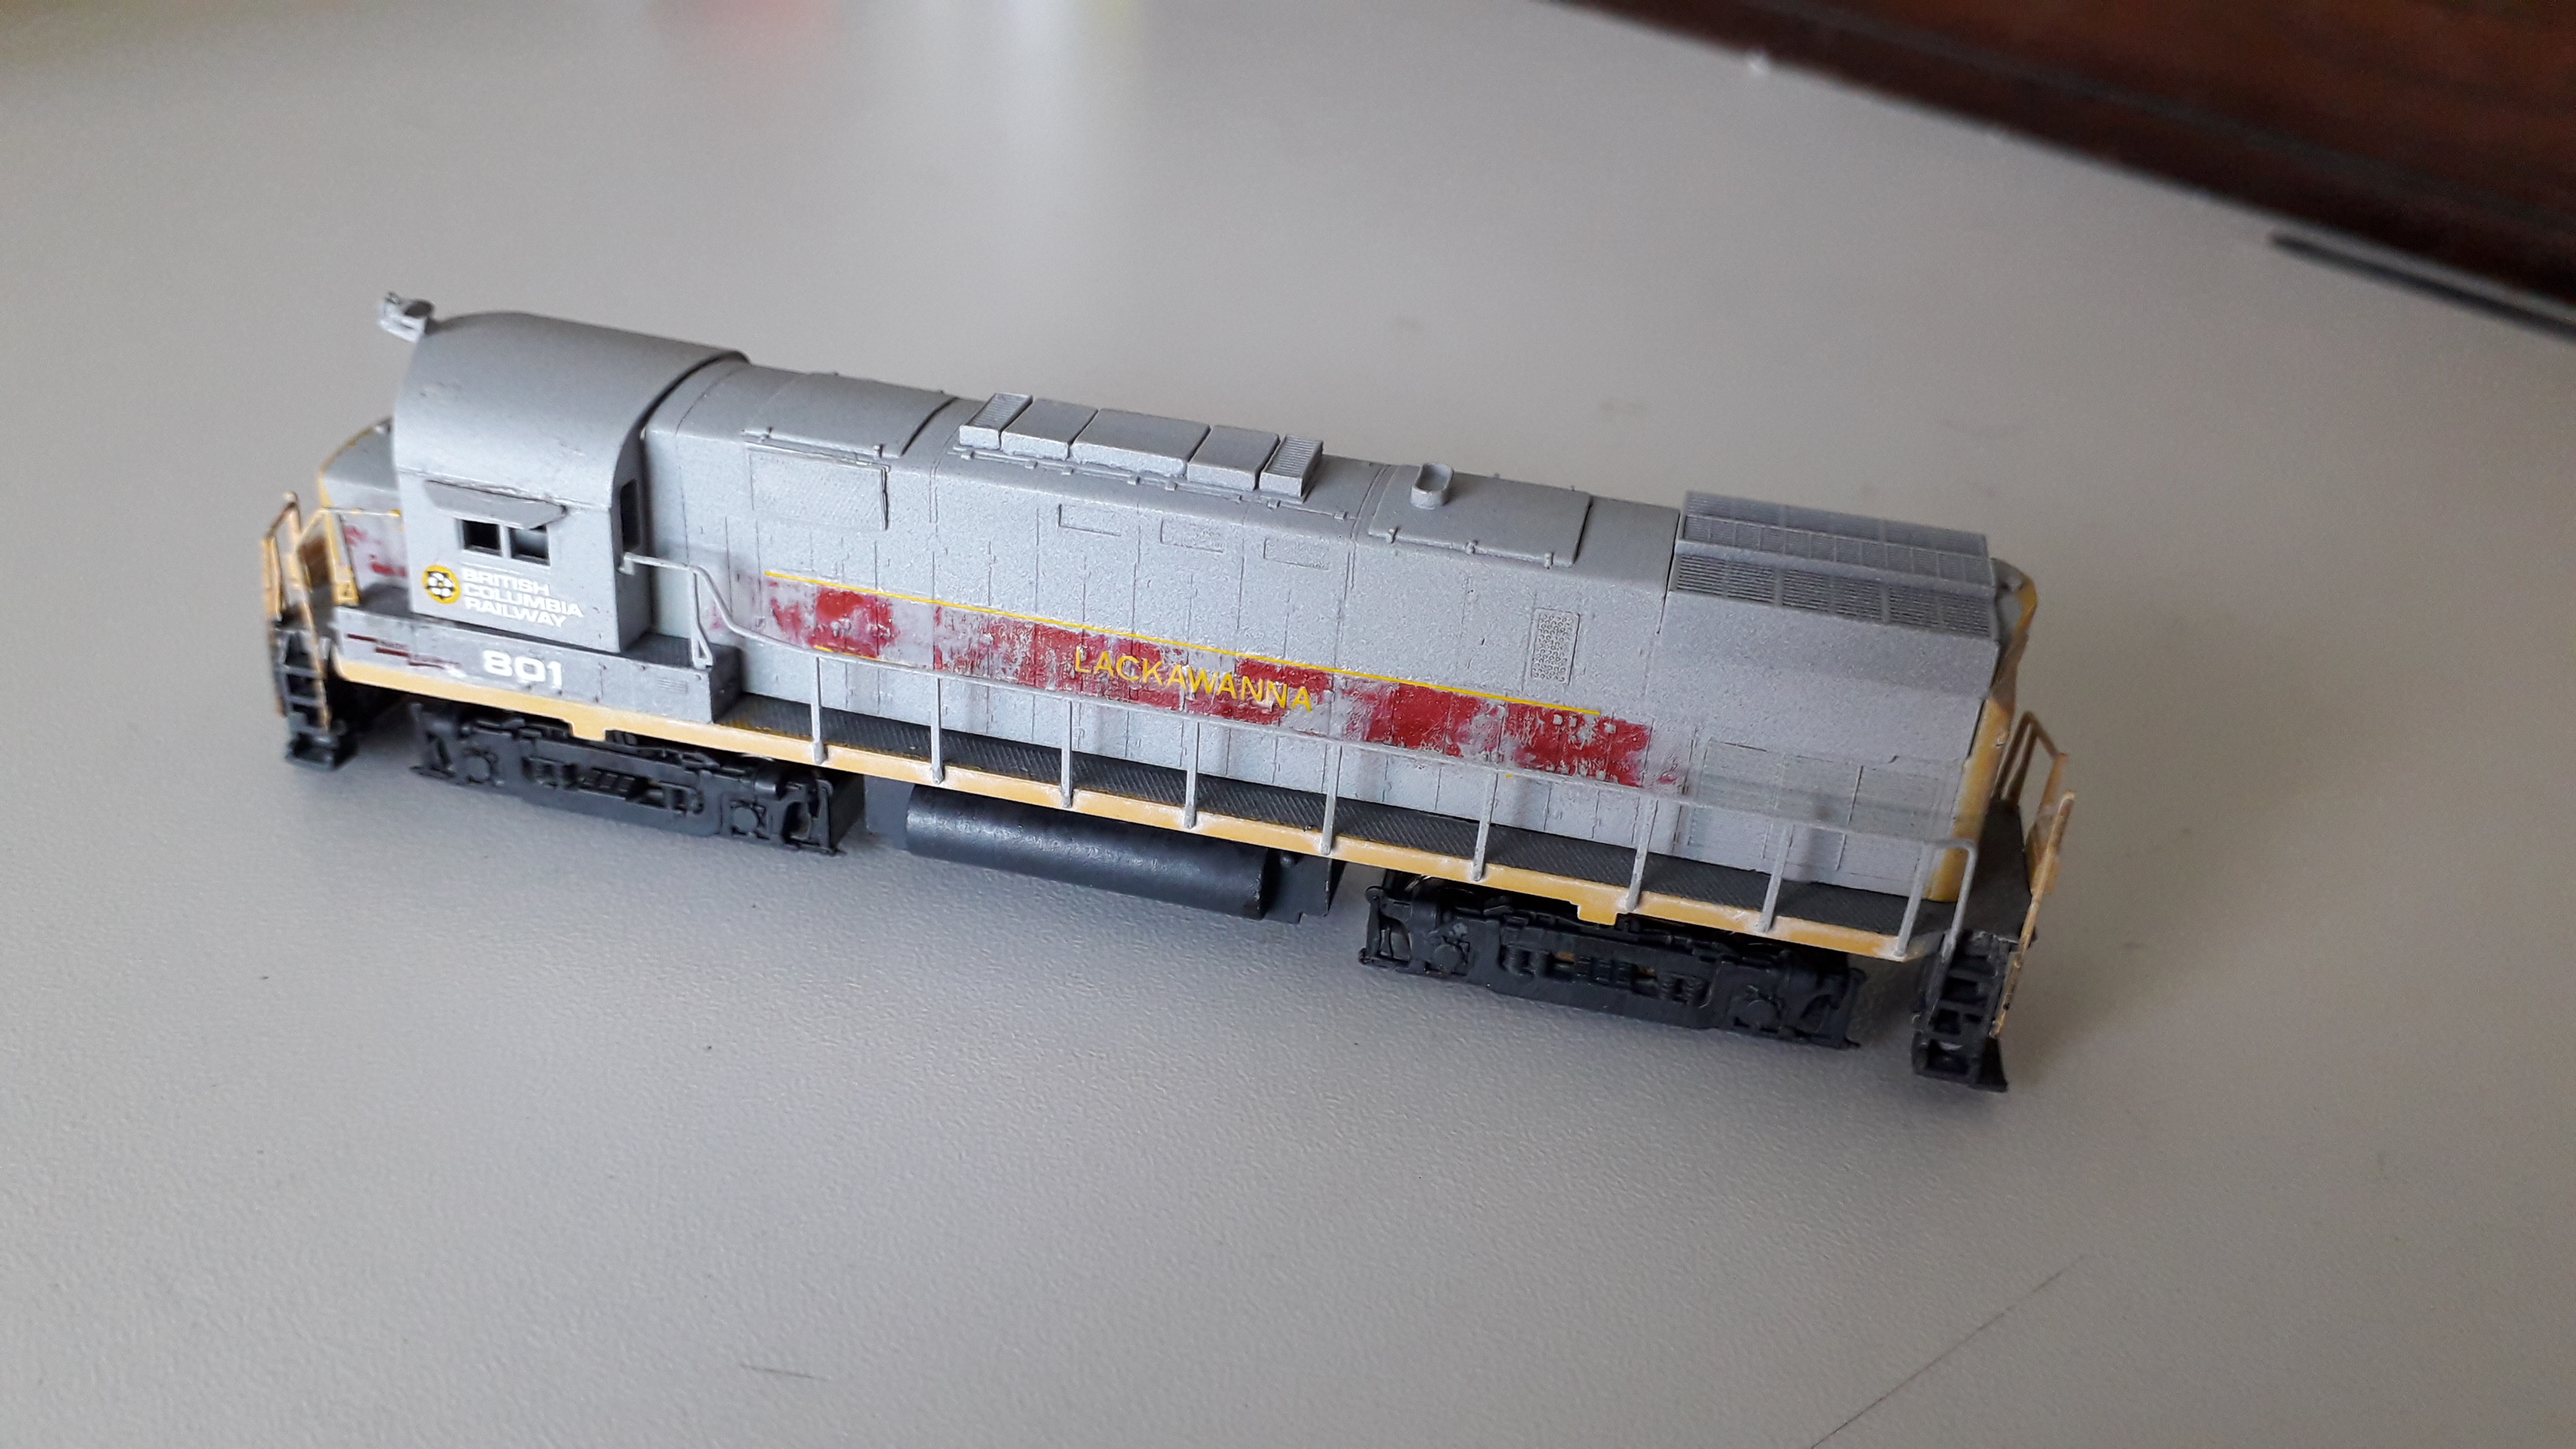
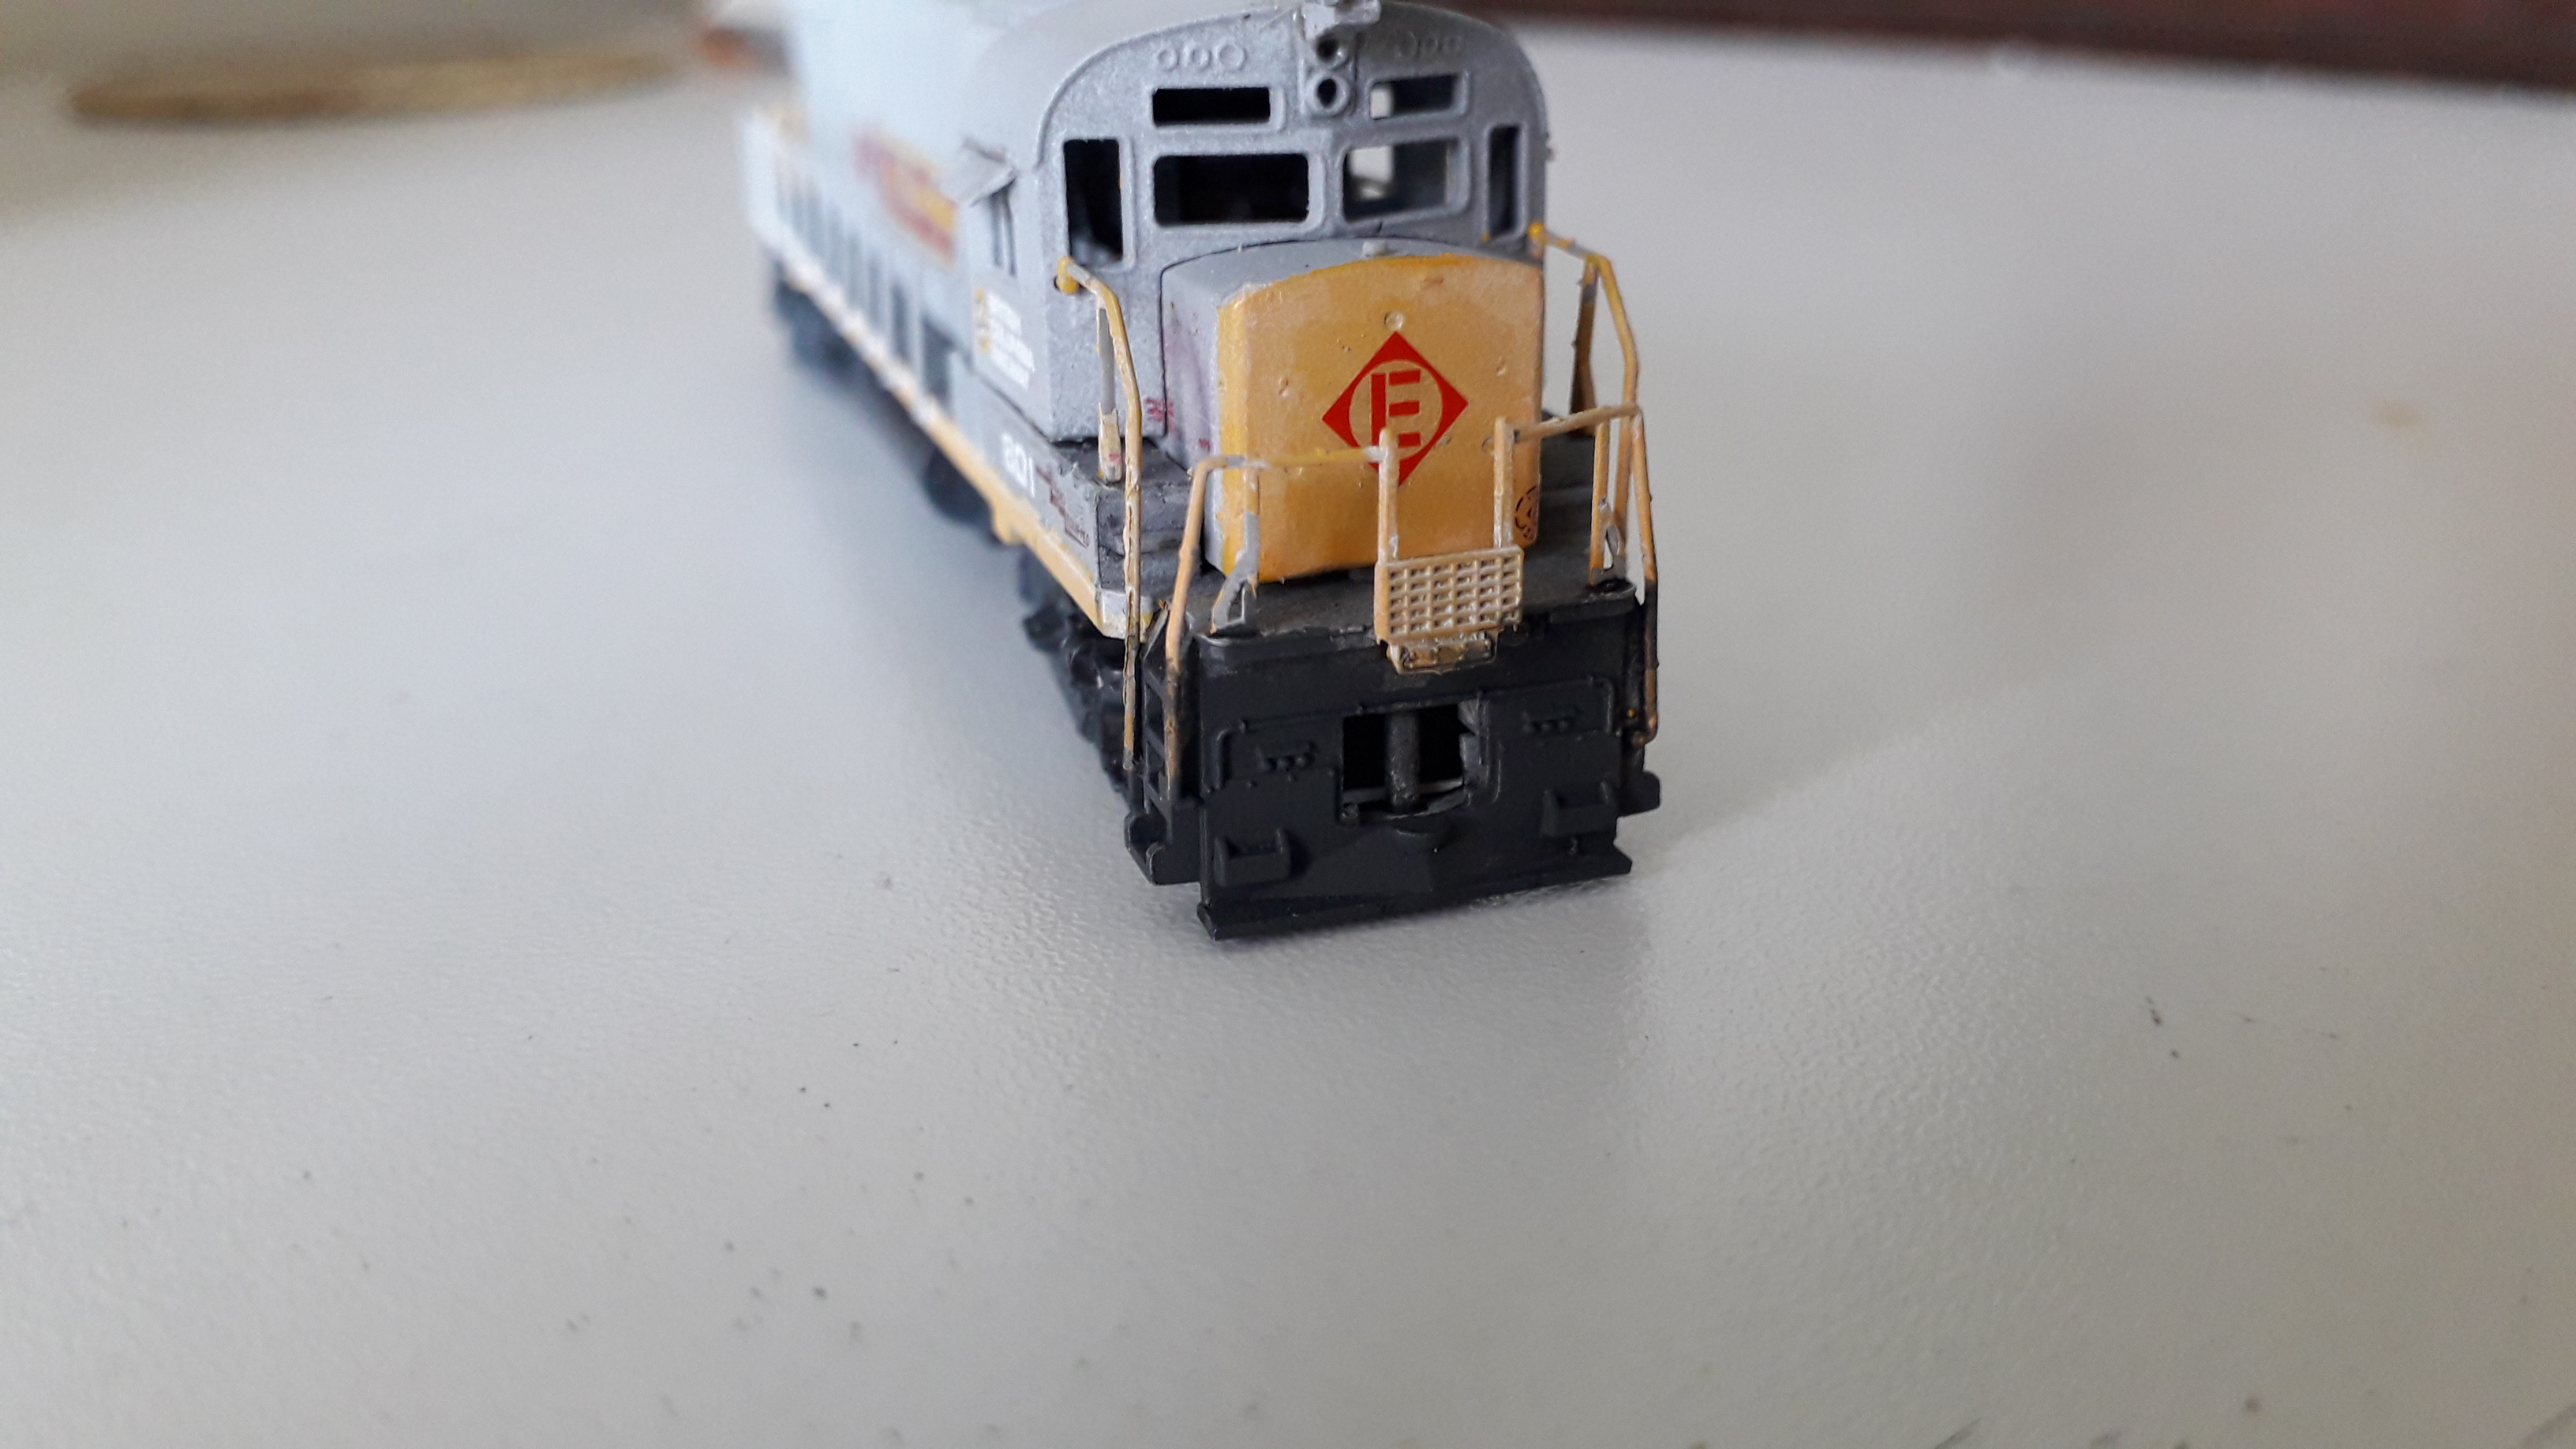
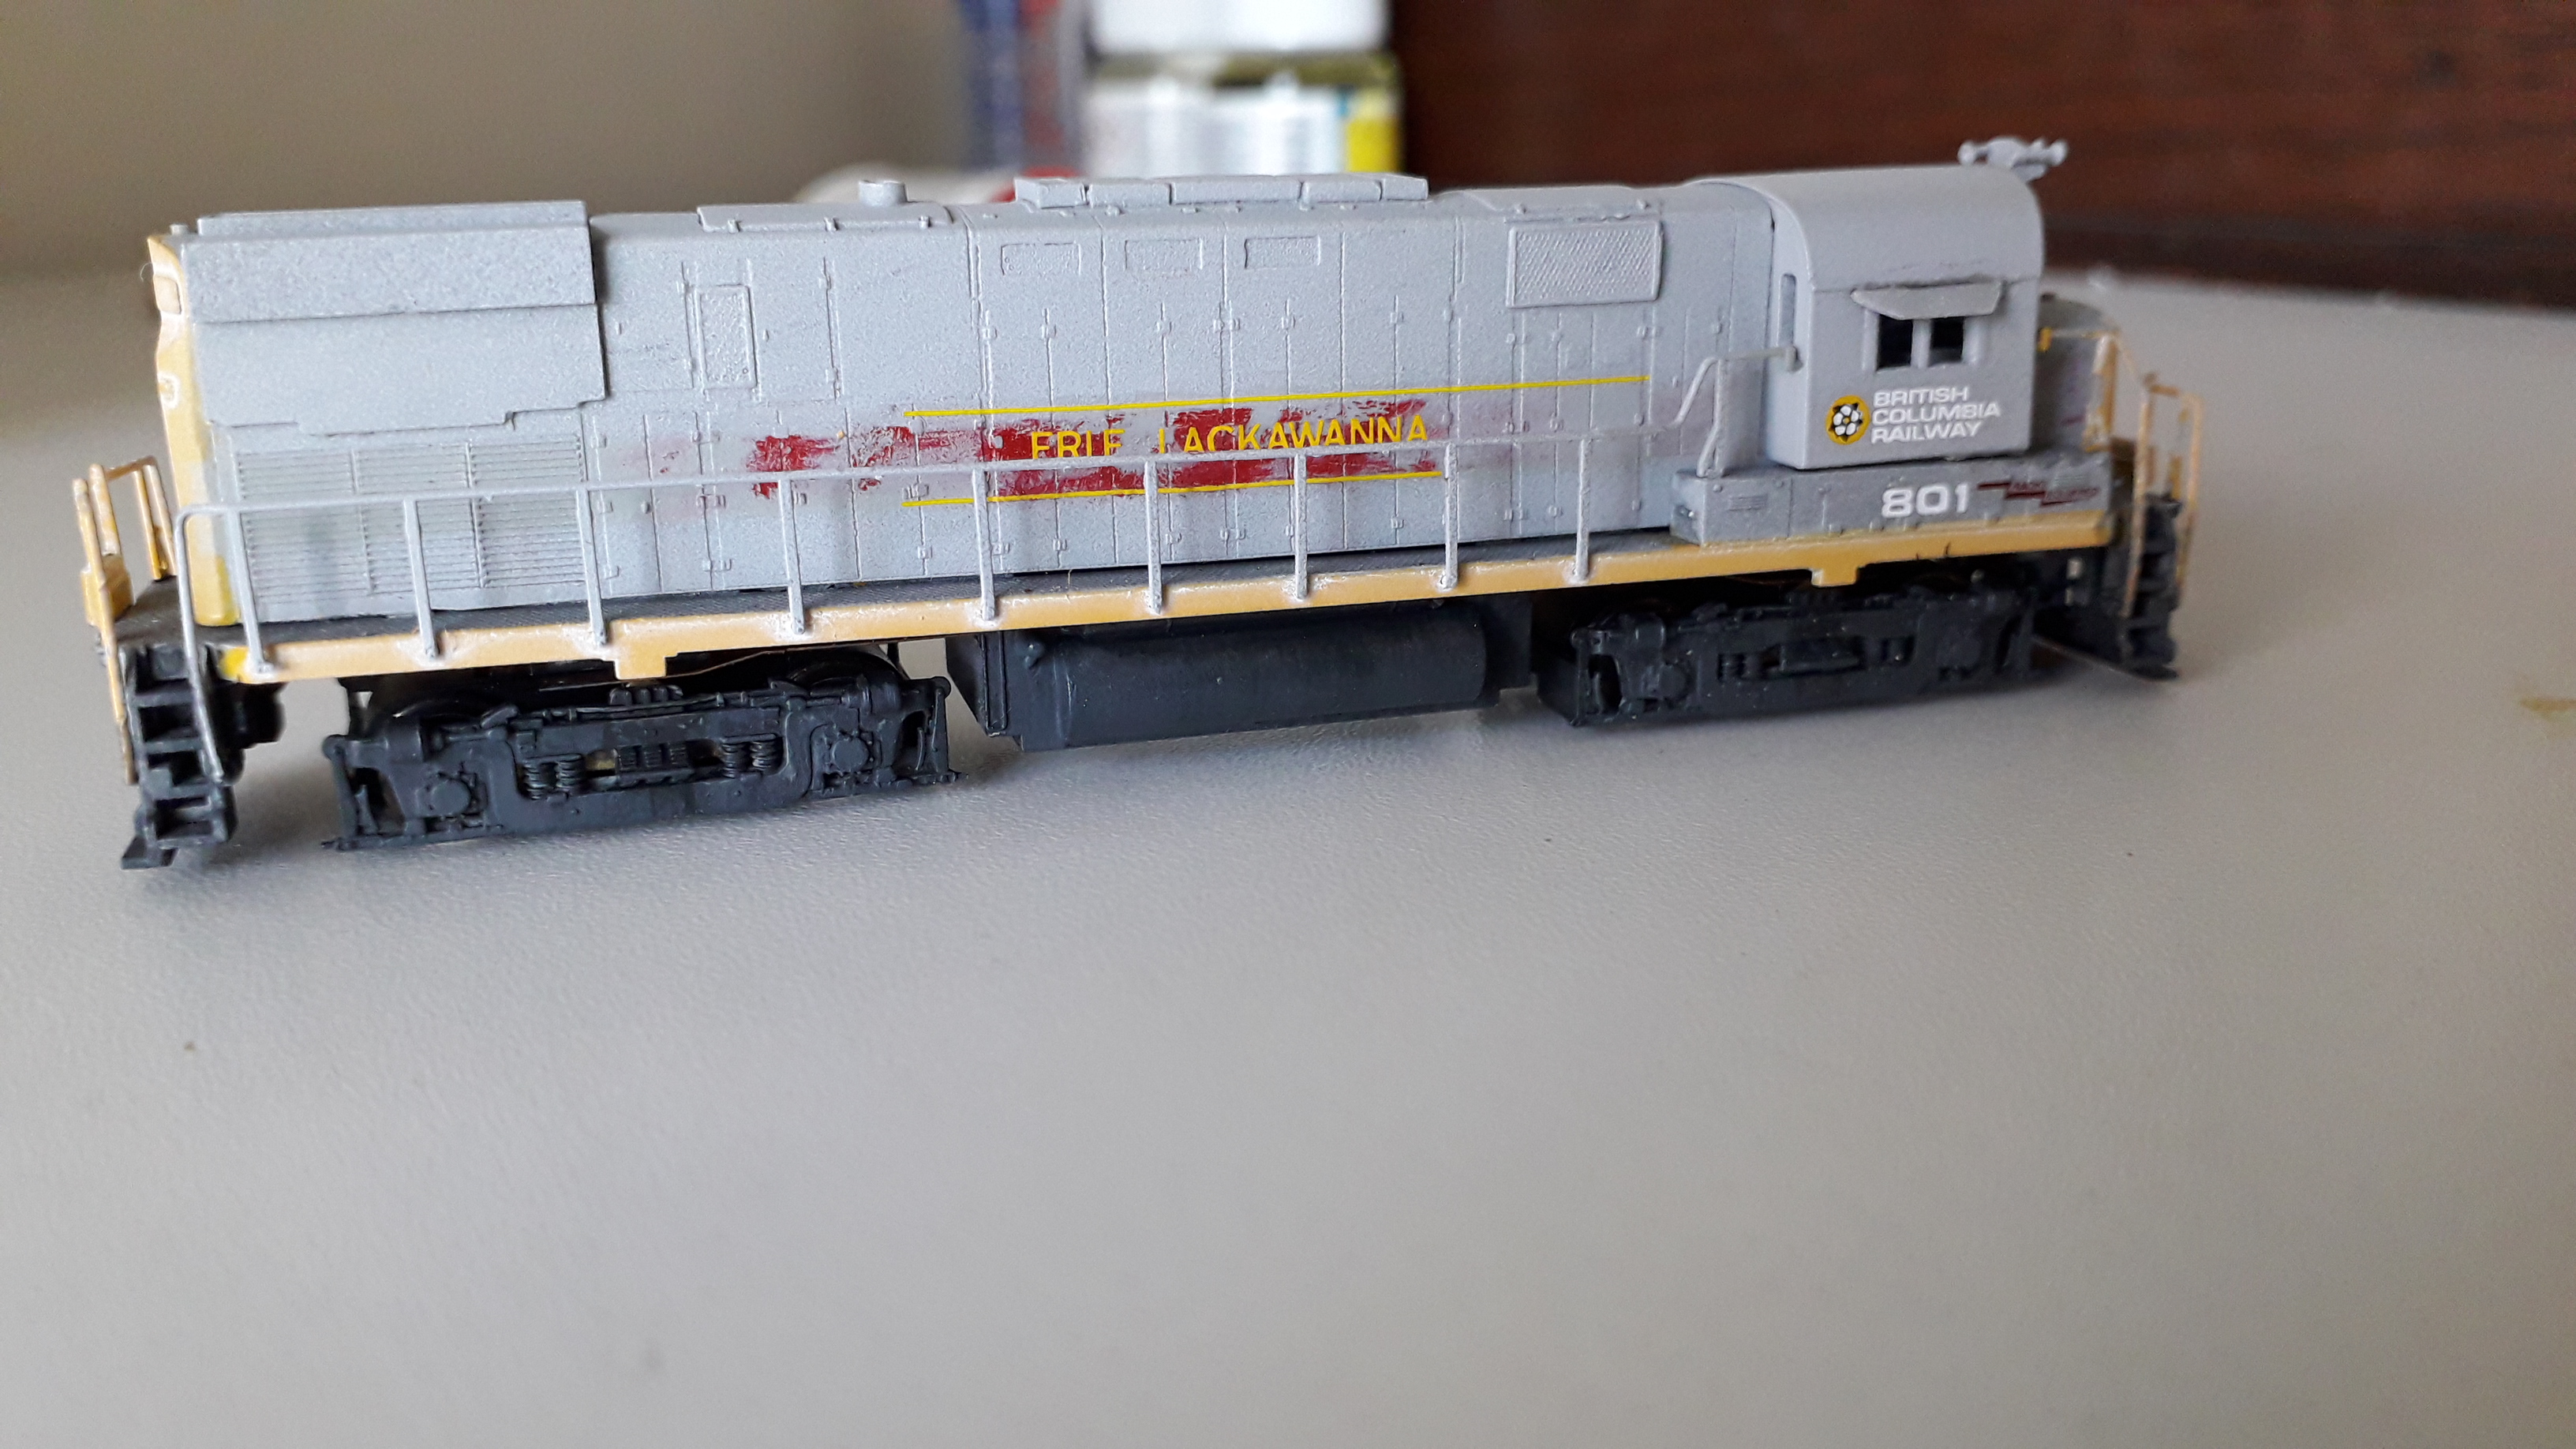
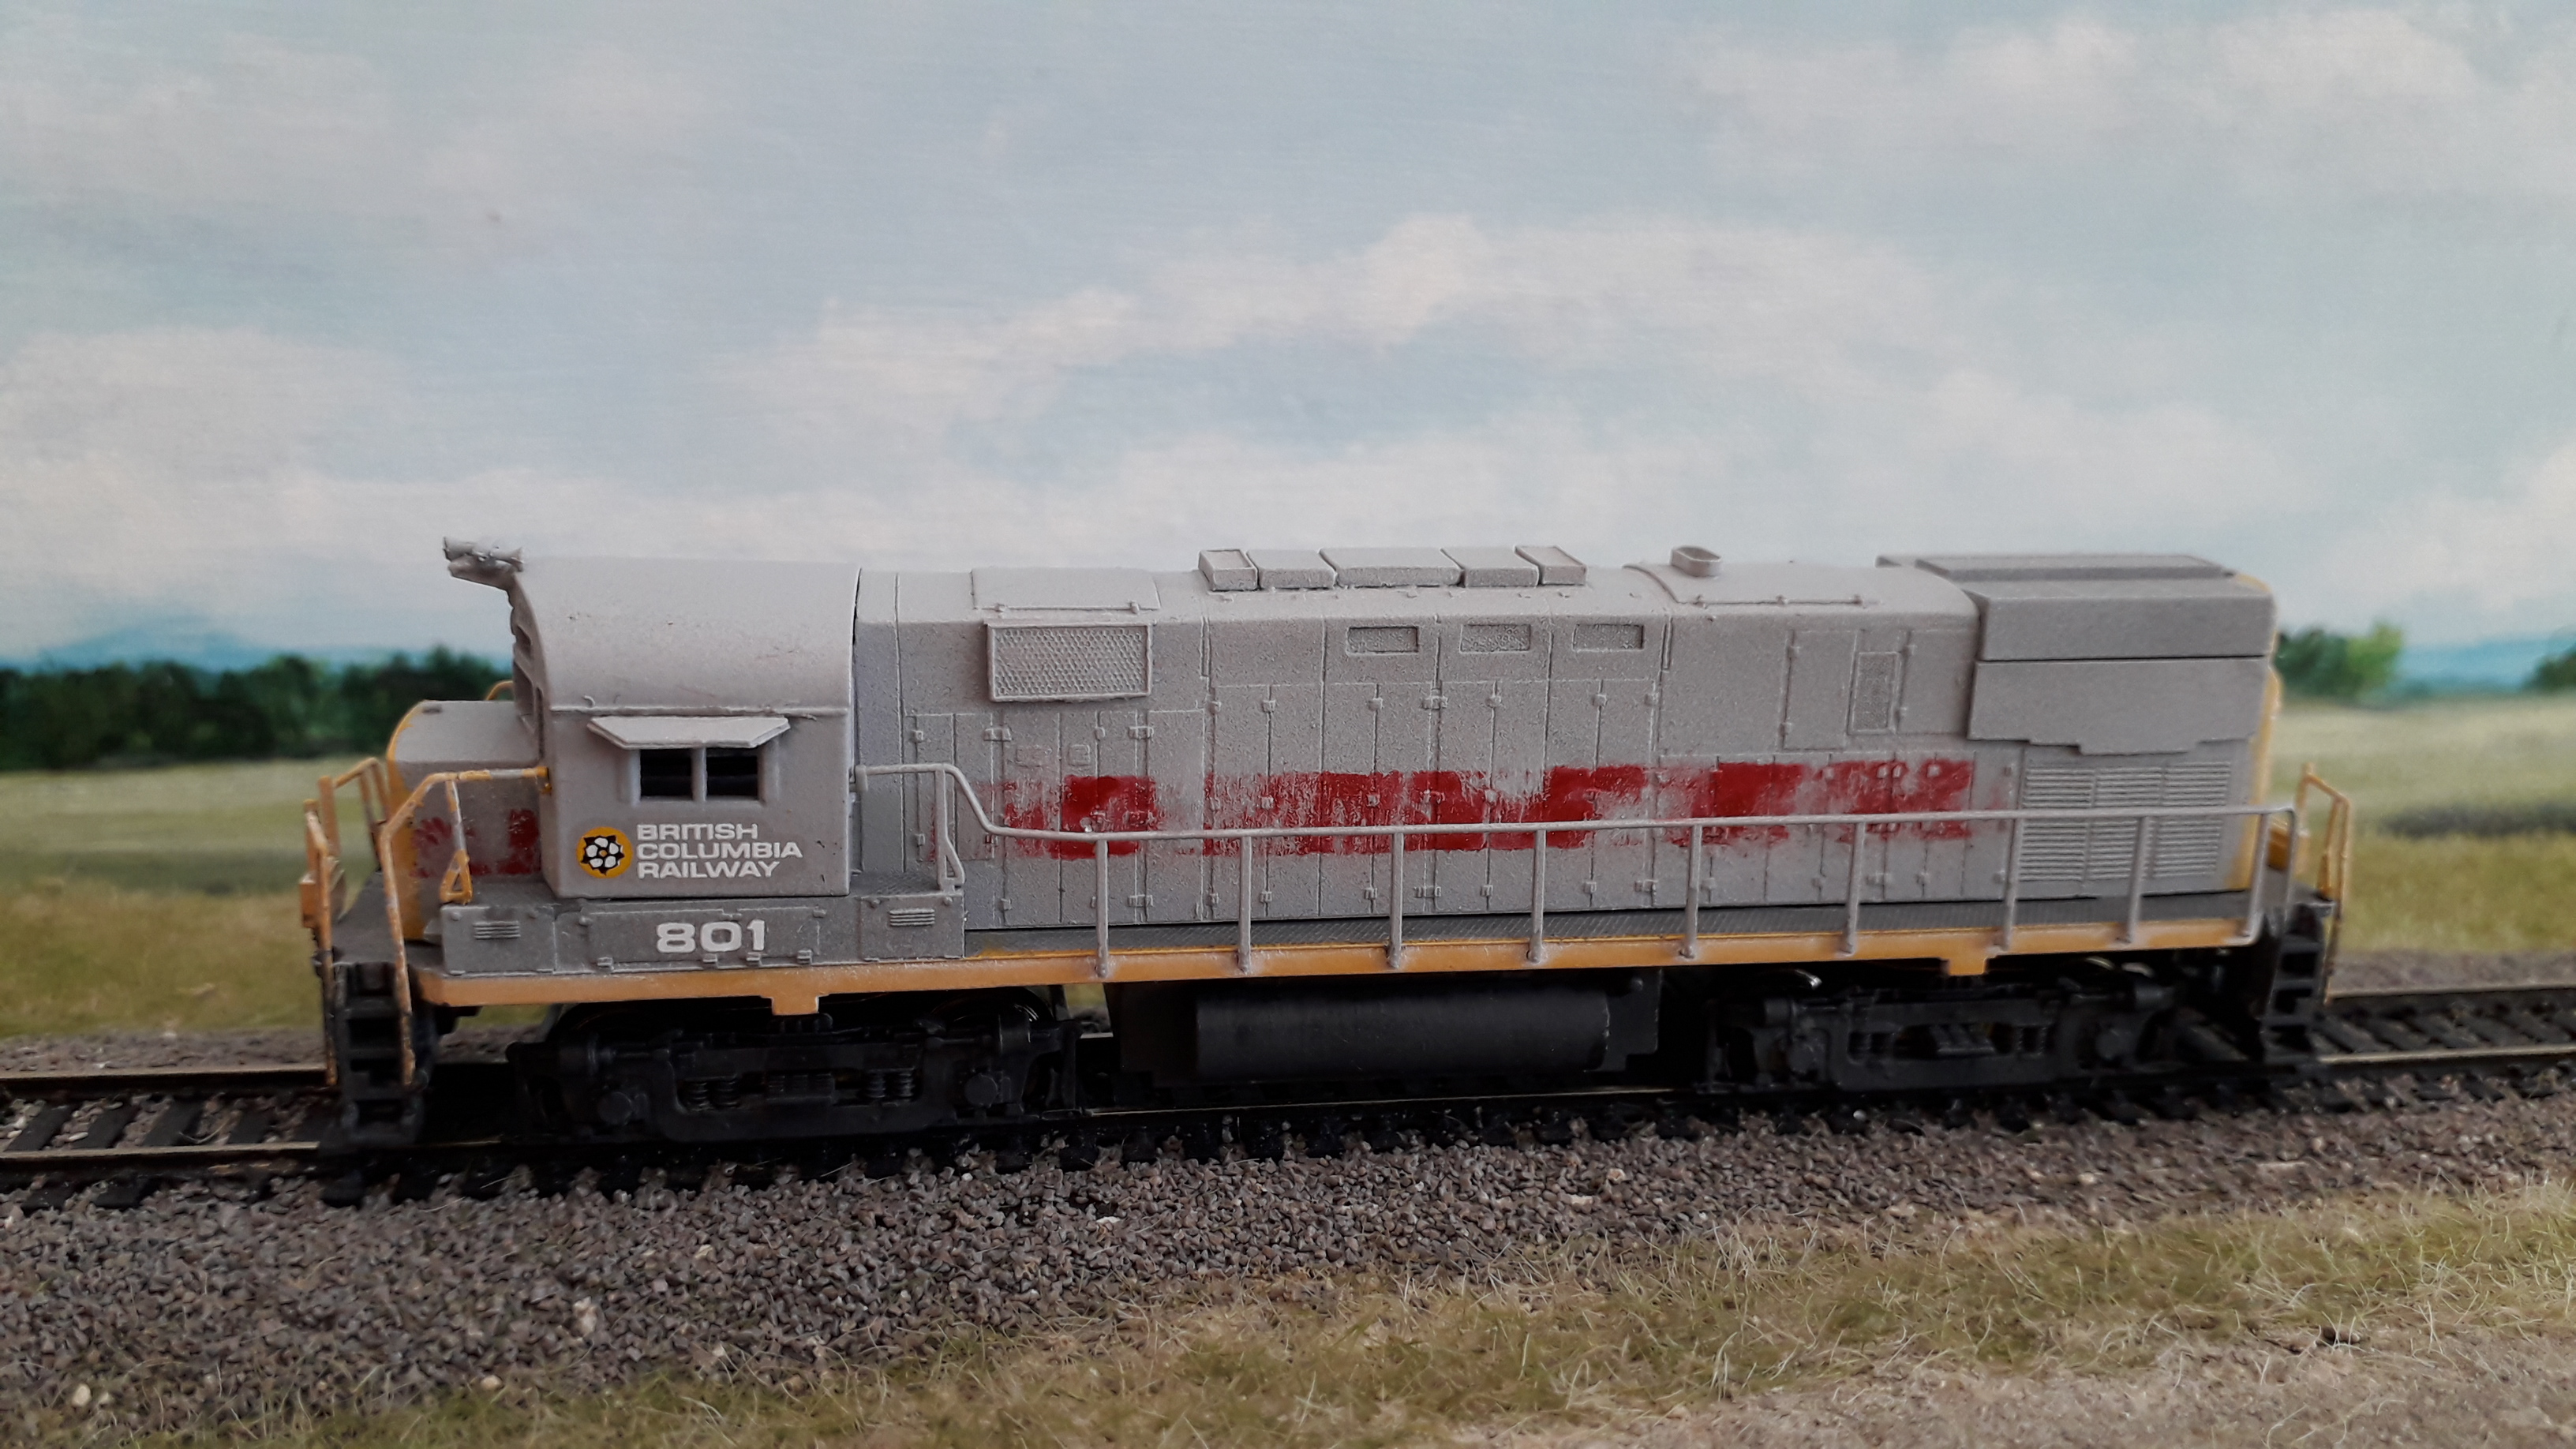
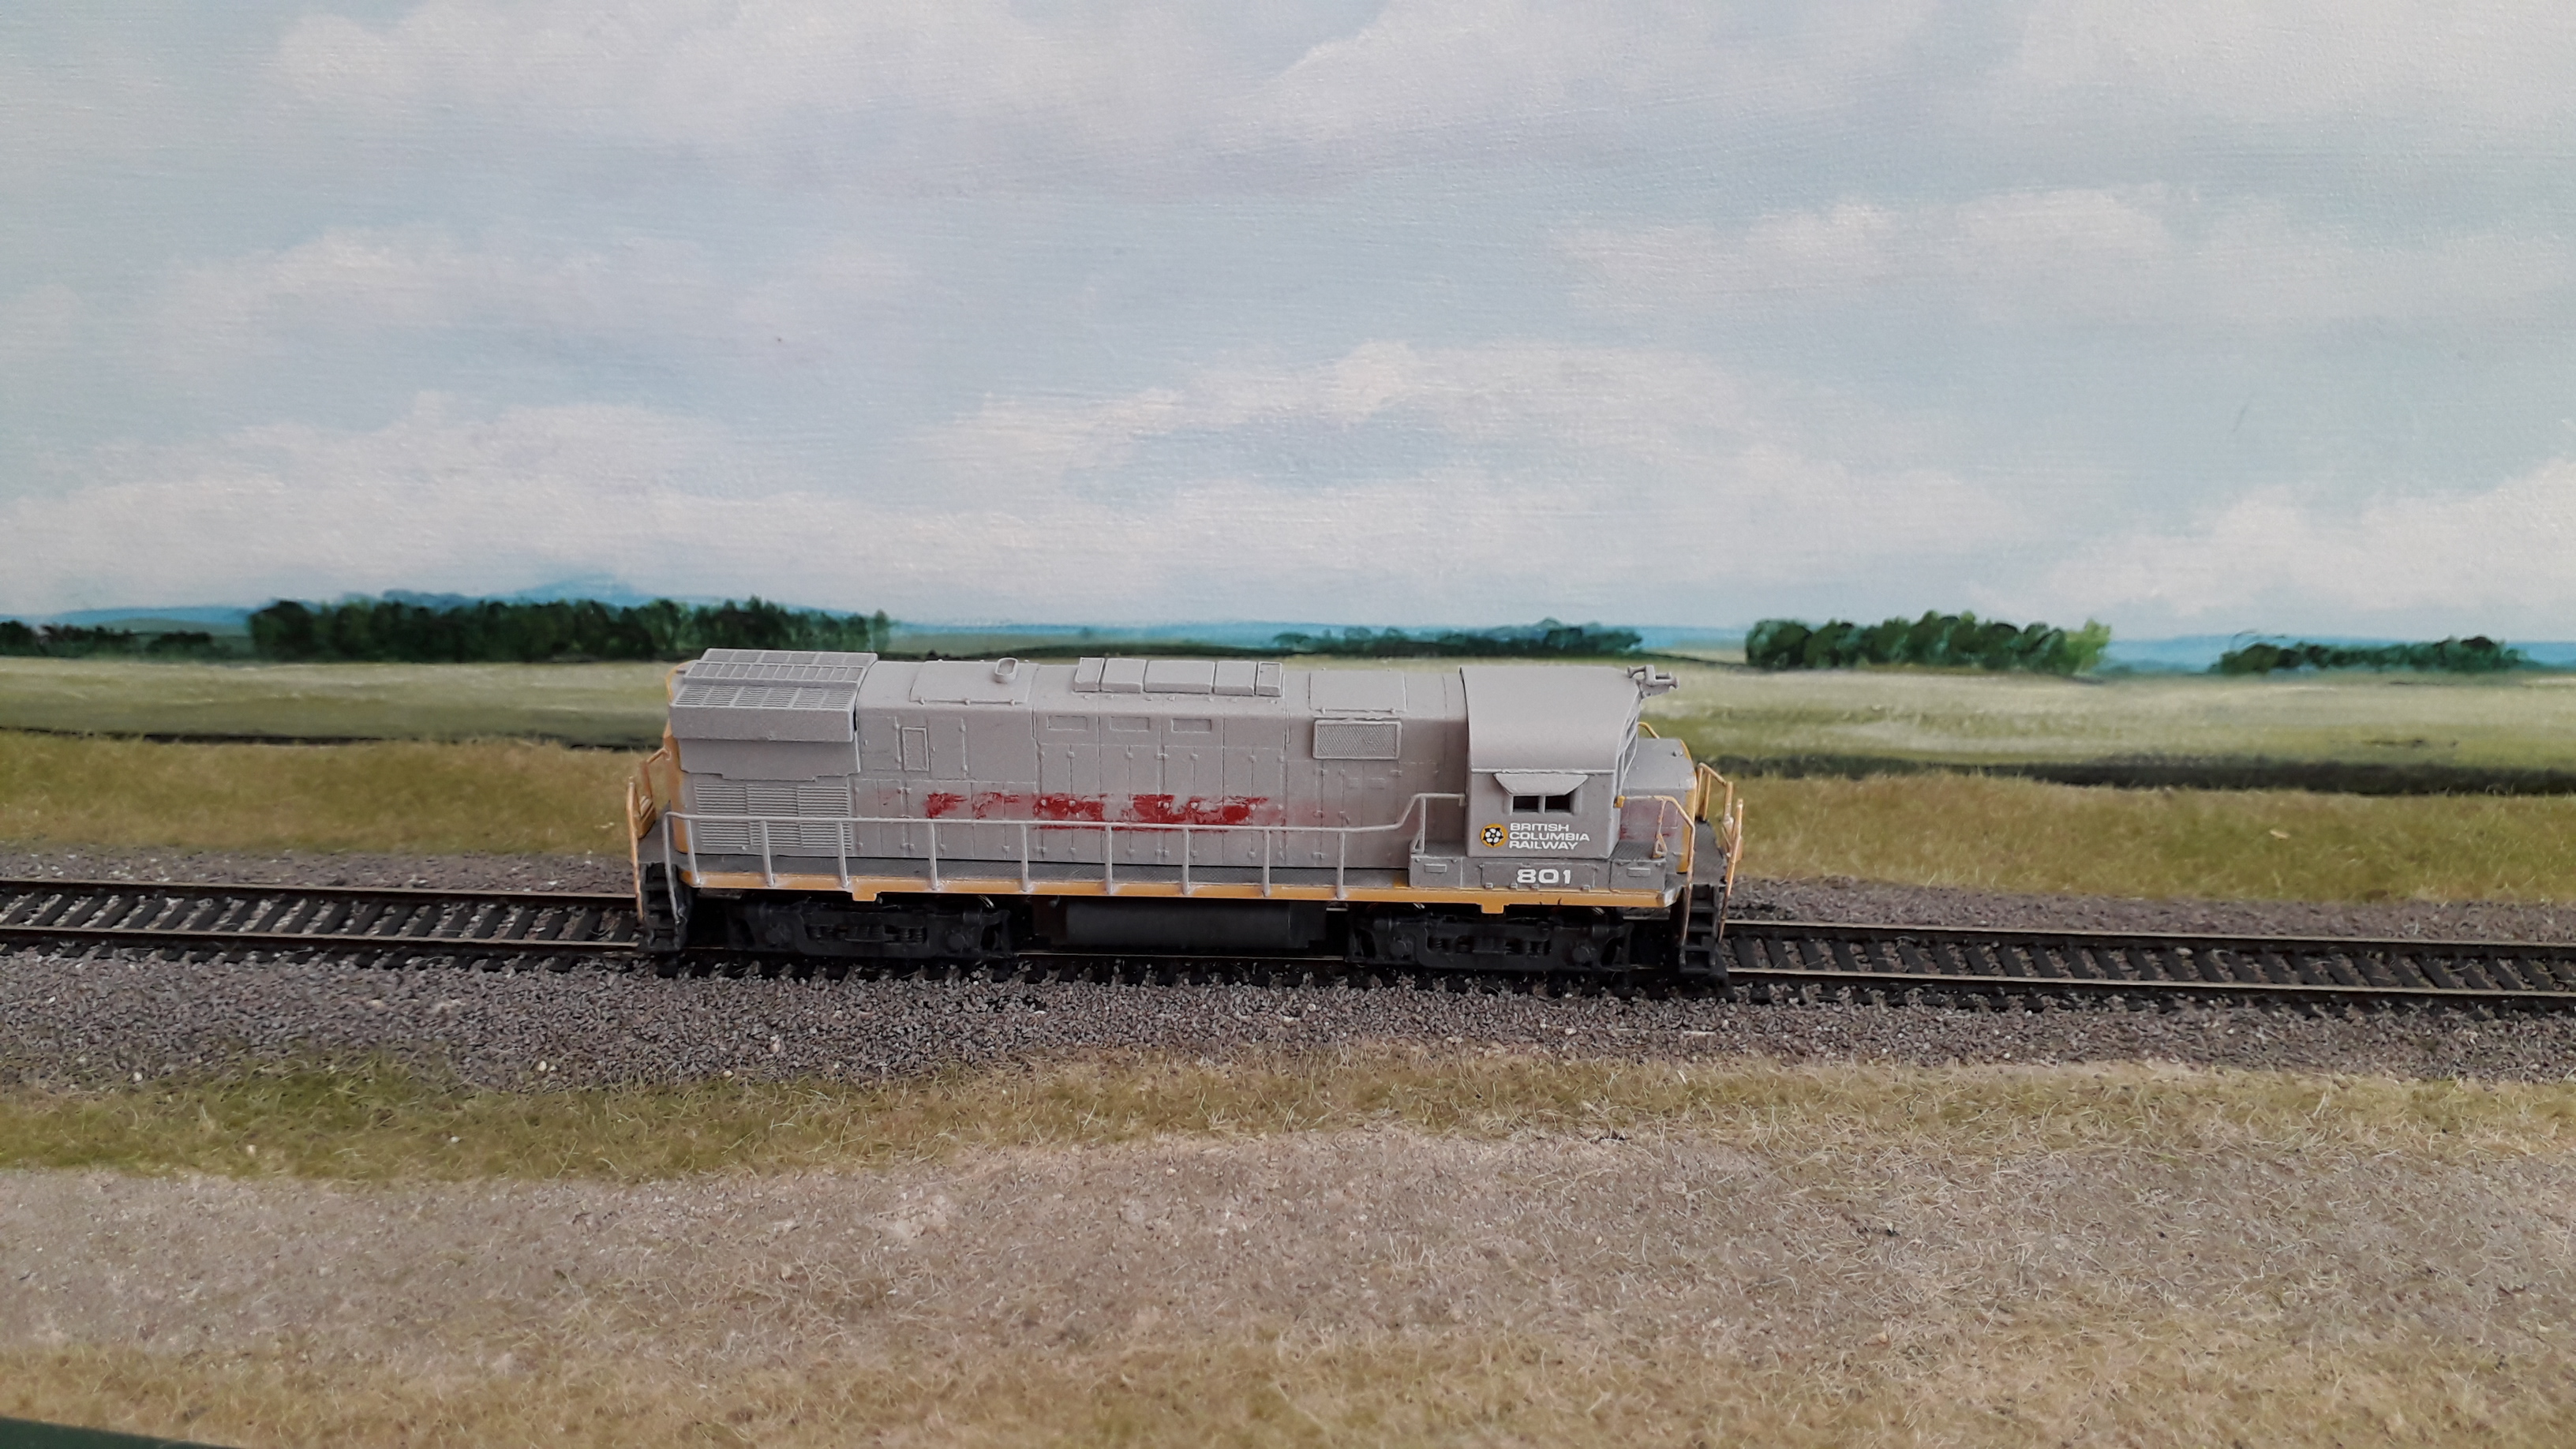
After the decals had thoroughly set I started chipping away the yellow linework and EL lettering on the long hood with a sharp hobby knife. The decals flake off very easily and I also did some additional scraping away of the underlying maroon band. The overall effect is quite pleasing. Using a microbrush I carefully painted over the nose diamond logo with orange paint as this was how most of the BCR units appeared.


While not an exact reproduction of the condition of 801 in 1978 it reproduces the general effect and the distinctive weathering difference between the right and left side of the long hood where the right side had less of the maroon band remaining relative to the left side.
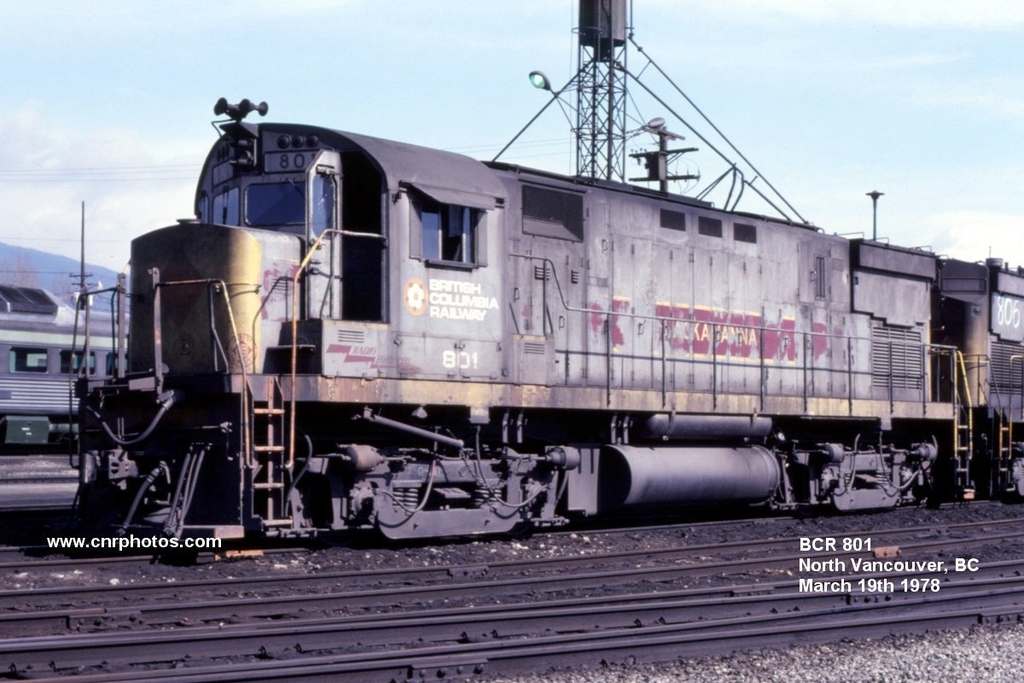
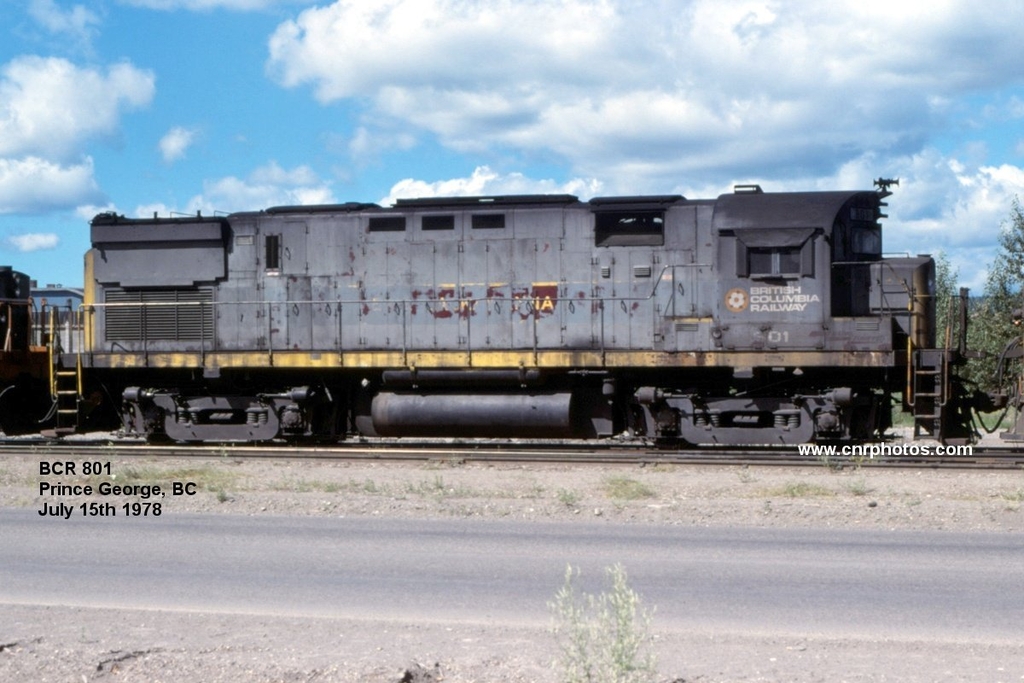
Prototype photos can be seen at links below:
http://www.cnrphotos.com/gallery2/main.php?g2_itemId=52380
http://www.cnrphotos.com/gallery2/main.php?g2_itemId=52384
The next step will be weathering which will be a fun process due to the very dirty appearance of the prototype. Unfortunately New Zealand appears to have completely run out of Dullcote, Tamiya Flat Clear (TS80) and all forms of sprayable flat finish so this is hampering a lot of my painting, decalling and weathering projects at the moment.
RS-18 Conversion Project – Part 6a (update)
May 7, 2021
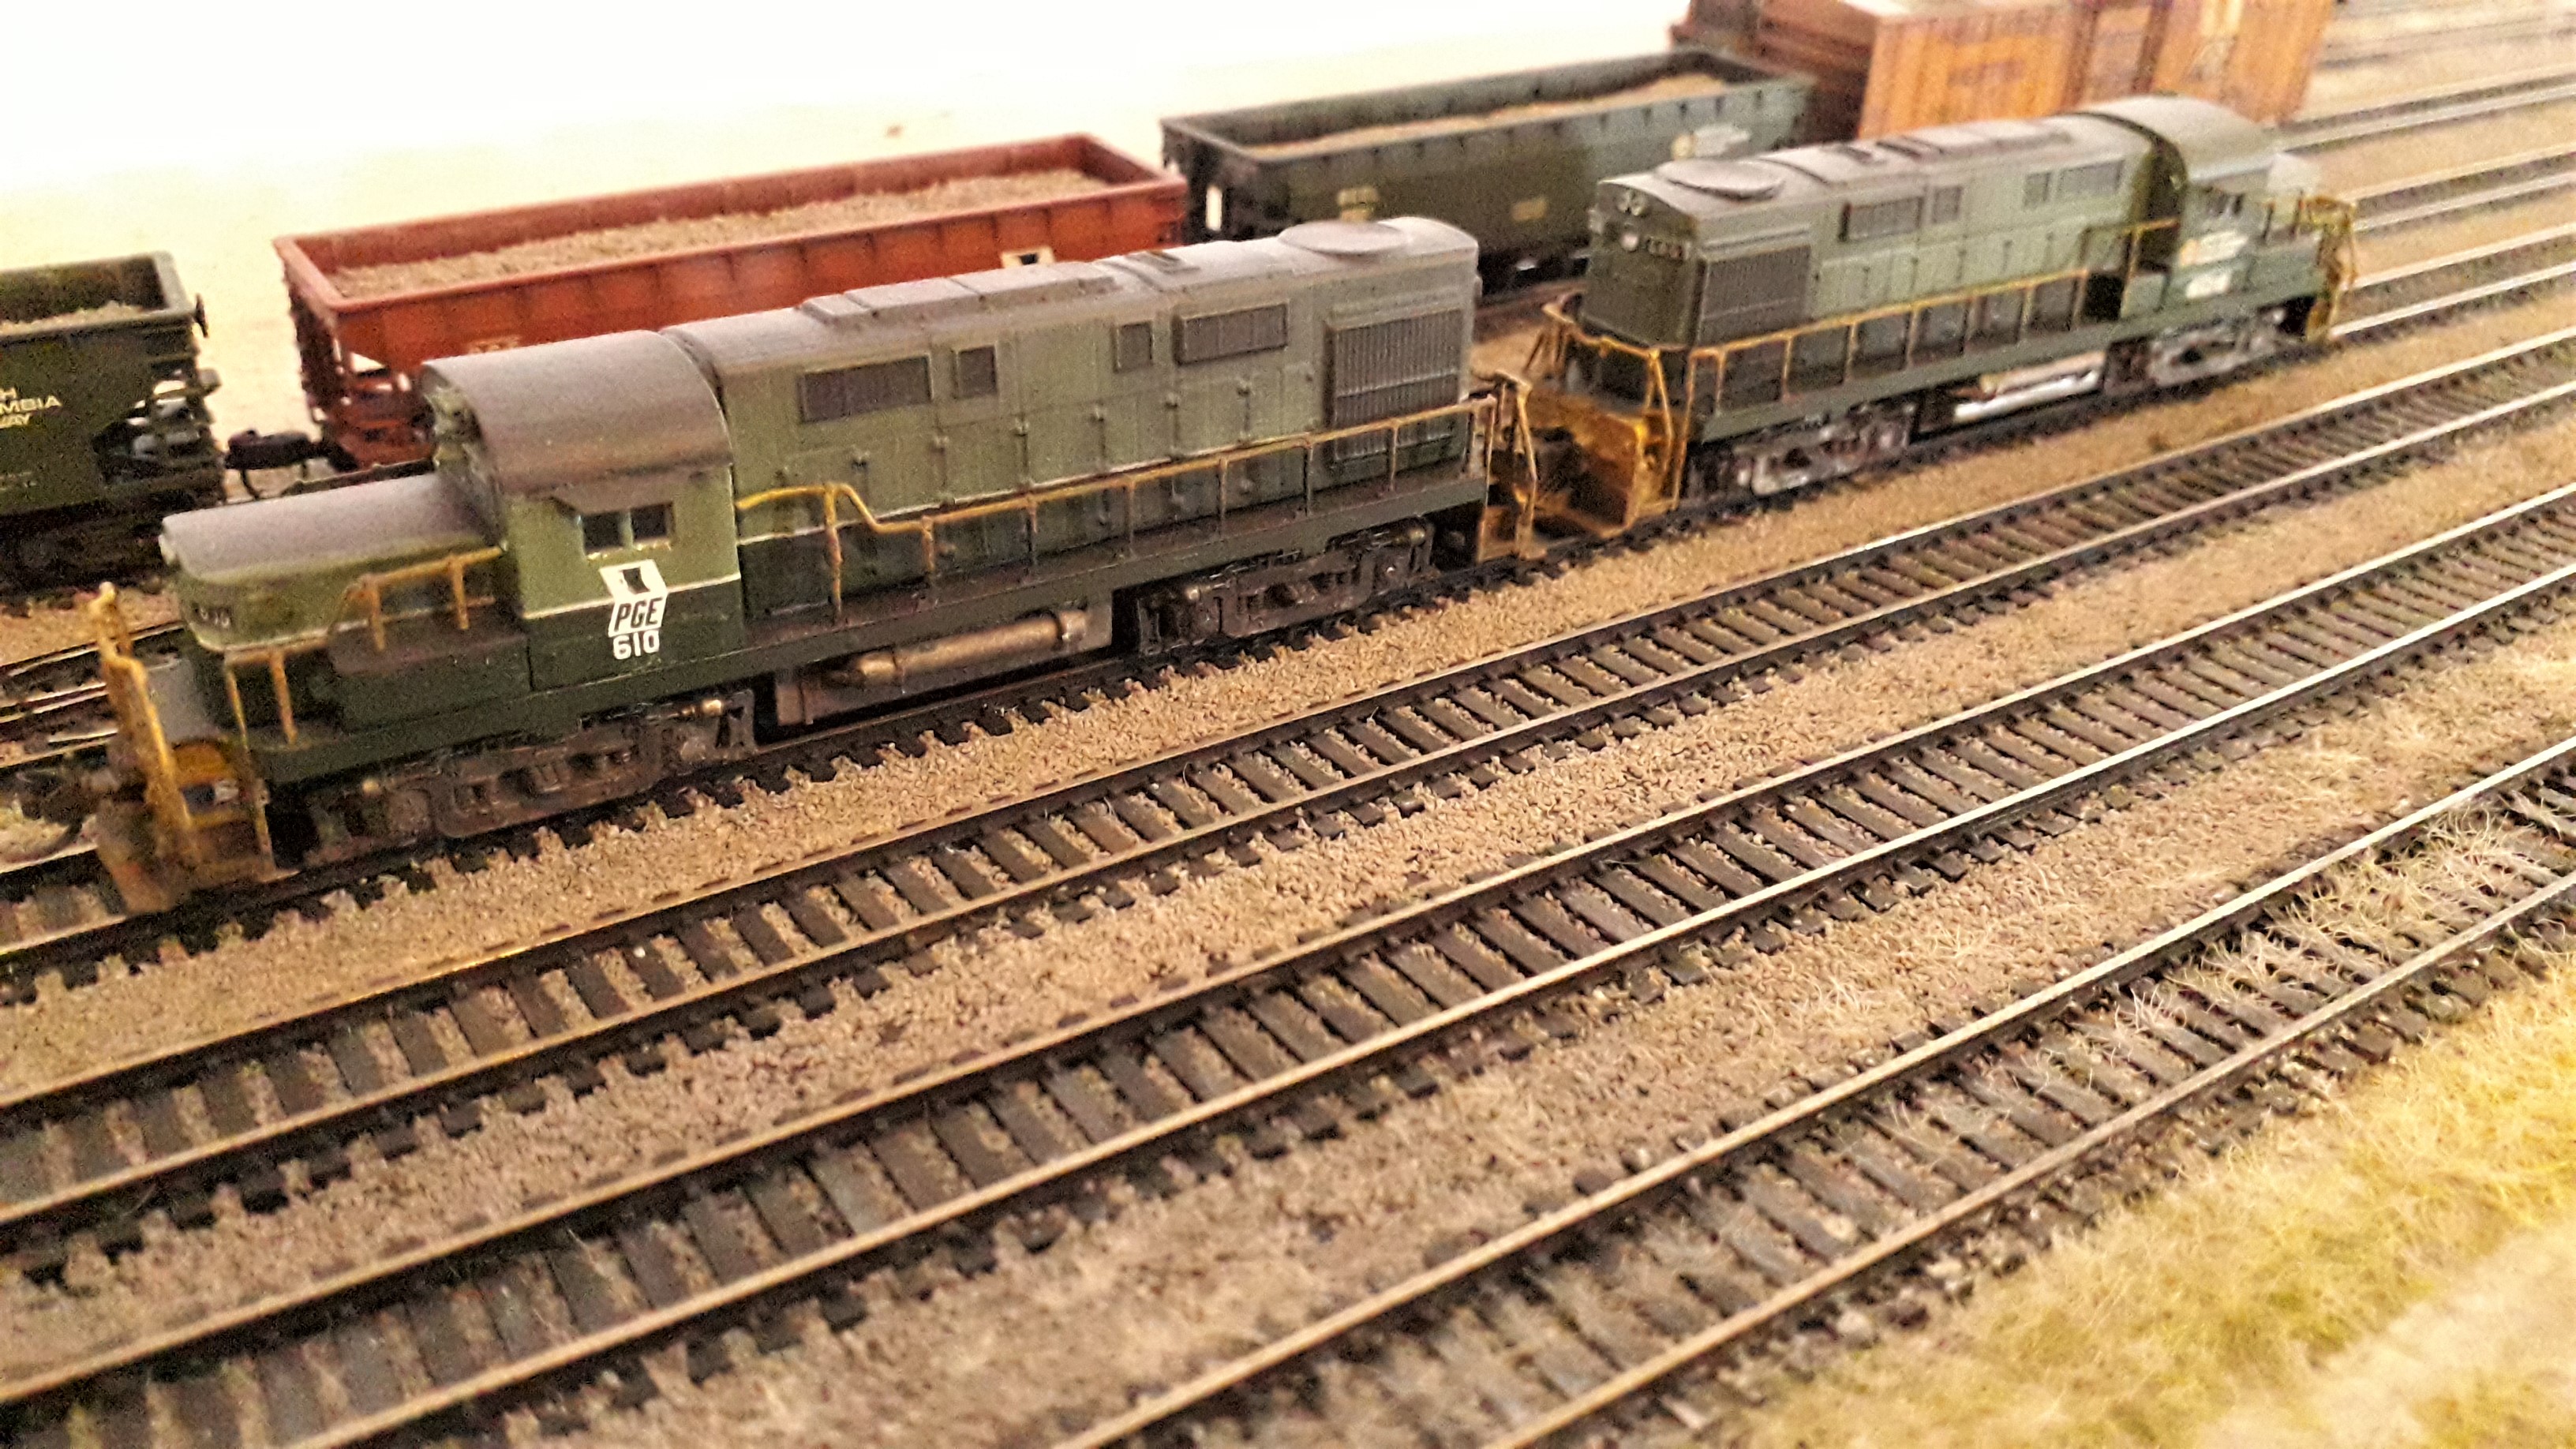
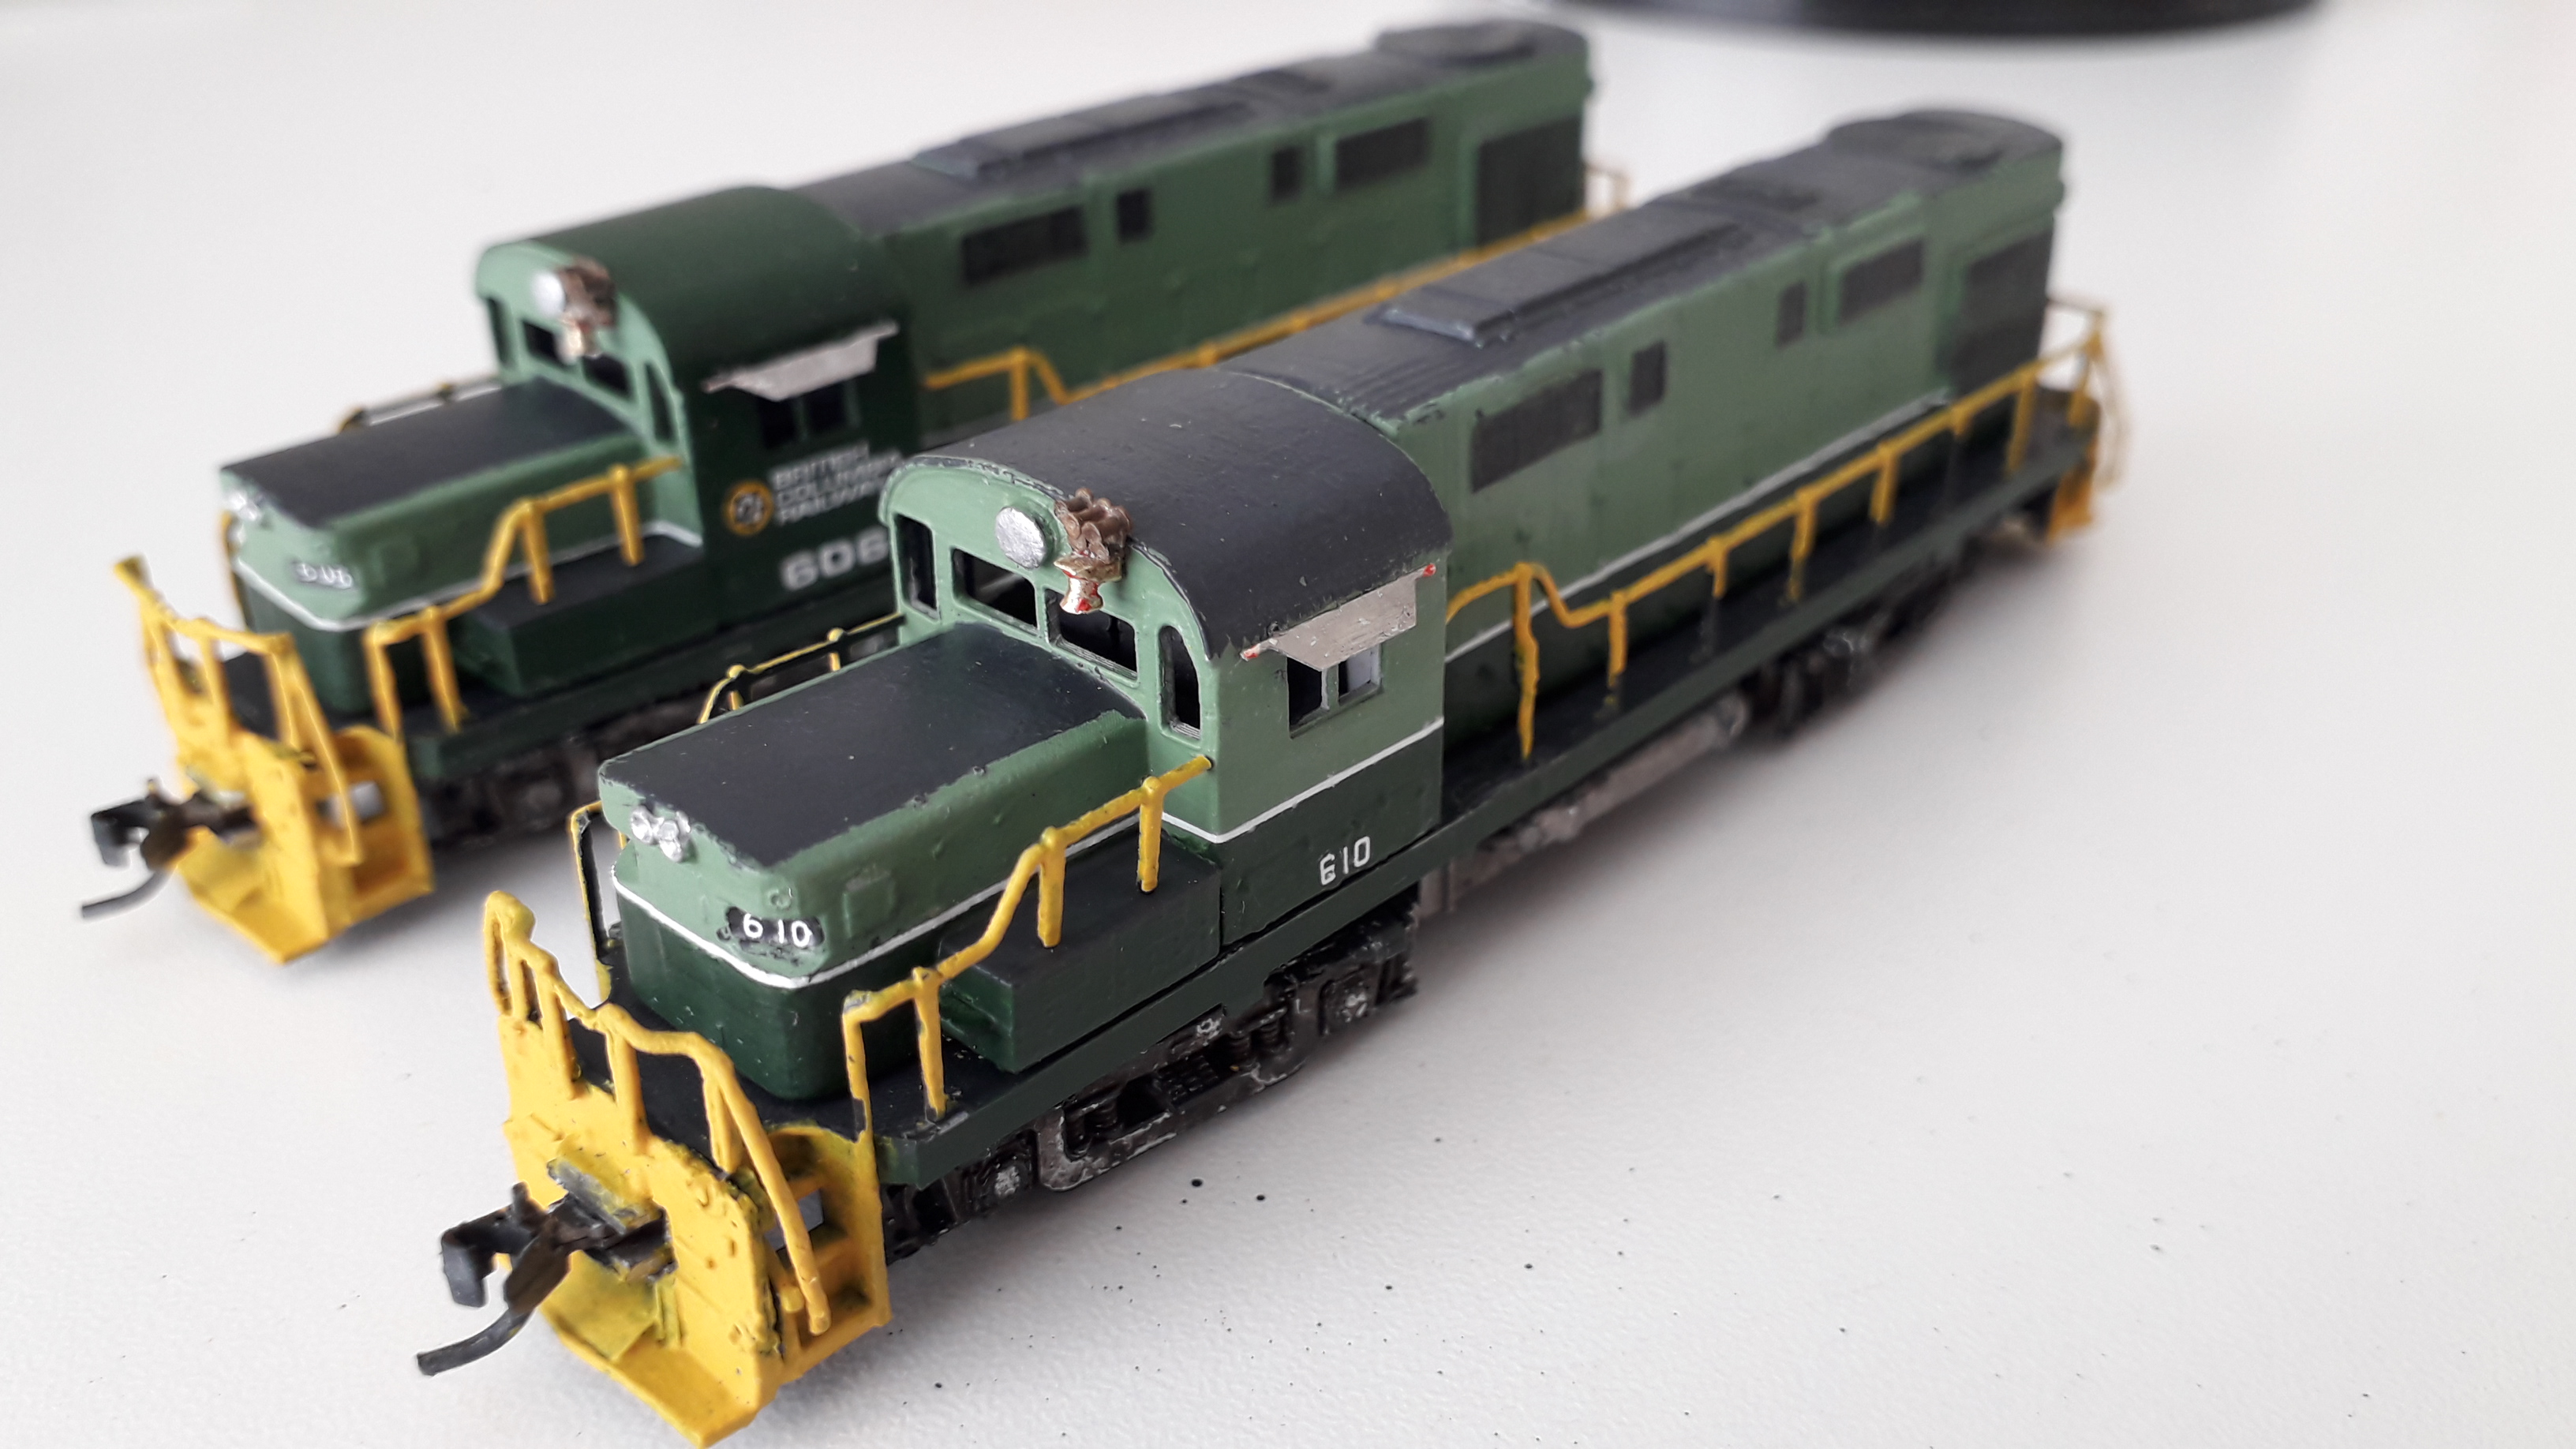
Just a minor update to the RS-18 build thread to report that the long-awaited PGE map herald decals for 610 recently arrived and were applied this weekend. Thanks go out to Timothy Horton and Phillipe Whyte in Vancouver, Canada for great work on the designing and printing of custom decals such as this for PGE and BCR models. The map herald was applied to the cab sides and is a very distinctive feature of PGE locomotives.


Some light weathering will be applied in and around the new decals to blend them in and then this project can be put aside again.
Both units will need to be updated with more modern mechanisms at some point in the future as the current ones are ancient and really don’t run that well at slow speed. After the arrival of another shipment of Briggs Kits from Canada I now have parts to do a third RS-18 so that will be something to plan for also.
C425 Conversion – Part 3
February 28, 2021
801 has progressed nicely over the last couple of weeks despite only having a few free hours to work on it. The underframe was painted using an initial base coat of Tamiya XF-85 (Rubber Black) and a series of washes of XF-63 (German Grey) were applied to pick out the raised detail. One tip with Tamiya acrylic paints I have found is that they thin far better using alcohol than water.

In the previous post I had noted that the Tamiya yellow spray paint used on the ends and underframe sides was a bit too vibrant for the EL shade of yellow. I applied a series of very thin washes of white (Tamiya XF-2) over these areas to fade the yellow. Again the Tamiya white was thinned with alcohol to make a wash and several coats were applied over the course of a day to progressively fade the yellow. The effect is very pleasing and I am looking forward to trying this on some freight cars soon.
The final step was to apply the British Columbia Railway lettering to the cab sides and add the road number to the battery box area below. Microscale provides the correct decals for this on their N scale BCR diesels (1972 – 1994) sheet.


At this point the project will be put aside as I have run out of supplies needed to finish it. Parts needed include Micro Trains couplers and Erie Lackawanna decals from Microscale. As with the the other locomotives in my fleet completed to date (2 RS-18s and 2 RS-3s) decoders will need to be acquired and installed at some point also.
Part 4 of this series will be posted when I obtain the parts needed. For now I have a large selection of unbuilt kits to choose from so the question is whether to start another locomotive project (three M420As using Briggs conversion kits) or maybe do some freight cars.
C425 Conversion Project – Part 2
February 13, 2021
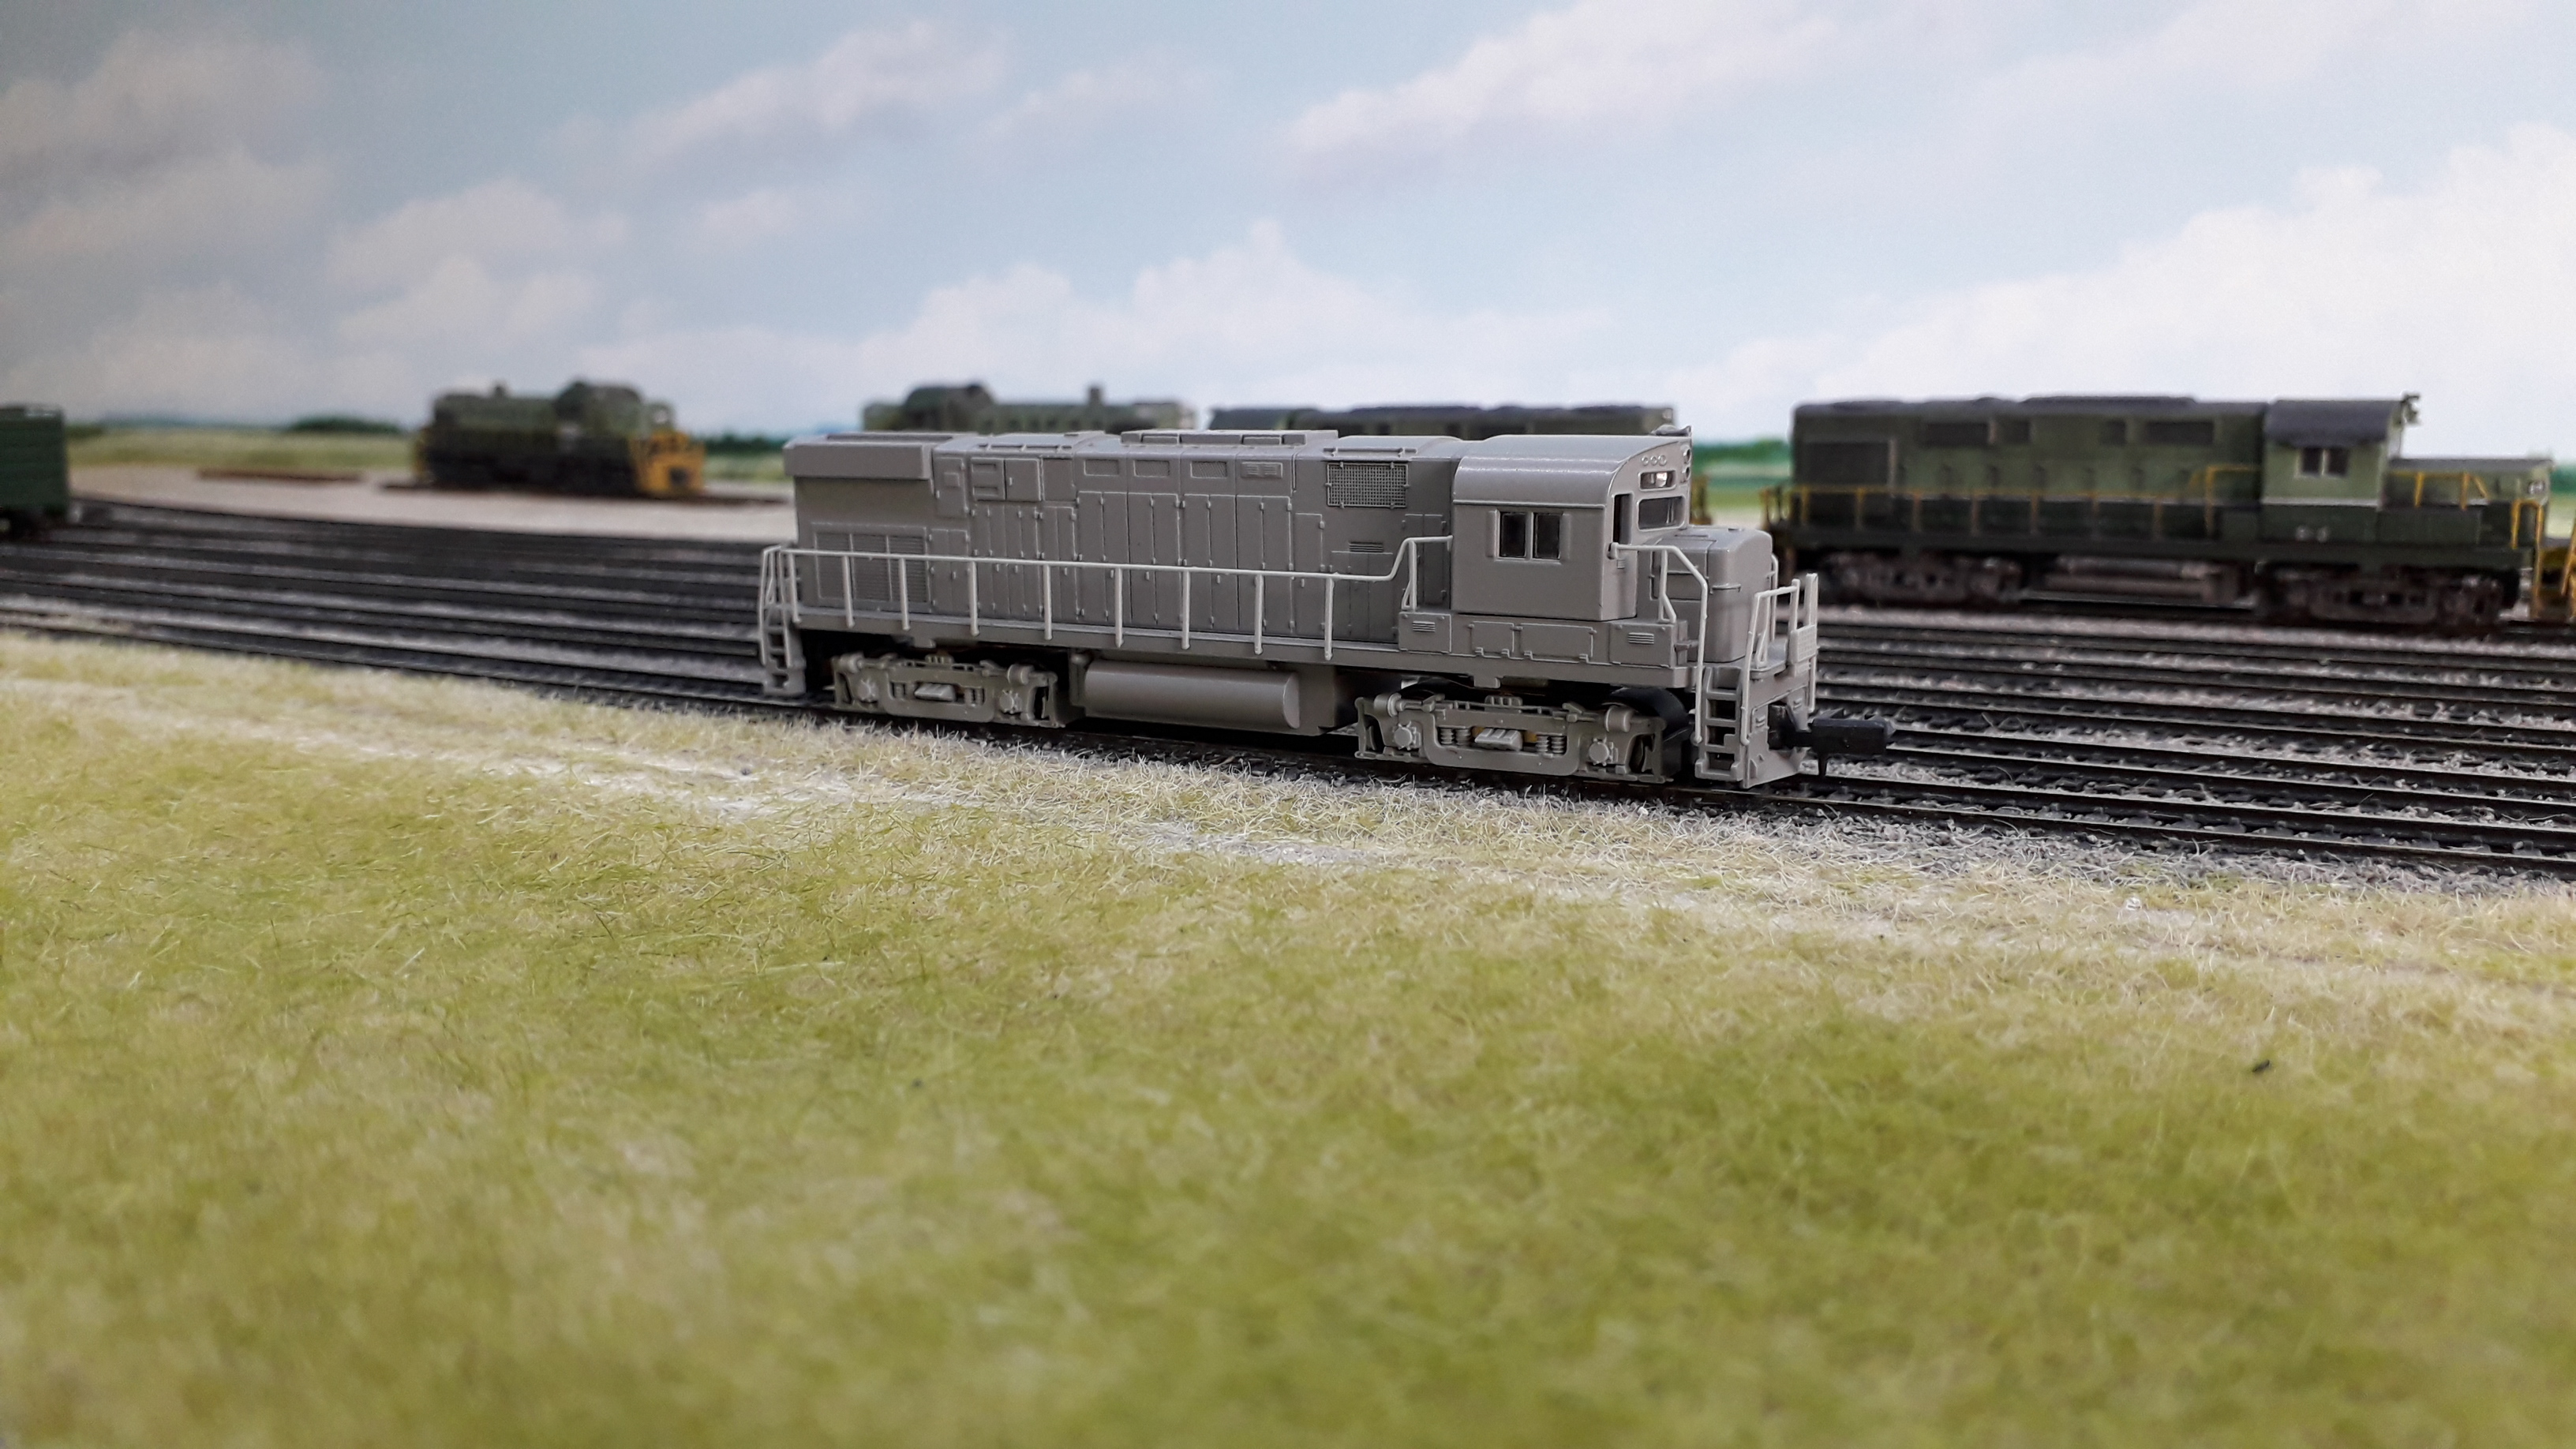
Recent weeks have seen good progress on 801. With major body shell conversion complete, attention turned to small details and painting. The Briggs kit comes with a set of small detail parts which can be used to complete a C425 in as-delivered ex-EL condition or in the later fully shopped BCR condition. The as-delivered EL units require only a few details as follows (all provided with the C425):
1.Horn cluster bracket installed on cab front above headlights. Life Life horn cluster mounted on this bracket
2.Cab side window sunshades added
3.Long hood carbody filters added behind cab.


Cab detail additions
The Briggs kit provides pilots with footstep which was an early modification to C425 units after delivery. I elected to use a strip of styrene glued to the bottom of the original Life Like pilot as it gives the general appearance of a footstep without having to cut into the existing pilot
A base coat of grey primer (Tamiya fine surface primer) was used as the basic EL grey. This is only an approximate match of EL grey because the final unit will see heavy weathering. Photos of 801 show a slightly darker grey ‘ghost’ band where areas of the EL maroon stripe have been removed.. This was simulated by masking the unit and spraying the long hood with Tamiya TS81 Royal Light Grey from a spray can. Upon removing the masking tape a very subtle band shadow effect is visible along the side of the long hood which is a good foundation to simulate the peeled EL maroon. After masking, the ends of the unit, the sides of the frame and the front and rear hand rails were sprayed with Tamiya spray can Camel Yellow (TS34). This is actually closer in shade to BCR yellow as the EL yellow is quite pale. The yellow will be toned down with weathering washes to reduce its intensity and bring it closer in appearance to the EL shade.


Major painting completed. This was all done using small spray cans of Tamiya paint (a great time savings that I highly recommend – especially for painting yellow!) The “ghost stripe” simulating the faded and peeled EL maroon stripe turned out quite well after masking the base grey and spraying with a slightly darker shade.
The final step of this stage was to simulate the peeling, faded and partially painted out Erie Lackawanna maroon band. The shade of red was chosen visually based on various photos and the closest match available in a local hobby shop was found to be from the MIG military modelling range, specifically, A MIG-0121 Blood Red. This was brushed on in a patched fashion following prototype photos of 801. Further dry brushing was then applied over the patching to blend it in. Photos below show the effect which I tried to match to prototype photos on both sides.


C425 Conversion Project – Part 1
January 30, 2021
My first project for the new year is a Alco Century 425. The British Columbia Railway acquired twelve of these ex- Erie Lackawanna units in 1976 and they were immediately pressed into service due to a shortage of motive power at the time. As a result, many of these units retained evidence of their Erie Lackawanna colours for several years before they were cycled through the paint shops
The C425s were a common sight on the north end which was four-axle territory exclusively in the 1970s so this project will be a great addition to the fleet. I have selected 801 as a prototype. During my modelling period of 1978 it was still in its original EL grey with rather worn EL lettering as shown at the image links below. I thought this would be fun to reproduce using paint peel weathering techniques and a combination of Microscale BCR and EL decals.
http://www.cnrphotos.com/gallery2/main.php?g2_itemId=52384
http://www.cnrphotos.com/gallery2/main.php?g2_itemId=52380
The starting point for this project is the Life Like Alco Century 425. I was lucky enough to stumble up on an undecorated unit in a Calgary hobby shop well over a decade ago and grabbed it for my future project collection. This model runs very well despite its age (the chunky rapido type couplers being a hint as to how old it is). I gave it a good run in and thoroughly cleaned the wheels and it is now one of my best running units.
The ex EL units had a very different carbody appearance than the Life Life model so a replacement bodyshell is needed.. Briggs Models offers a replacement body shell and detail parts. The original Life Like Cab and handrail set is retained so it is actually a relatively straightforward conversion. As with any BCR locomotive project, photos of the particular prototype are recommended as the C425s had several modifications made as the years progressed and these were not always the same across all units.
The Briggs conversion kit comes with a set of instructions but I recommend (if you have access to it) following the article written by T. Horton in the January-February, 2008 edition of N Scale Magazine. This is a step-by-step guide with model and prototype photos that makes the conversion easy and enjoyable. As such I do not provide an exhaustive descriptions of the steps here, just a summary.
Out of the box the Life Like C425 has very pleasing dimensions and, as mentioned earlier, runs very smoothly once given a good run-in and wheel clean. The first step is to disassemble the major parts. There is some minor filing required to the metal frame but it is not too arduous.

With frame filing complete, the Briggs body shell was fit to the frame. Generally the fit is pretty good although a little work may be needed to get the cab to sit nice and flush with the frame. At this stage, the bulk of the conversion is actually done, with just a few more detail parts to install
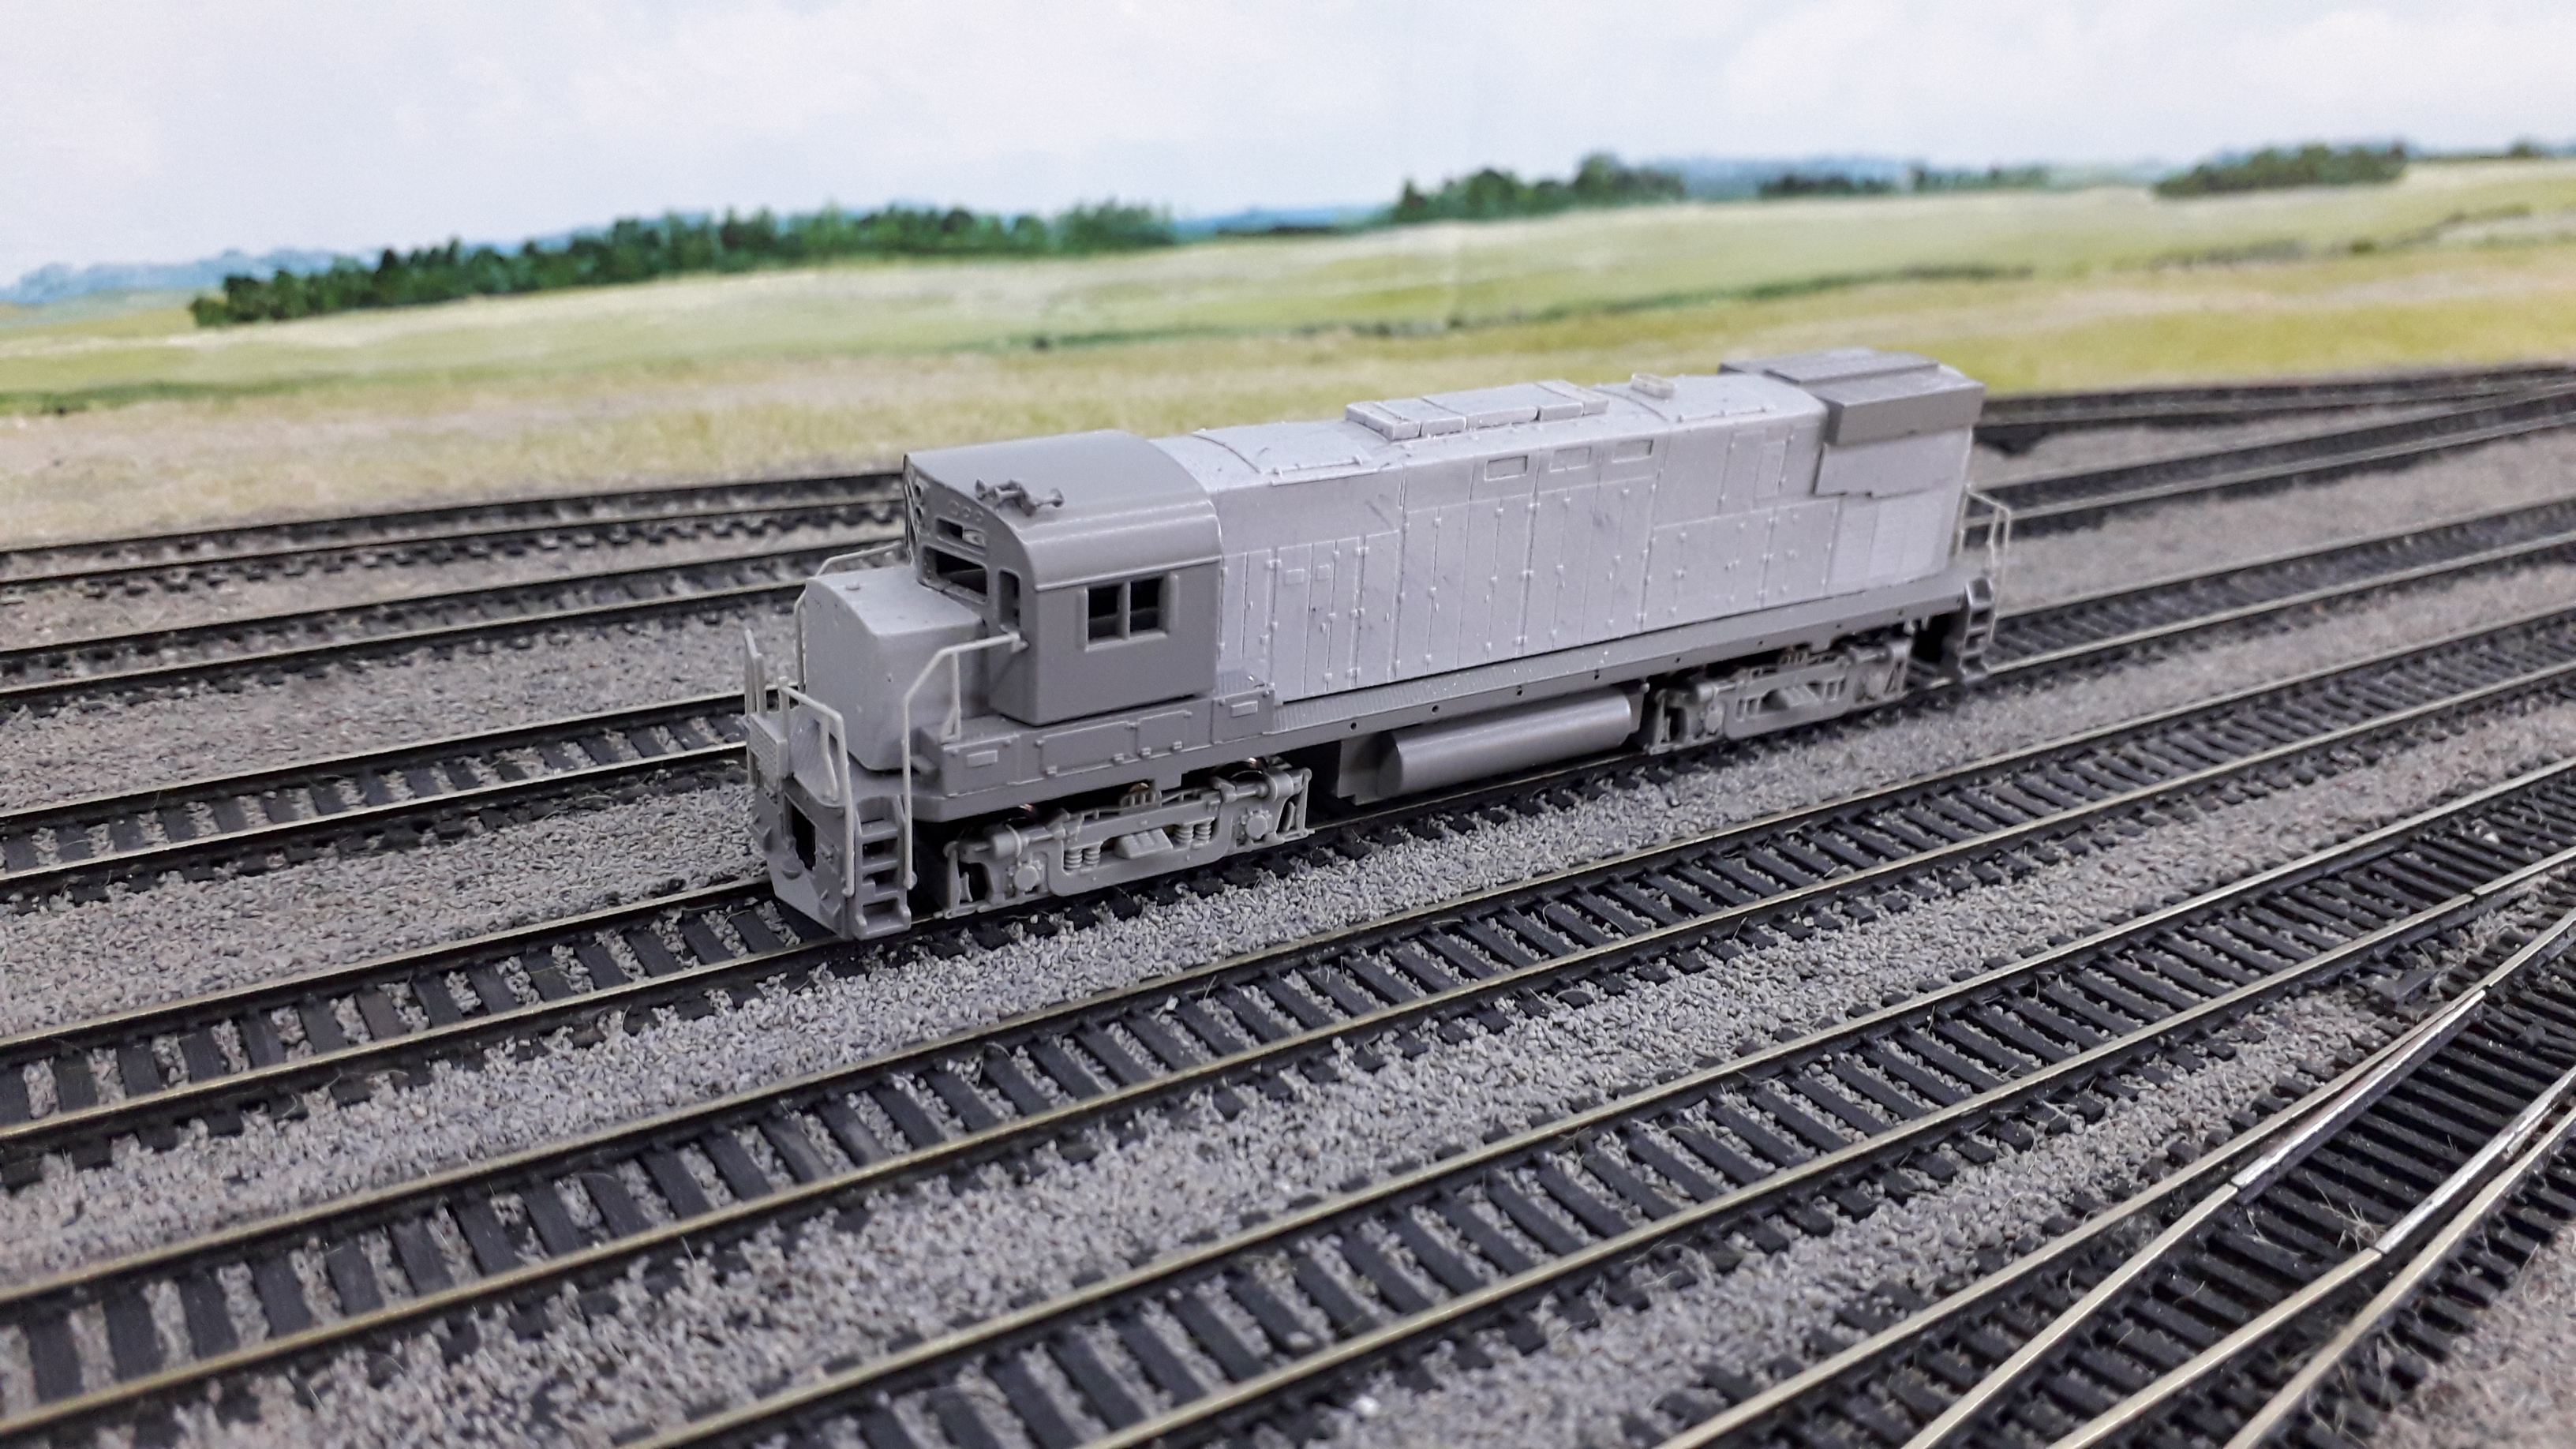
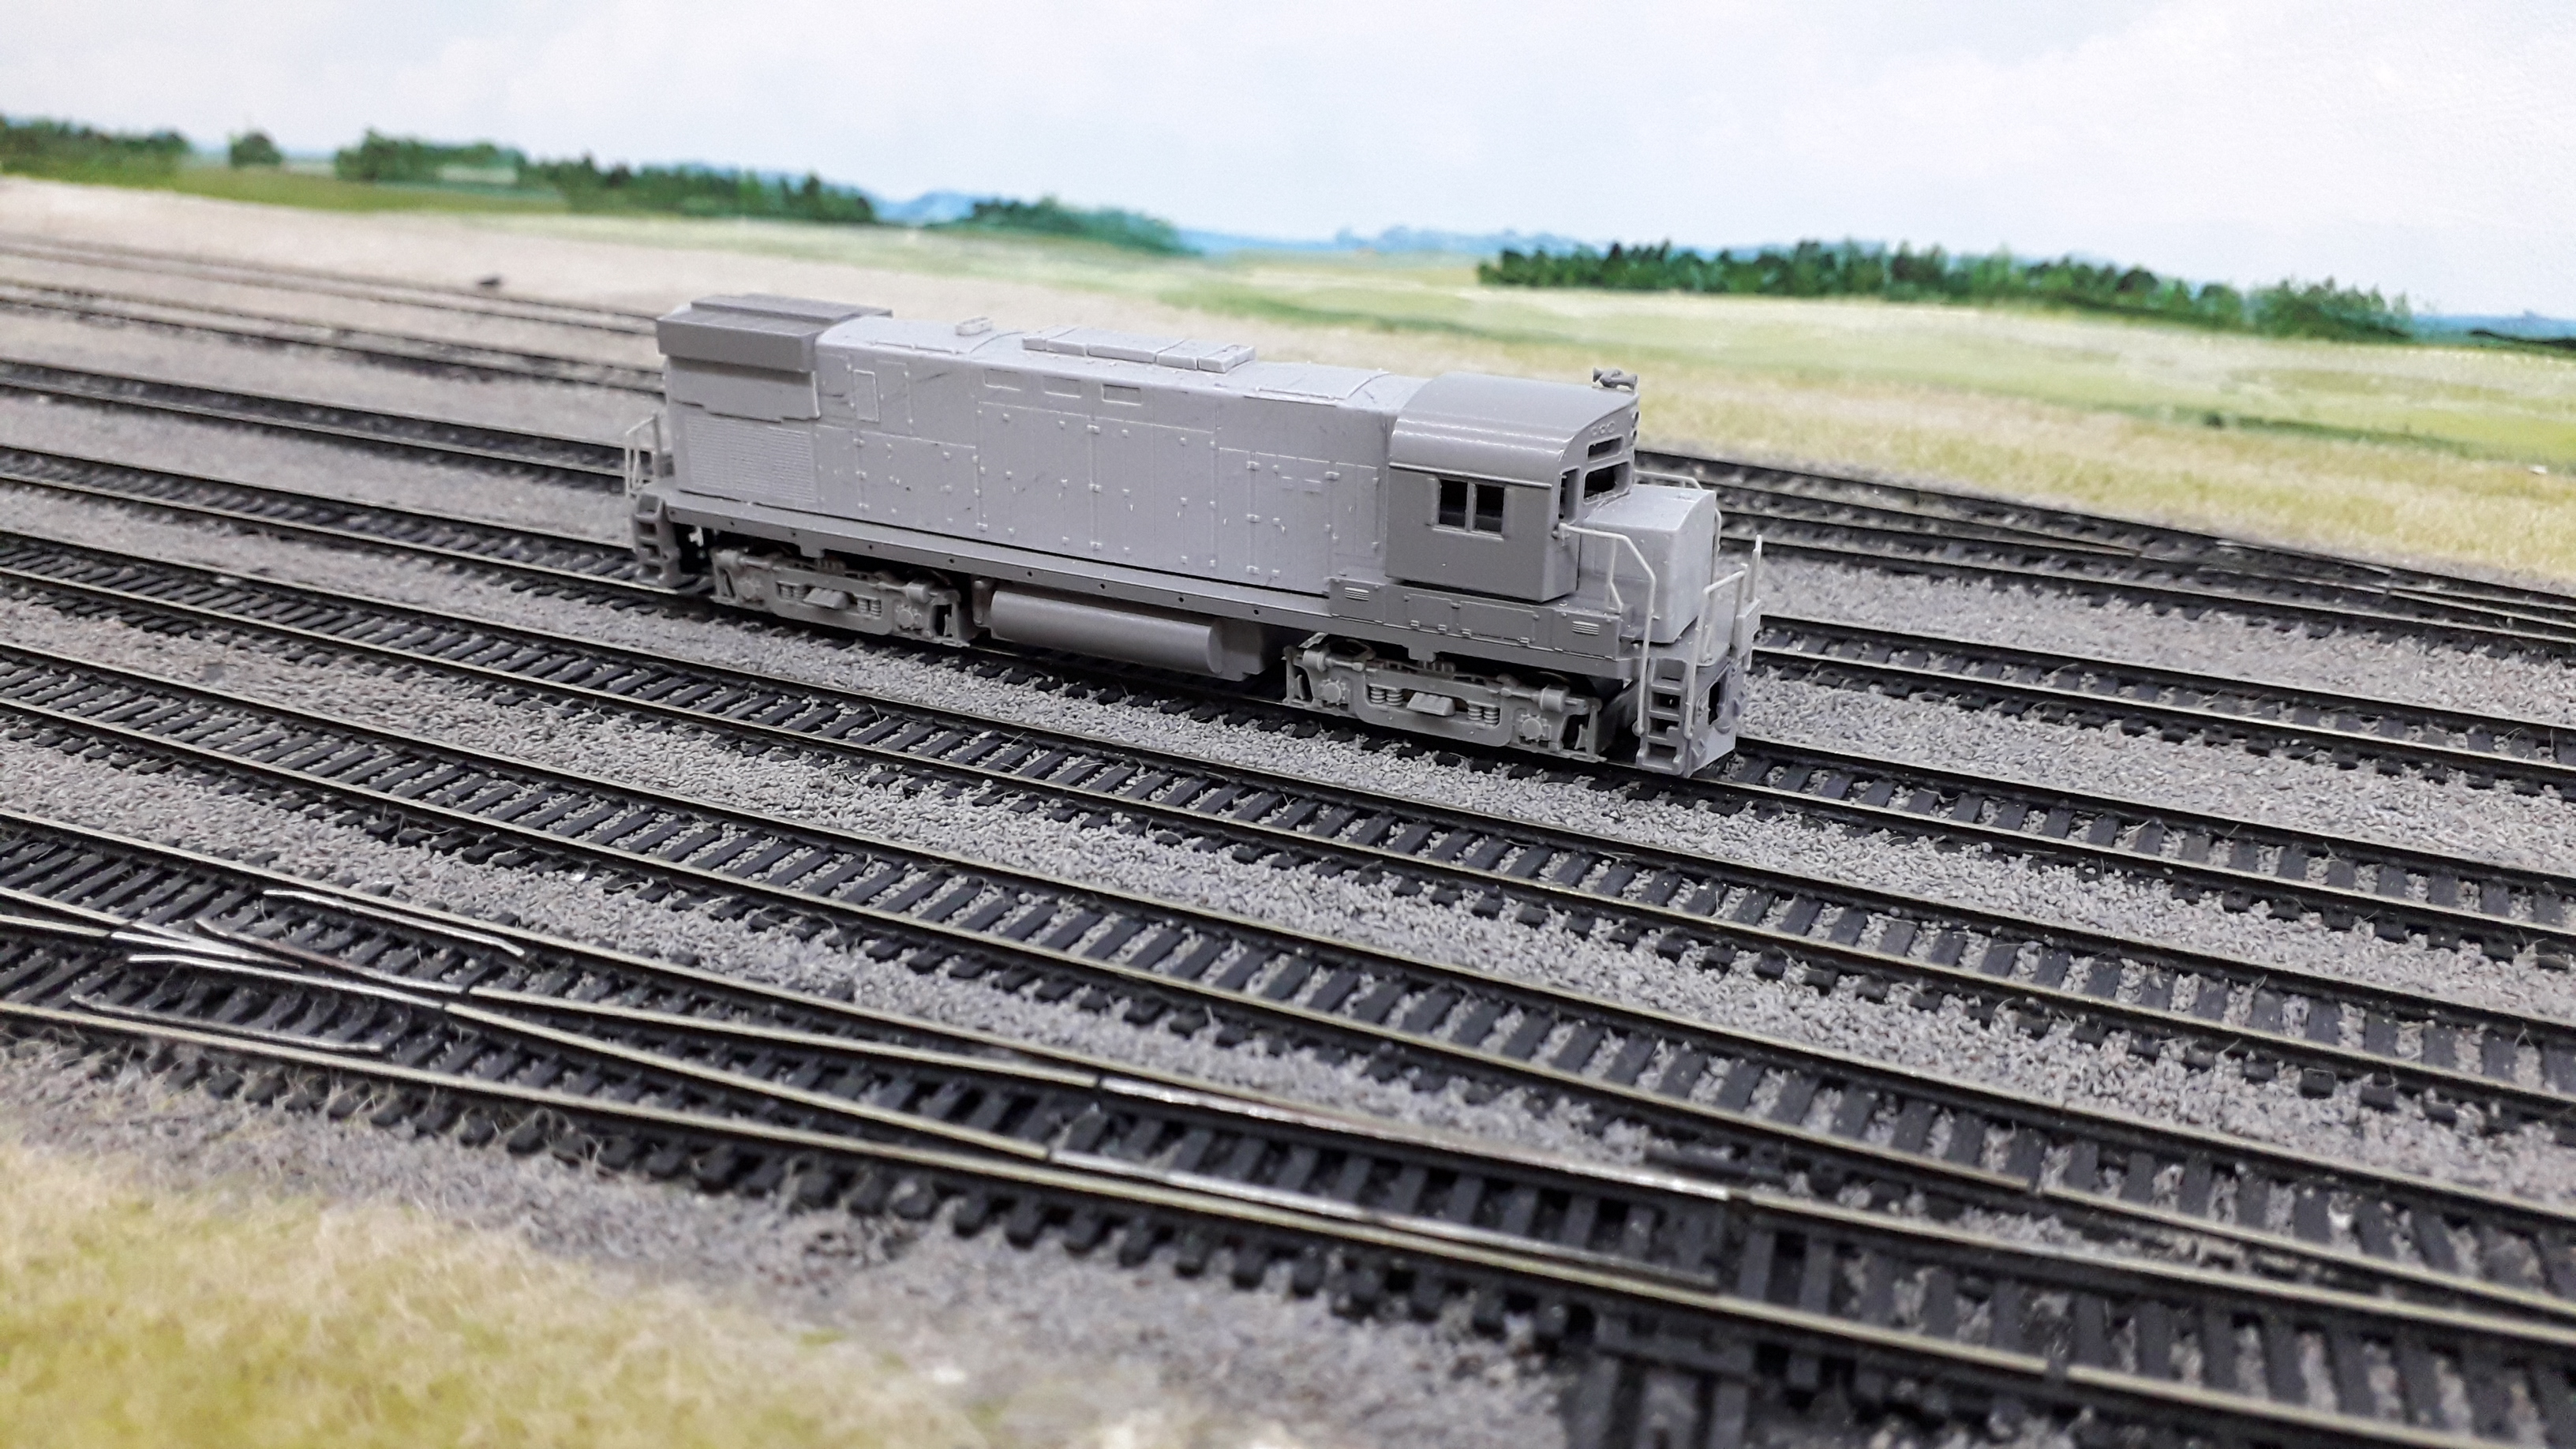
Next steps are finalizing the remaining details and getting a coat of primer on in preparation for final painting.
RS-18 Conversion Project – Part 6
January 4, 2021

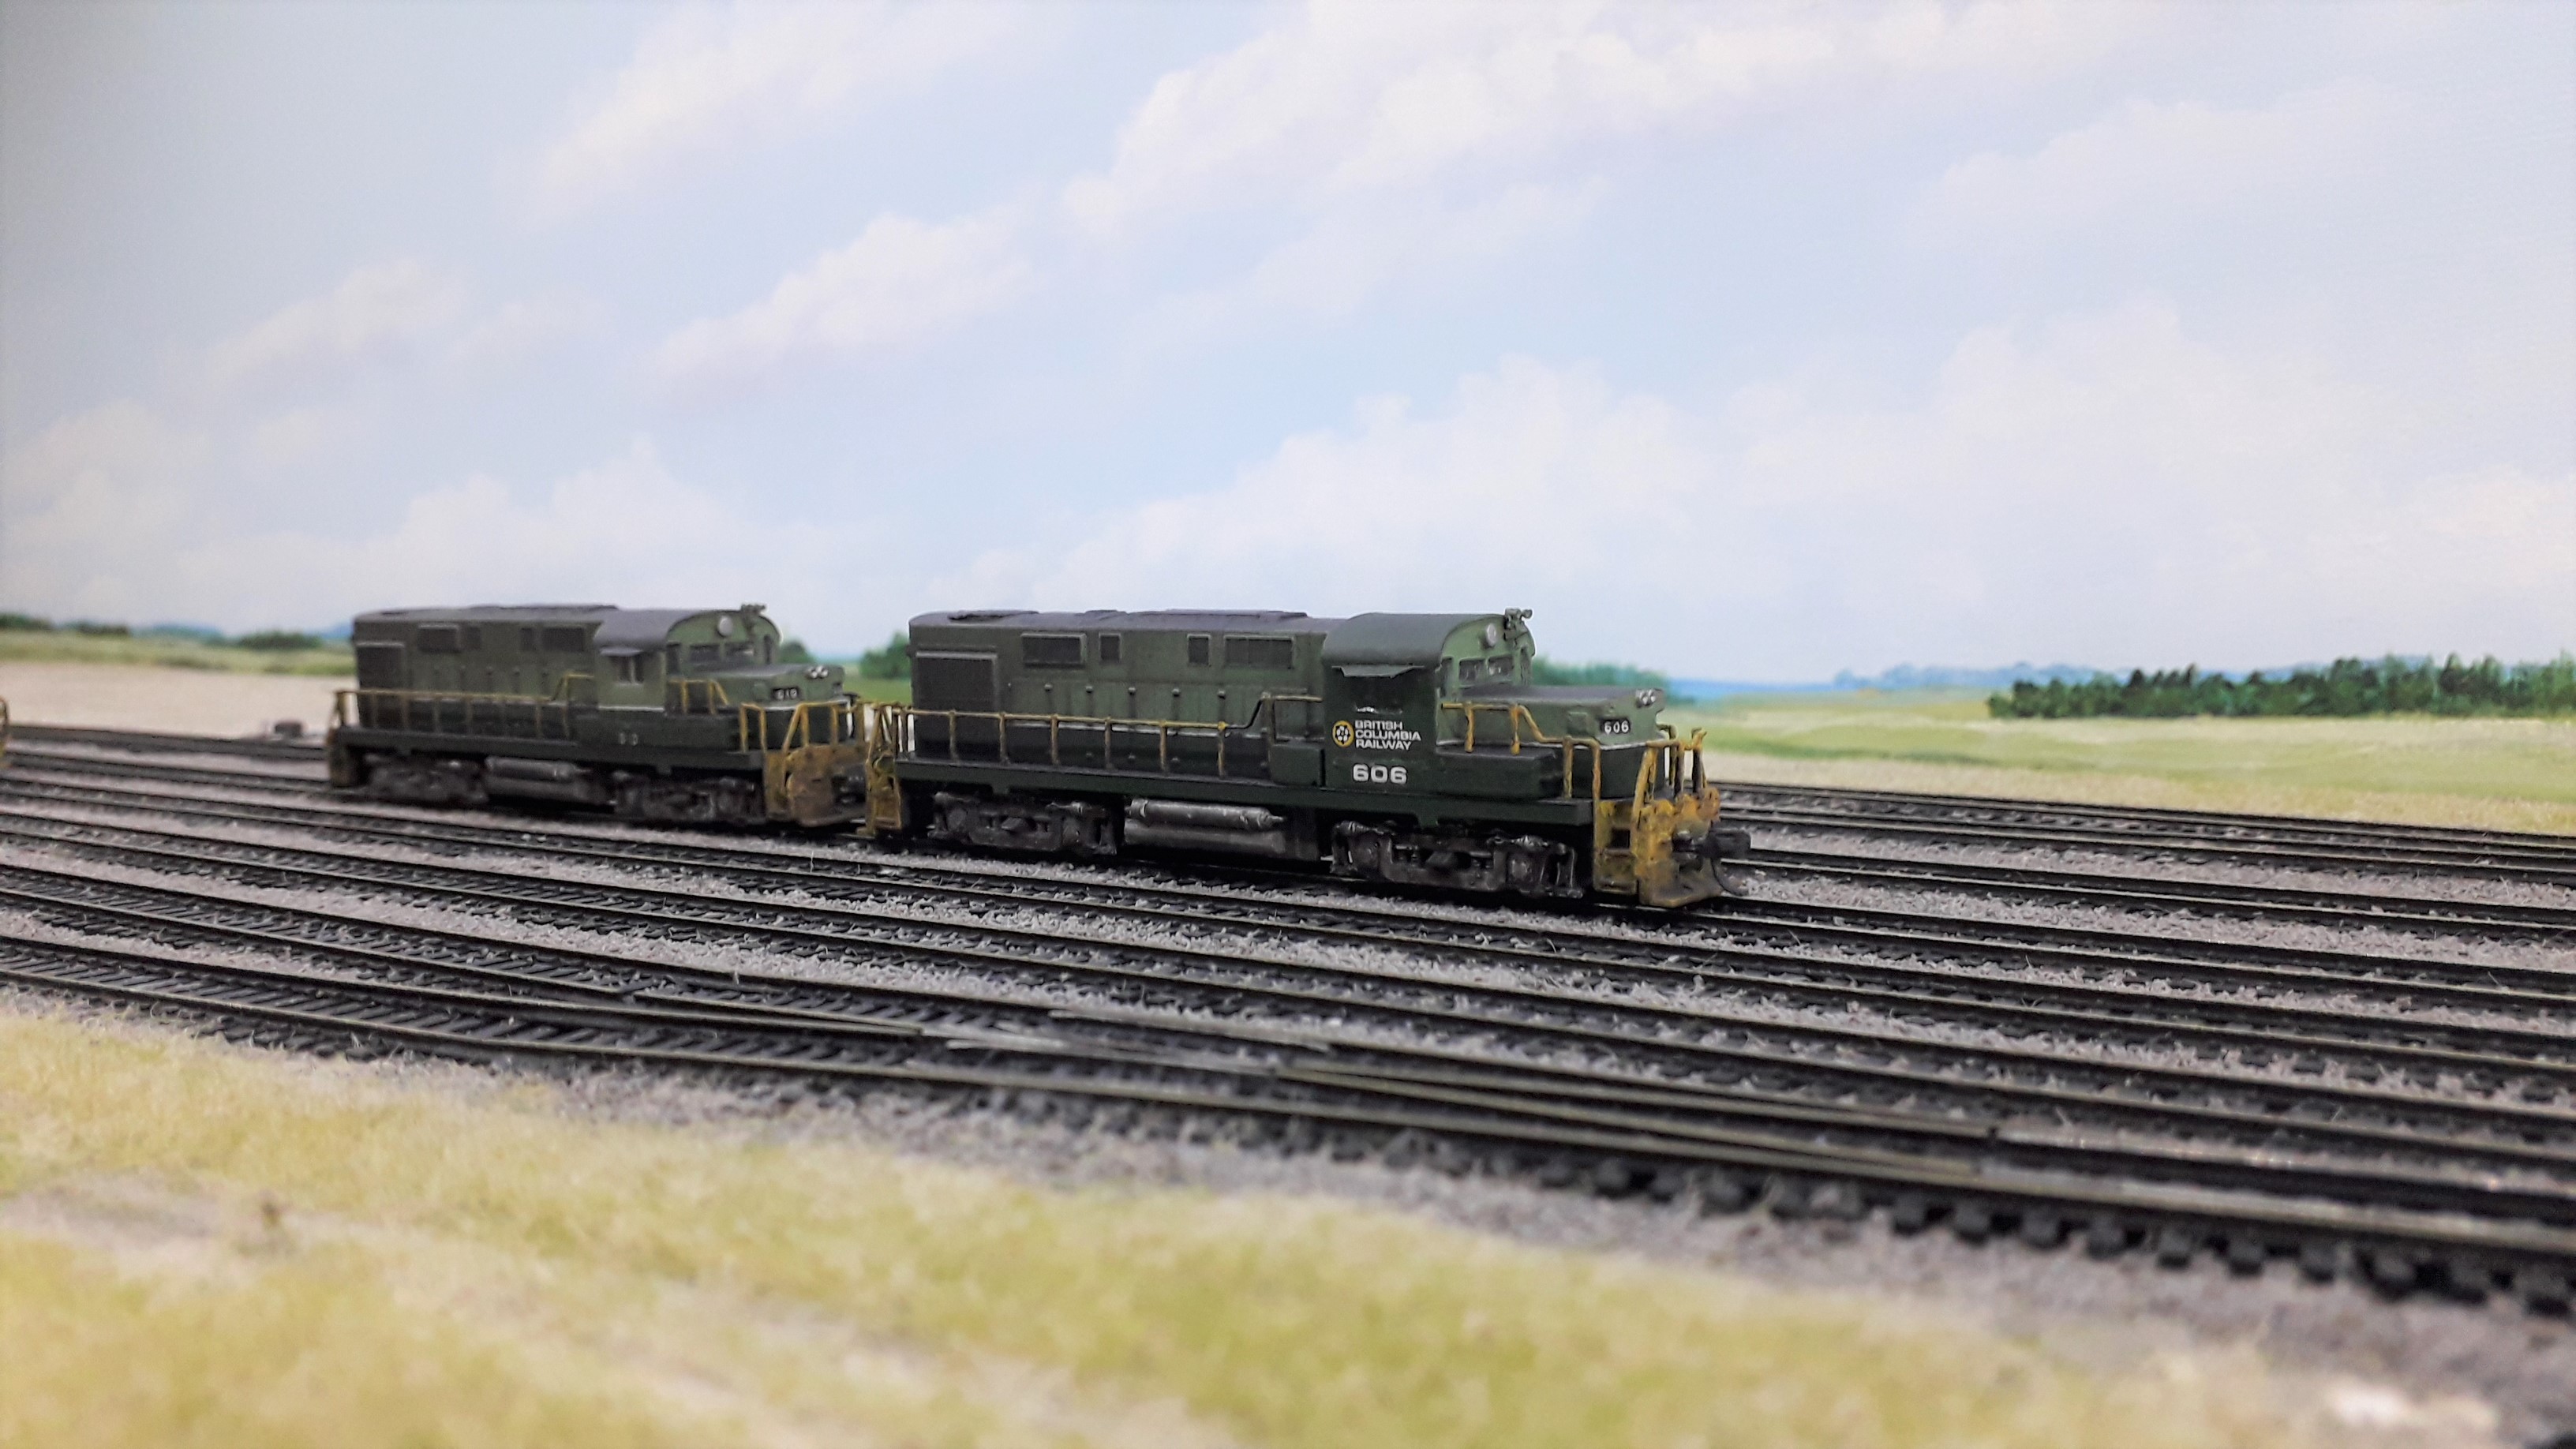
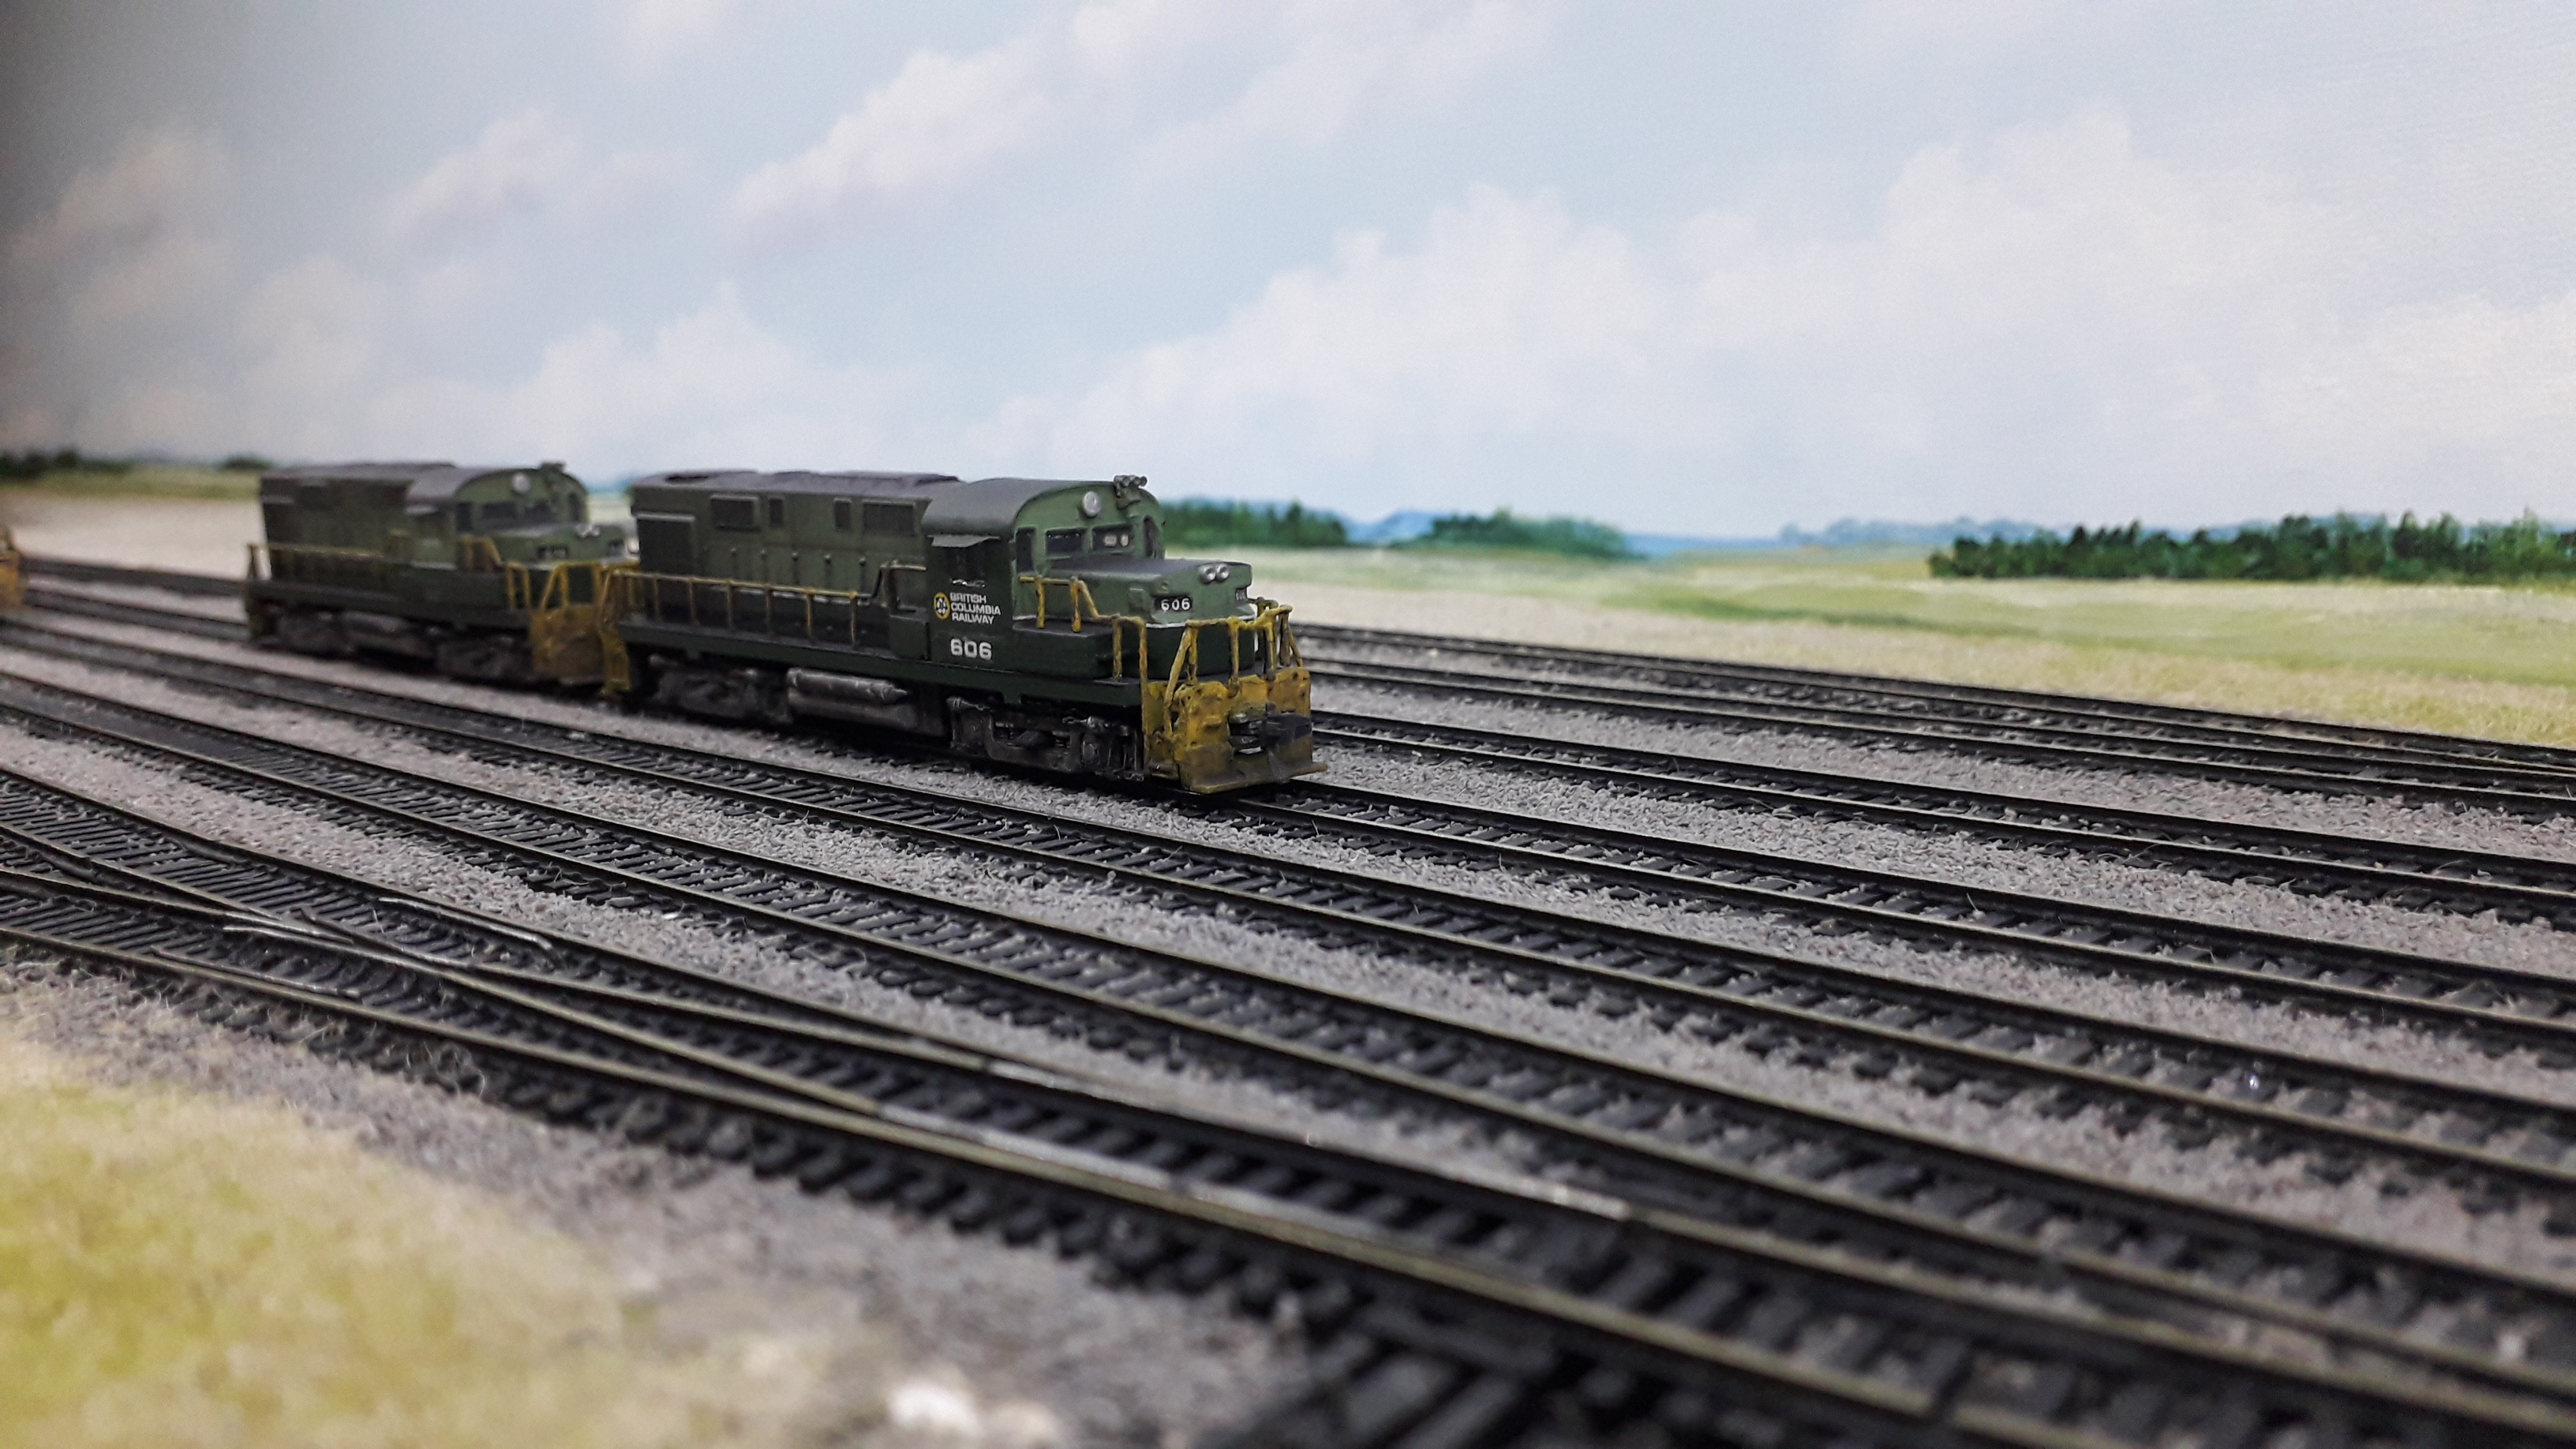
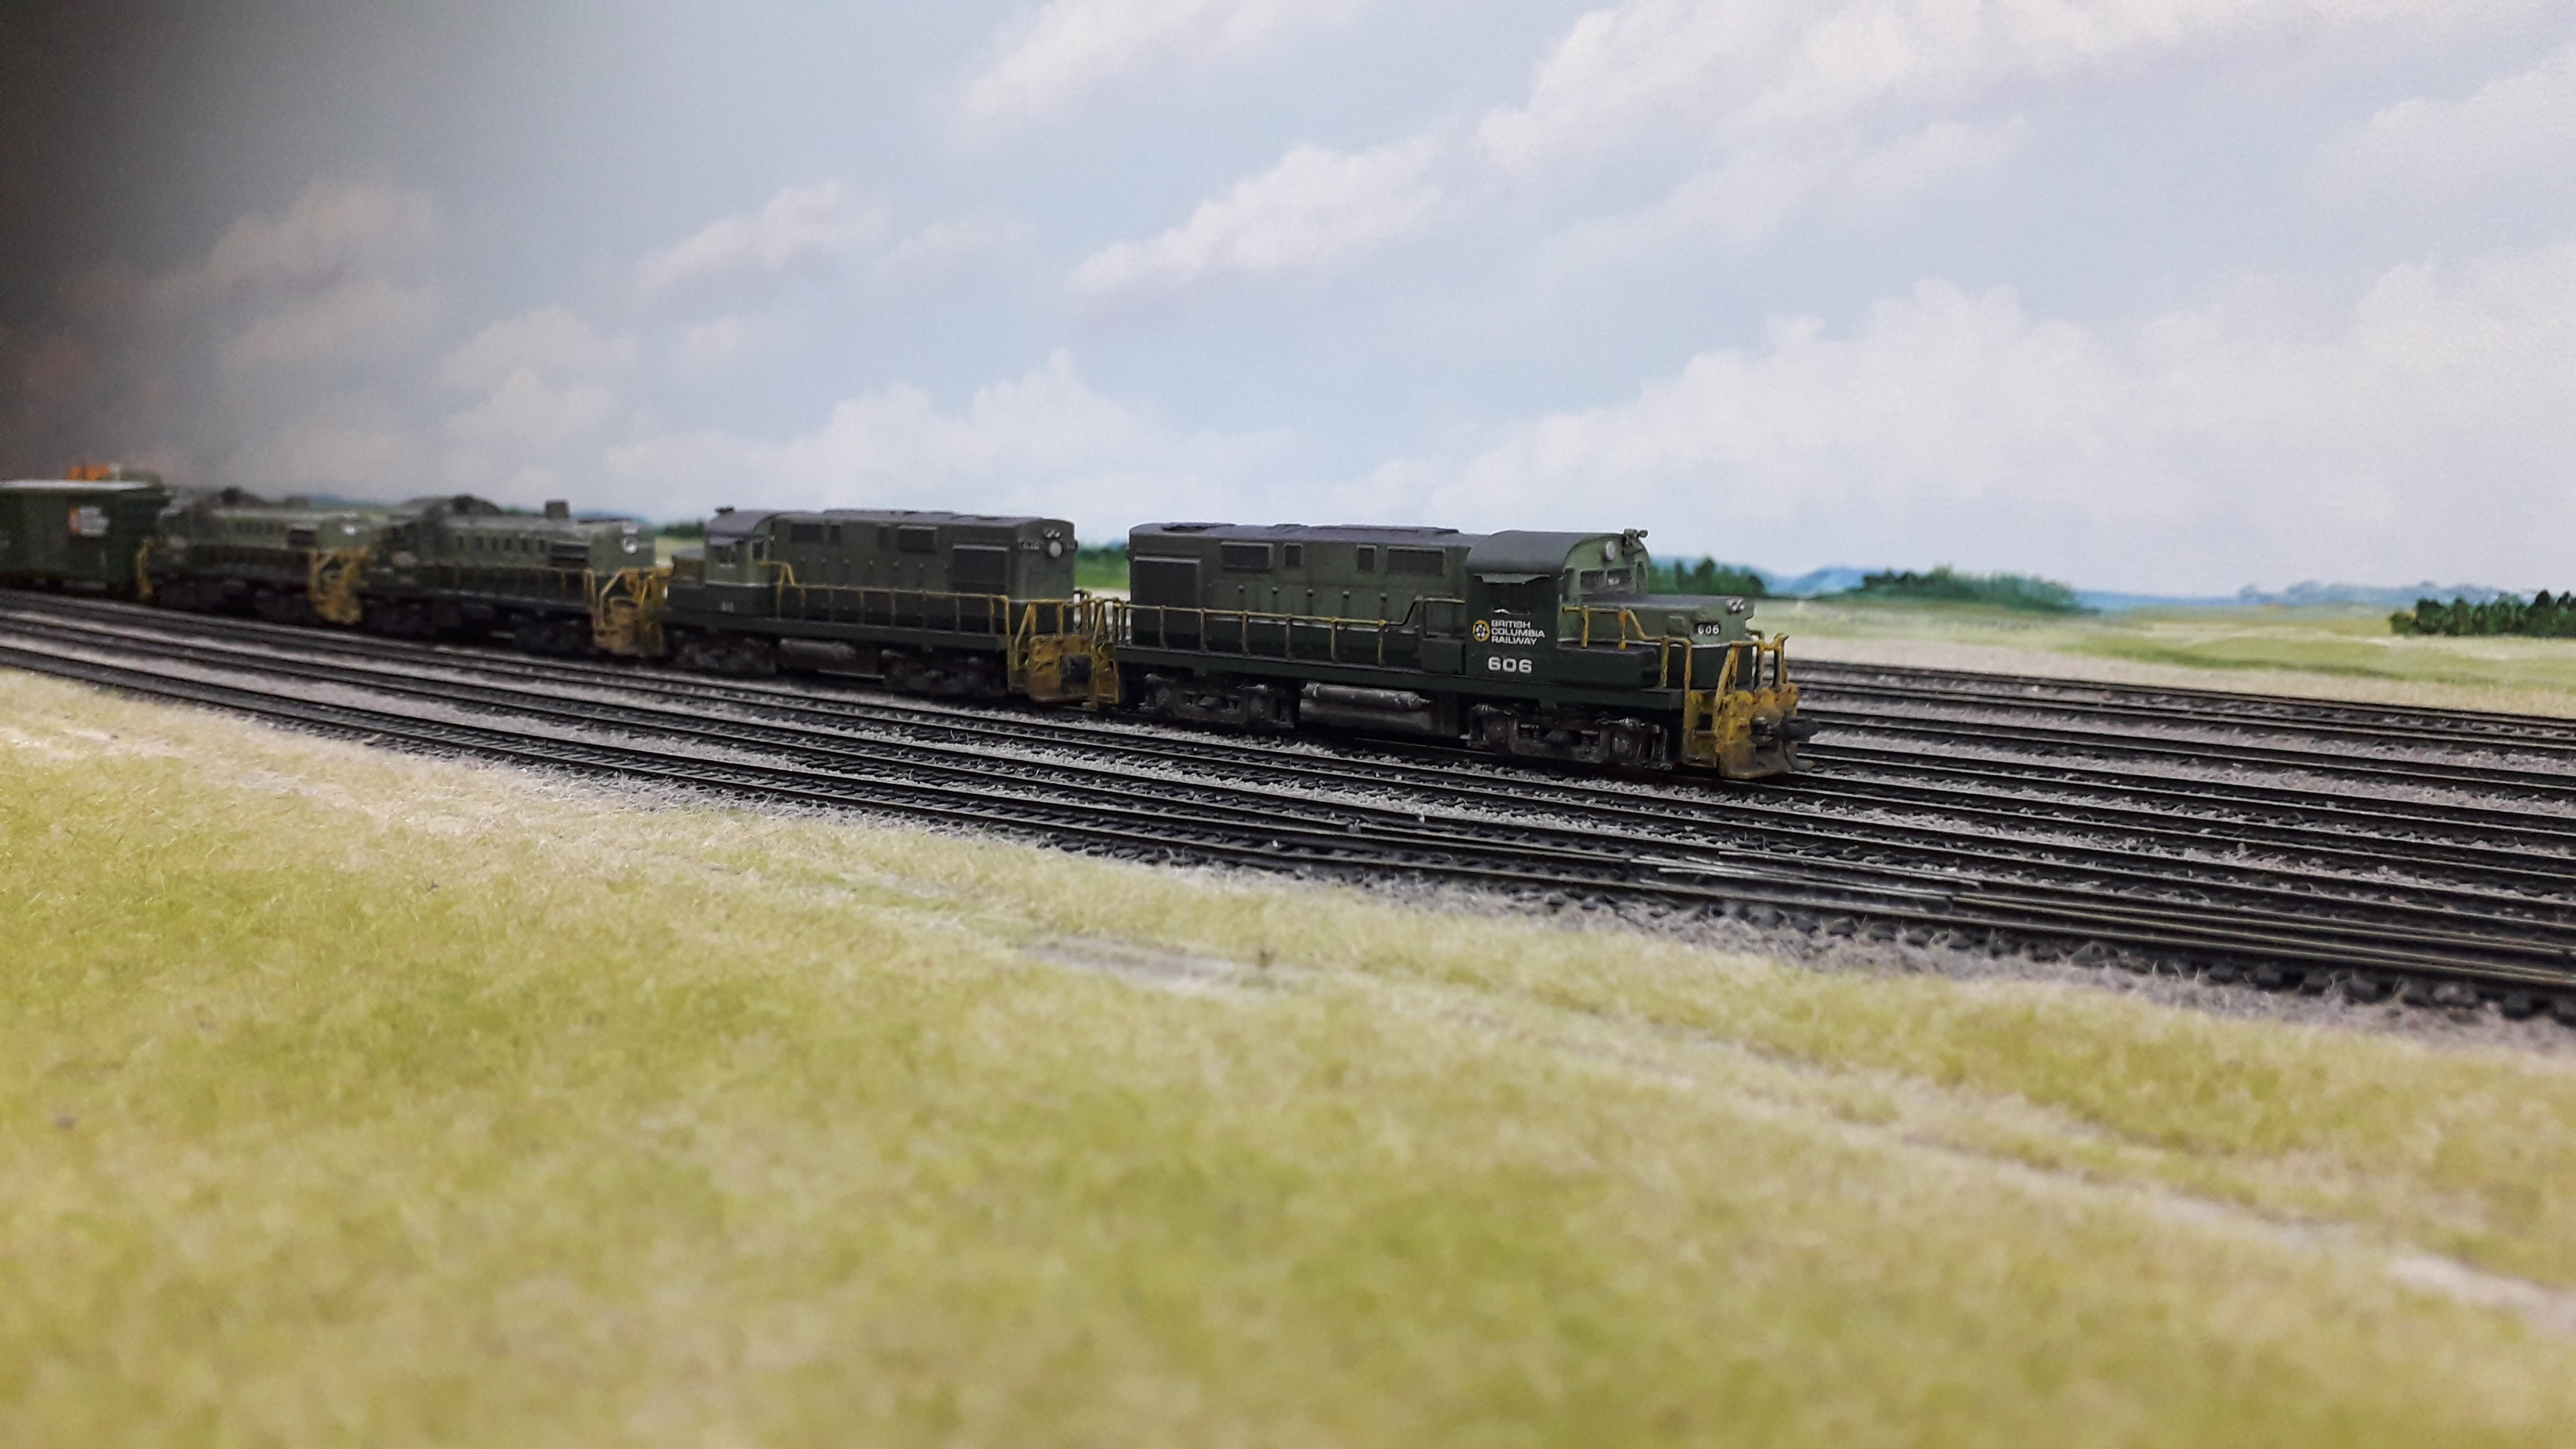
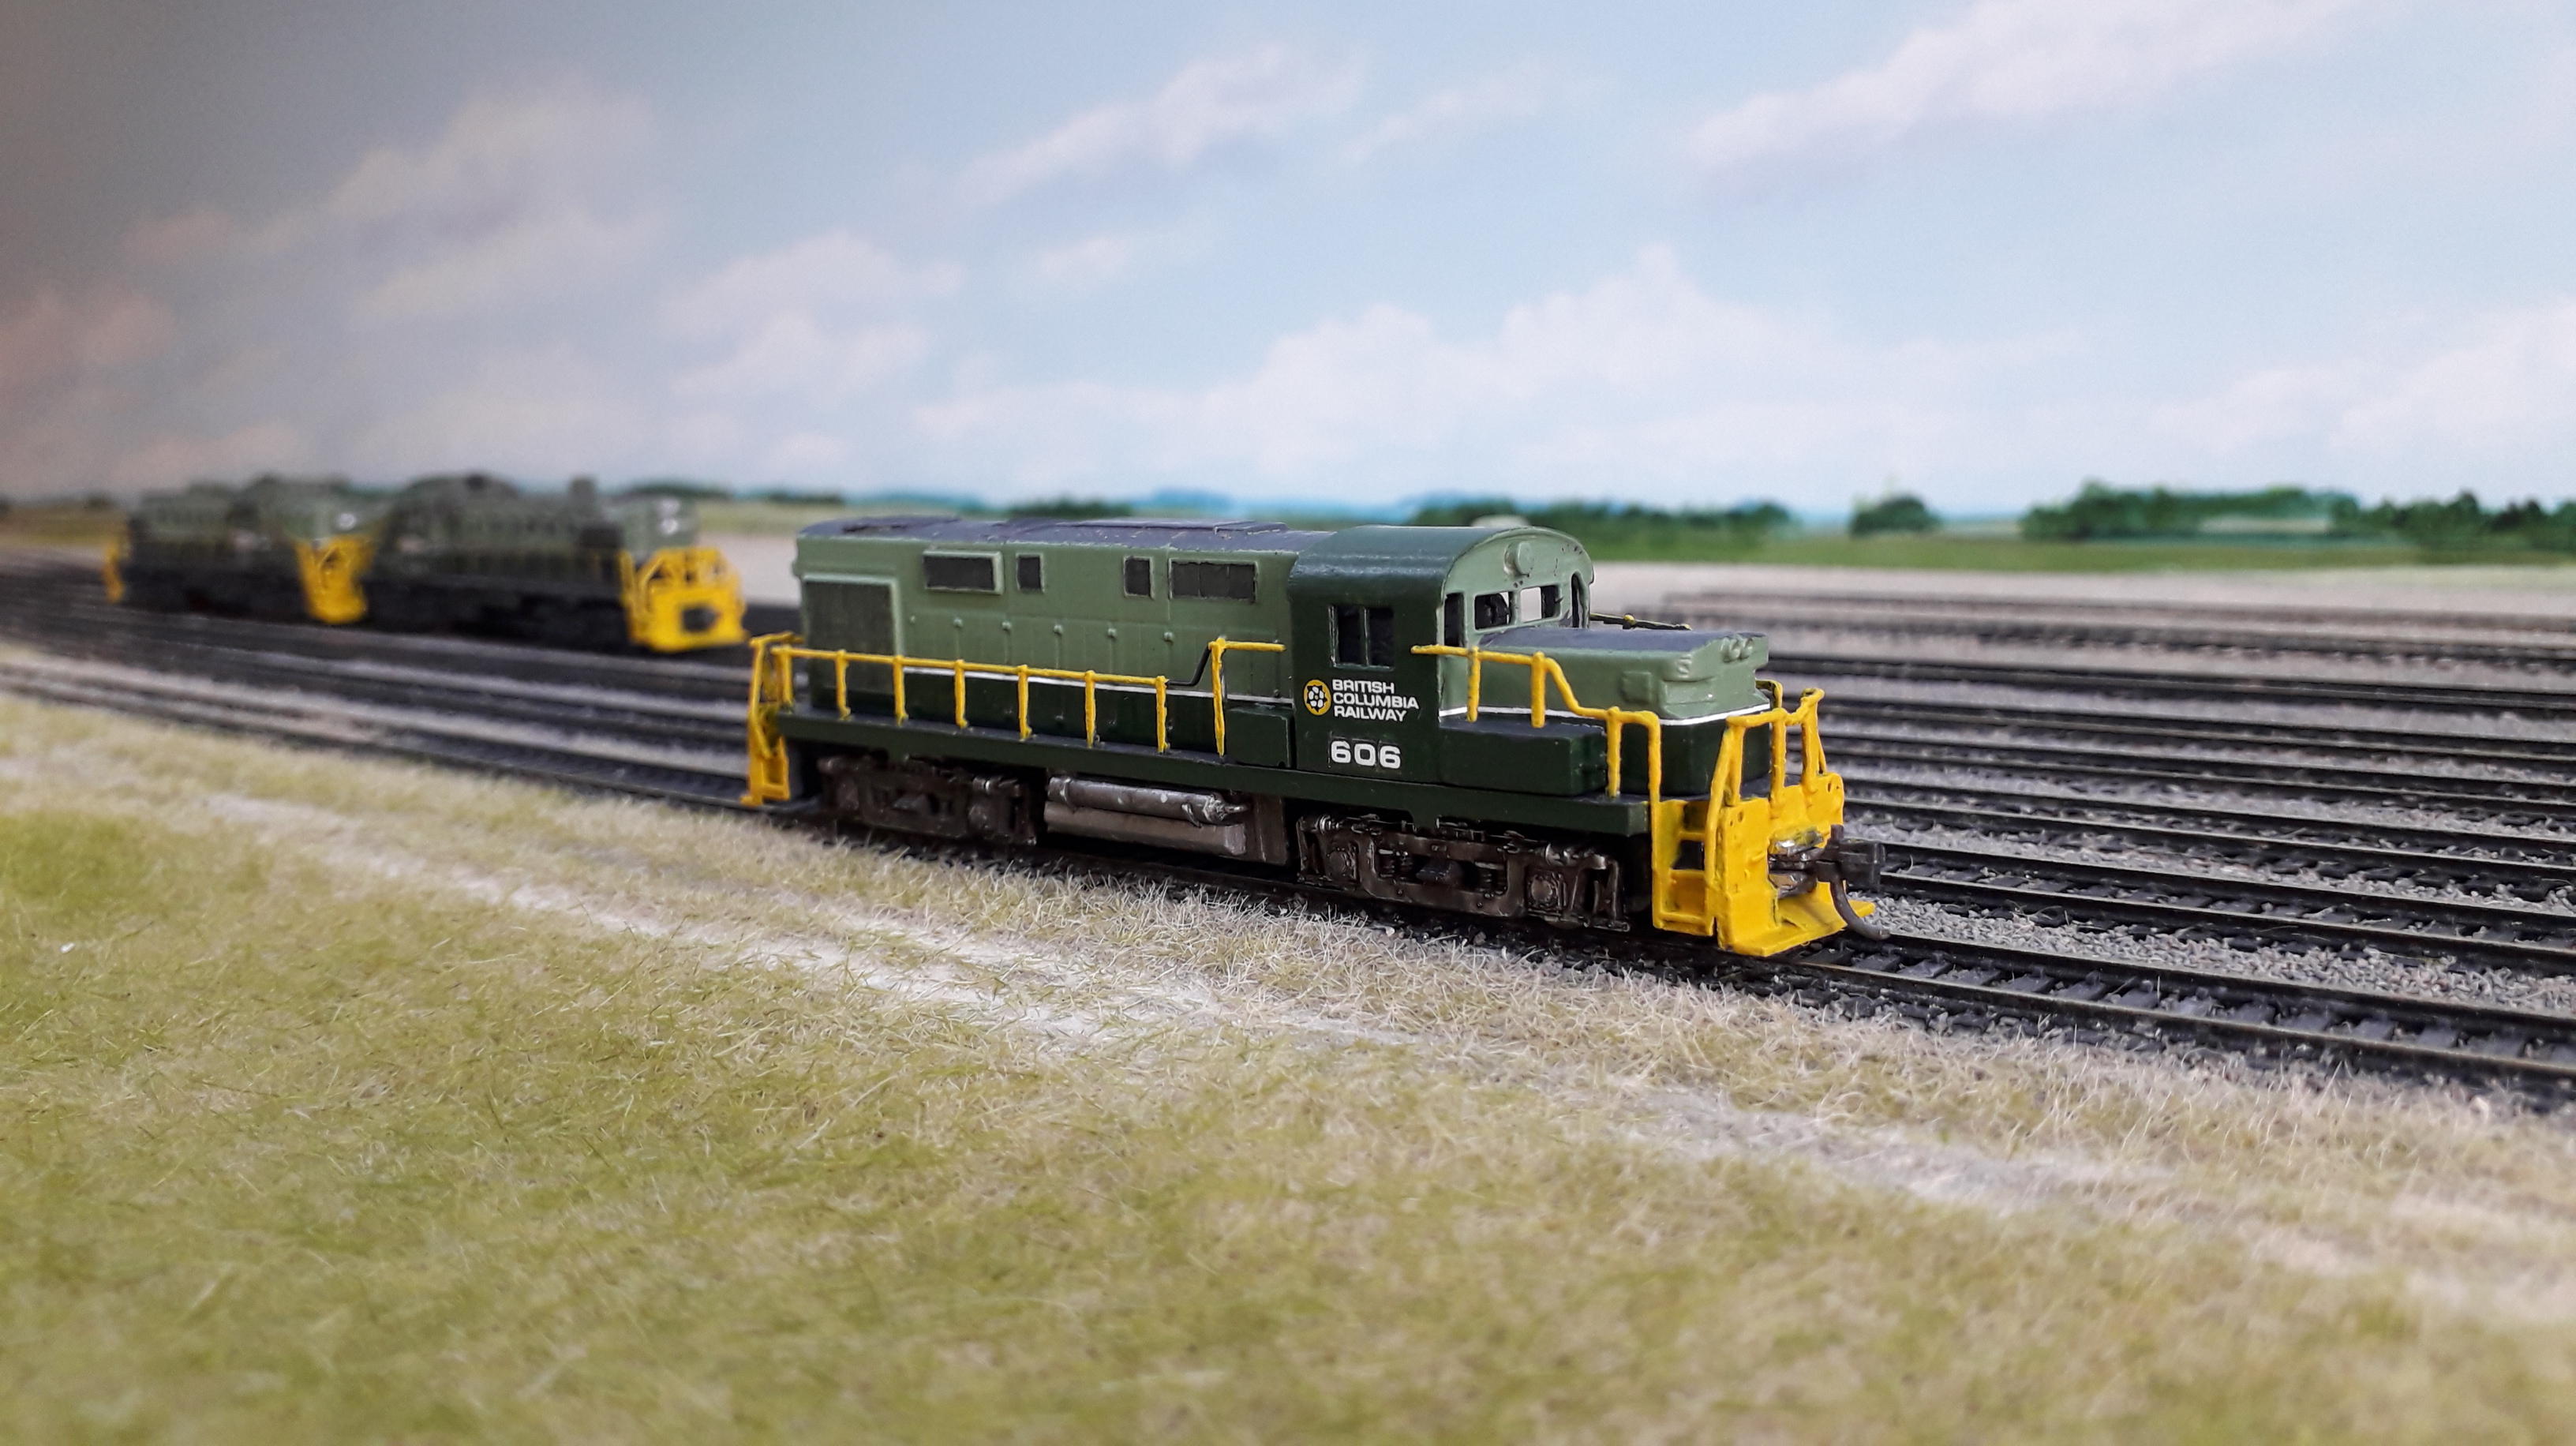
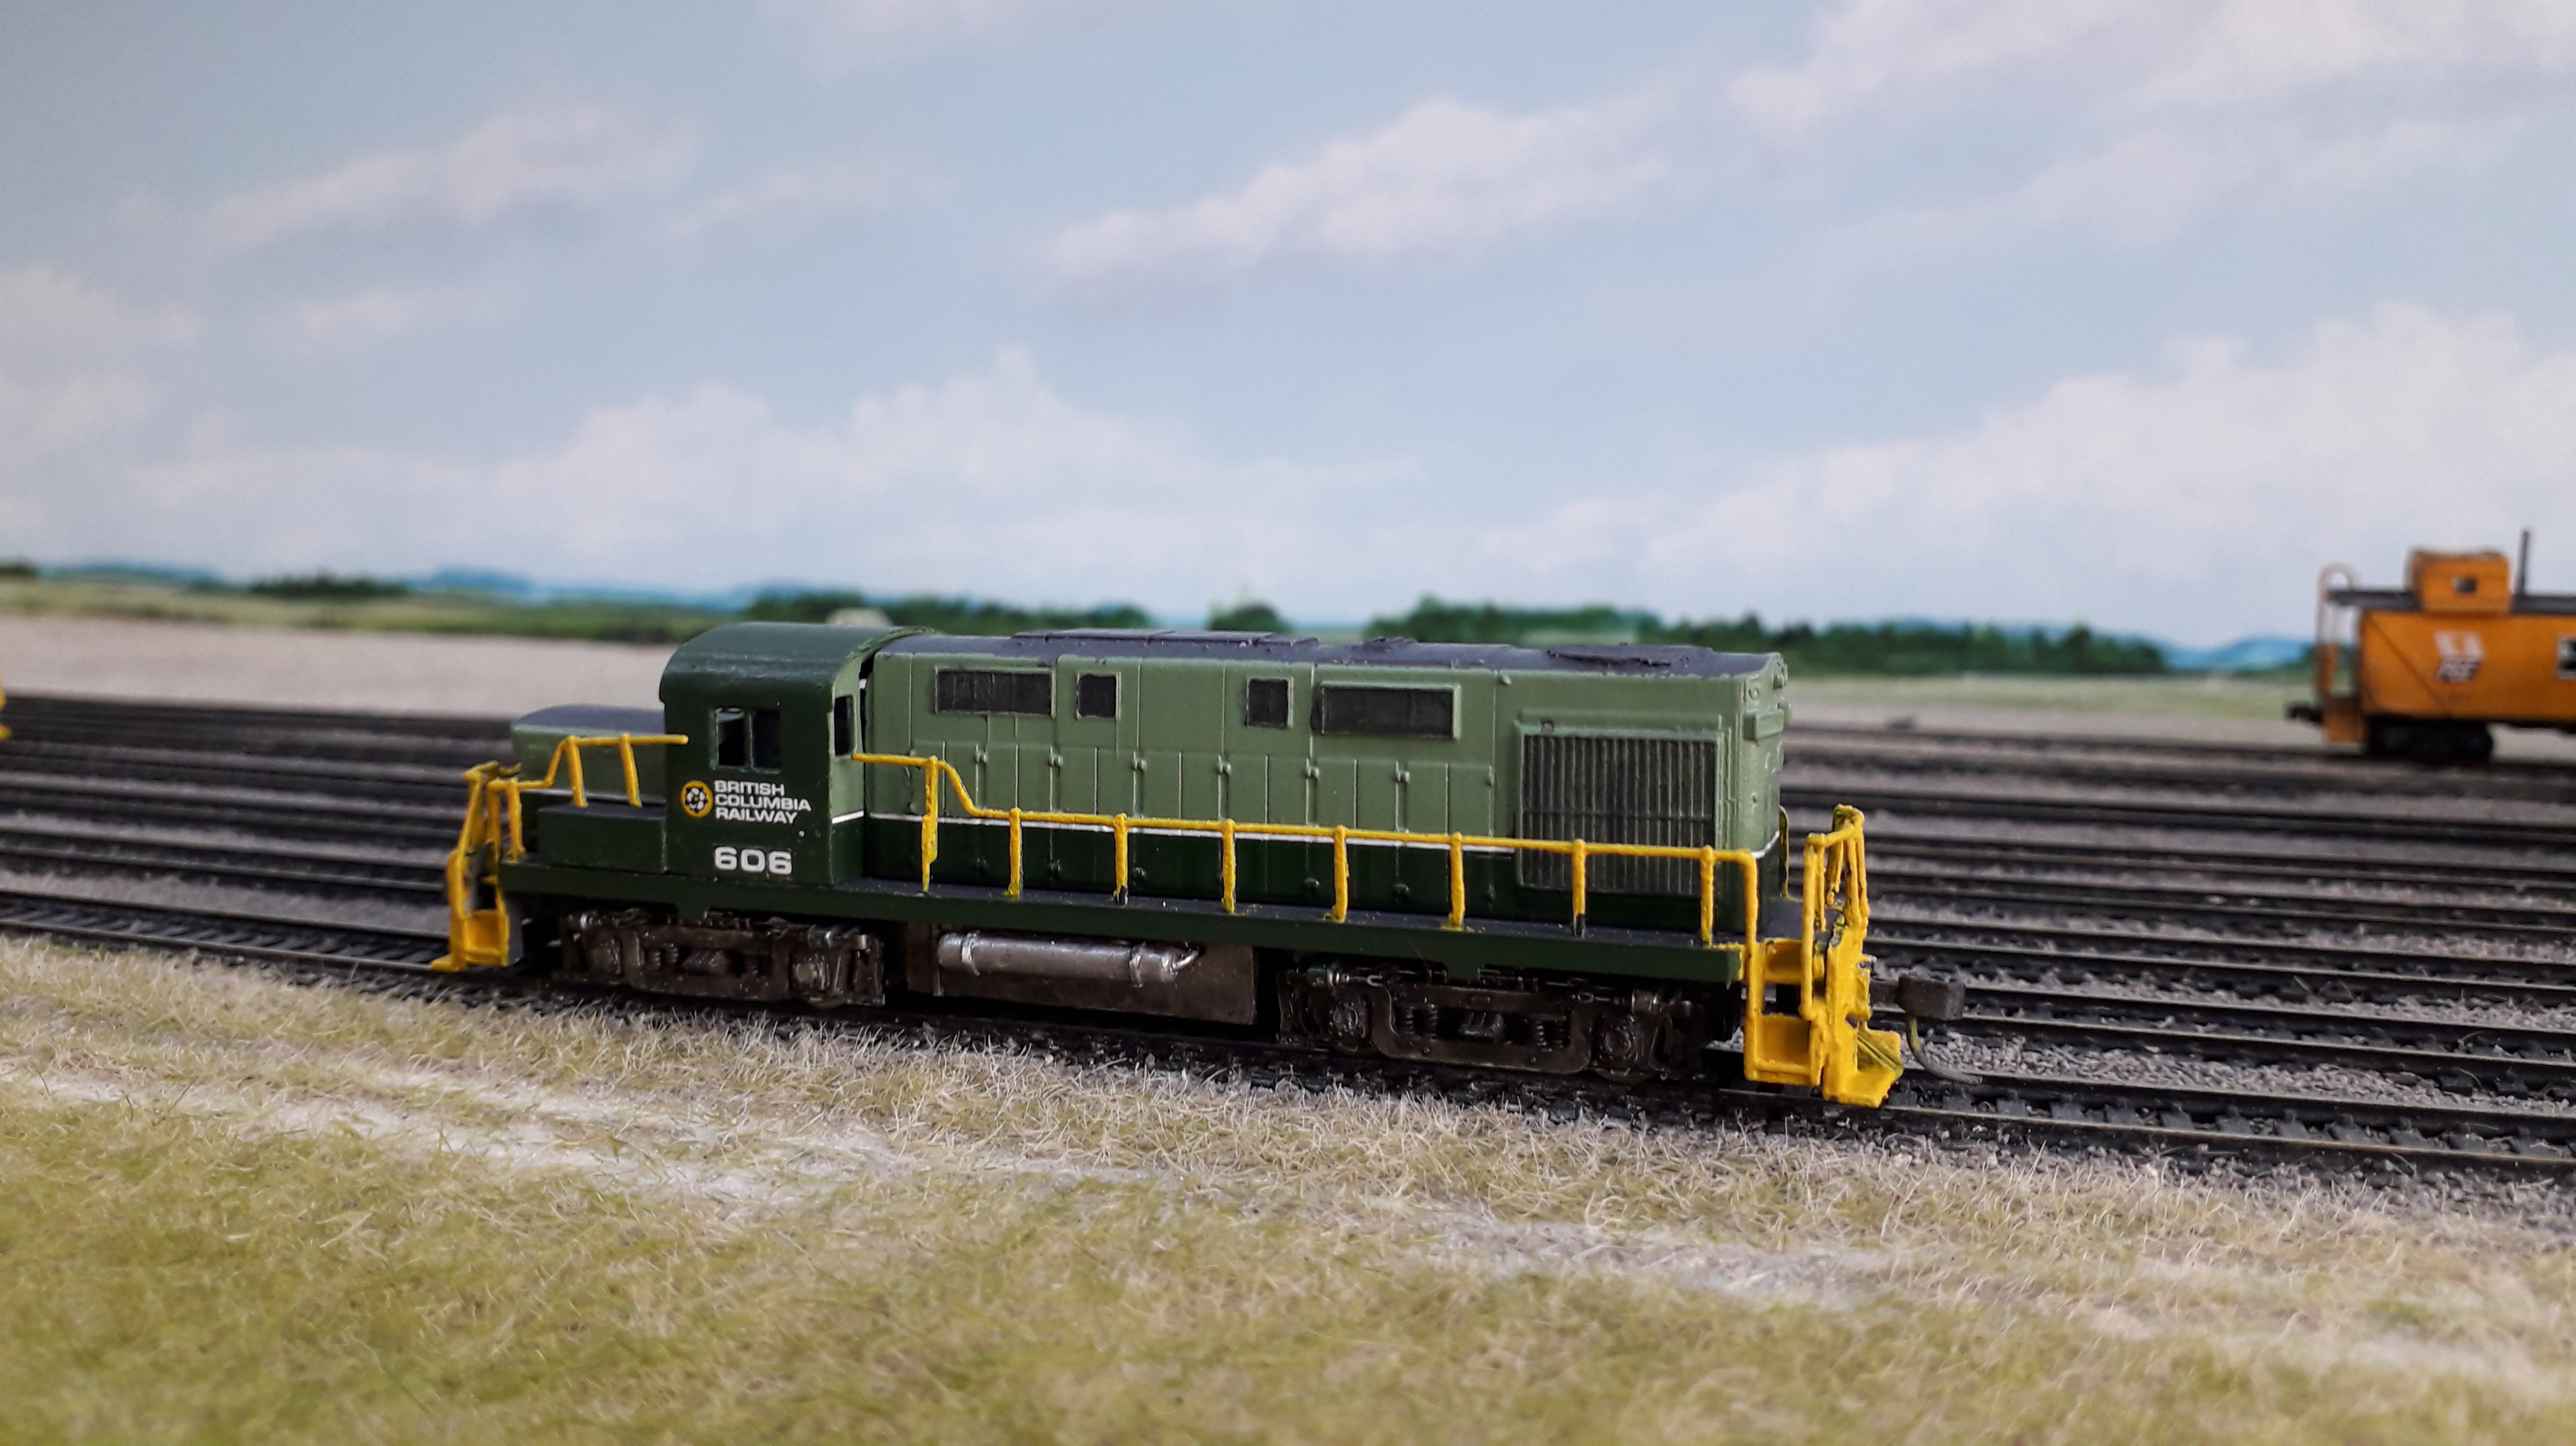
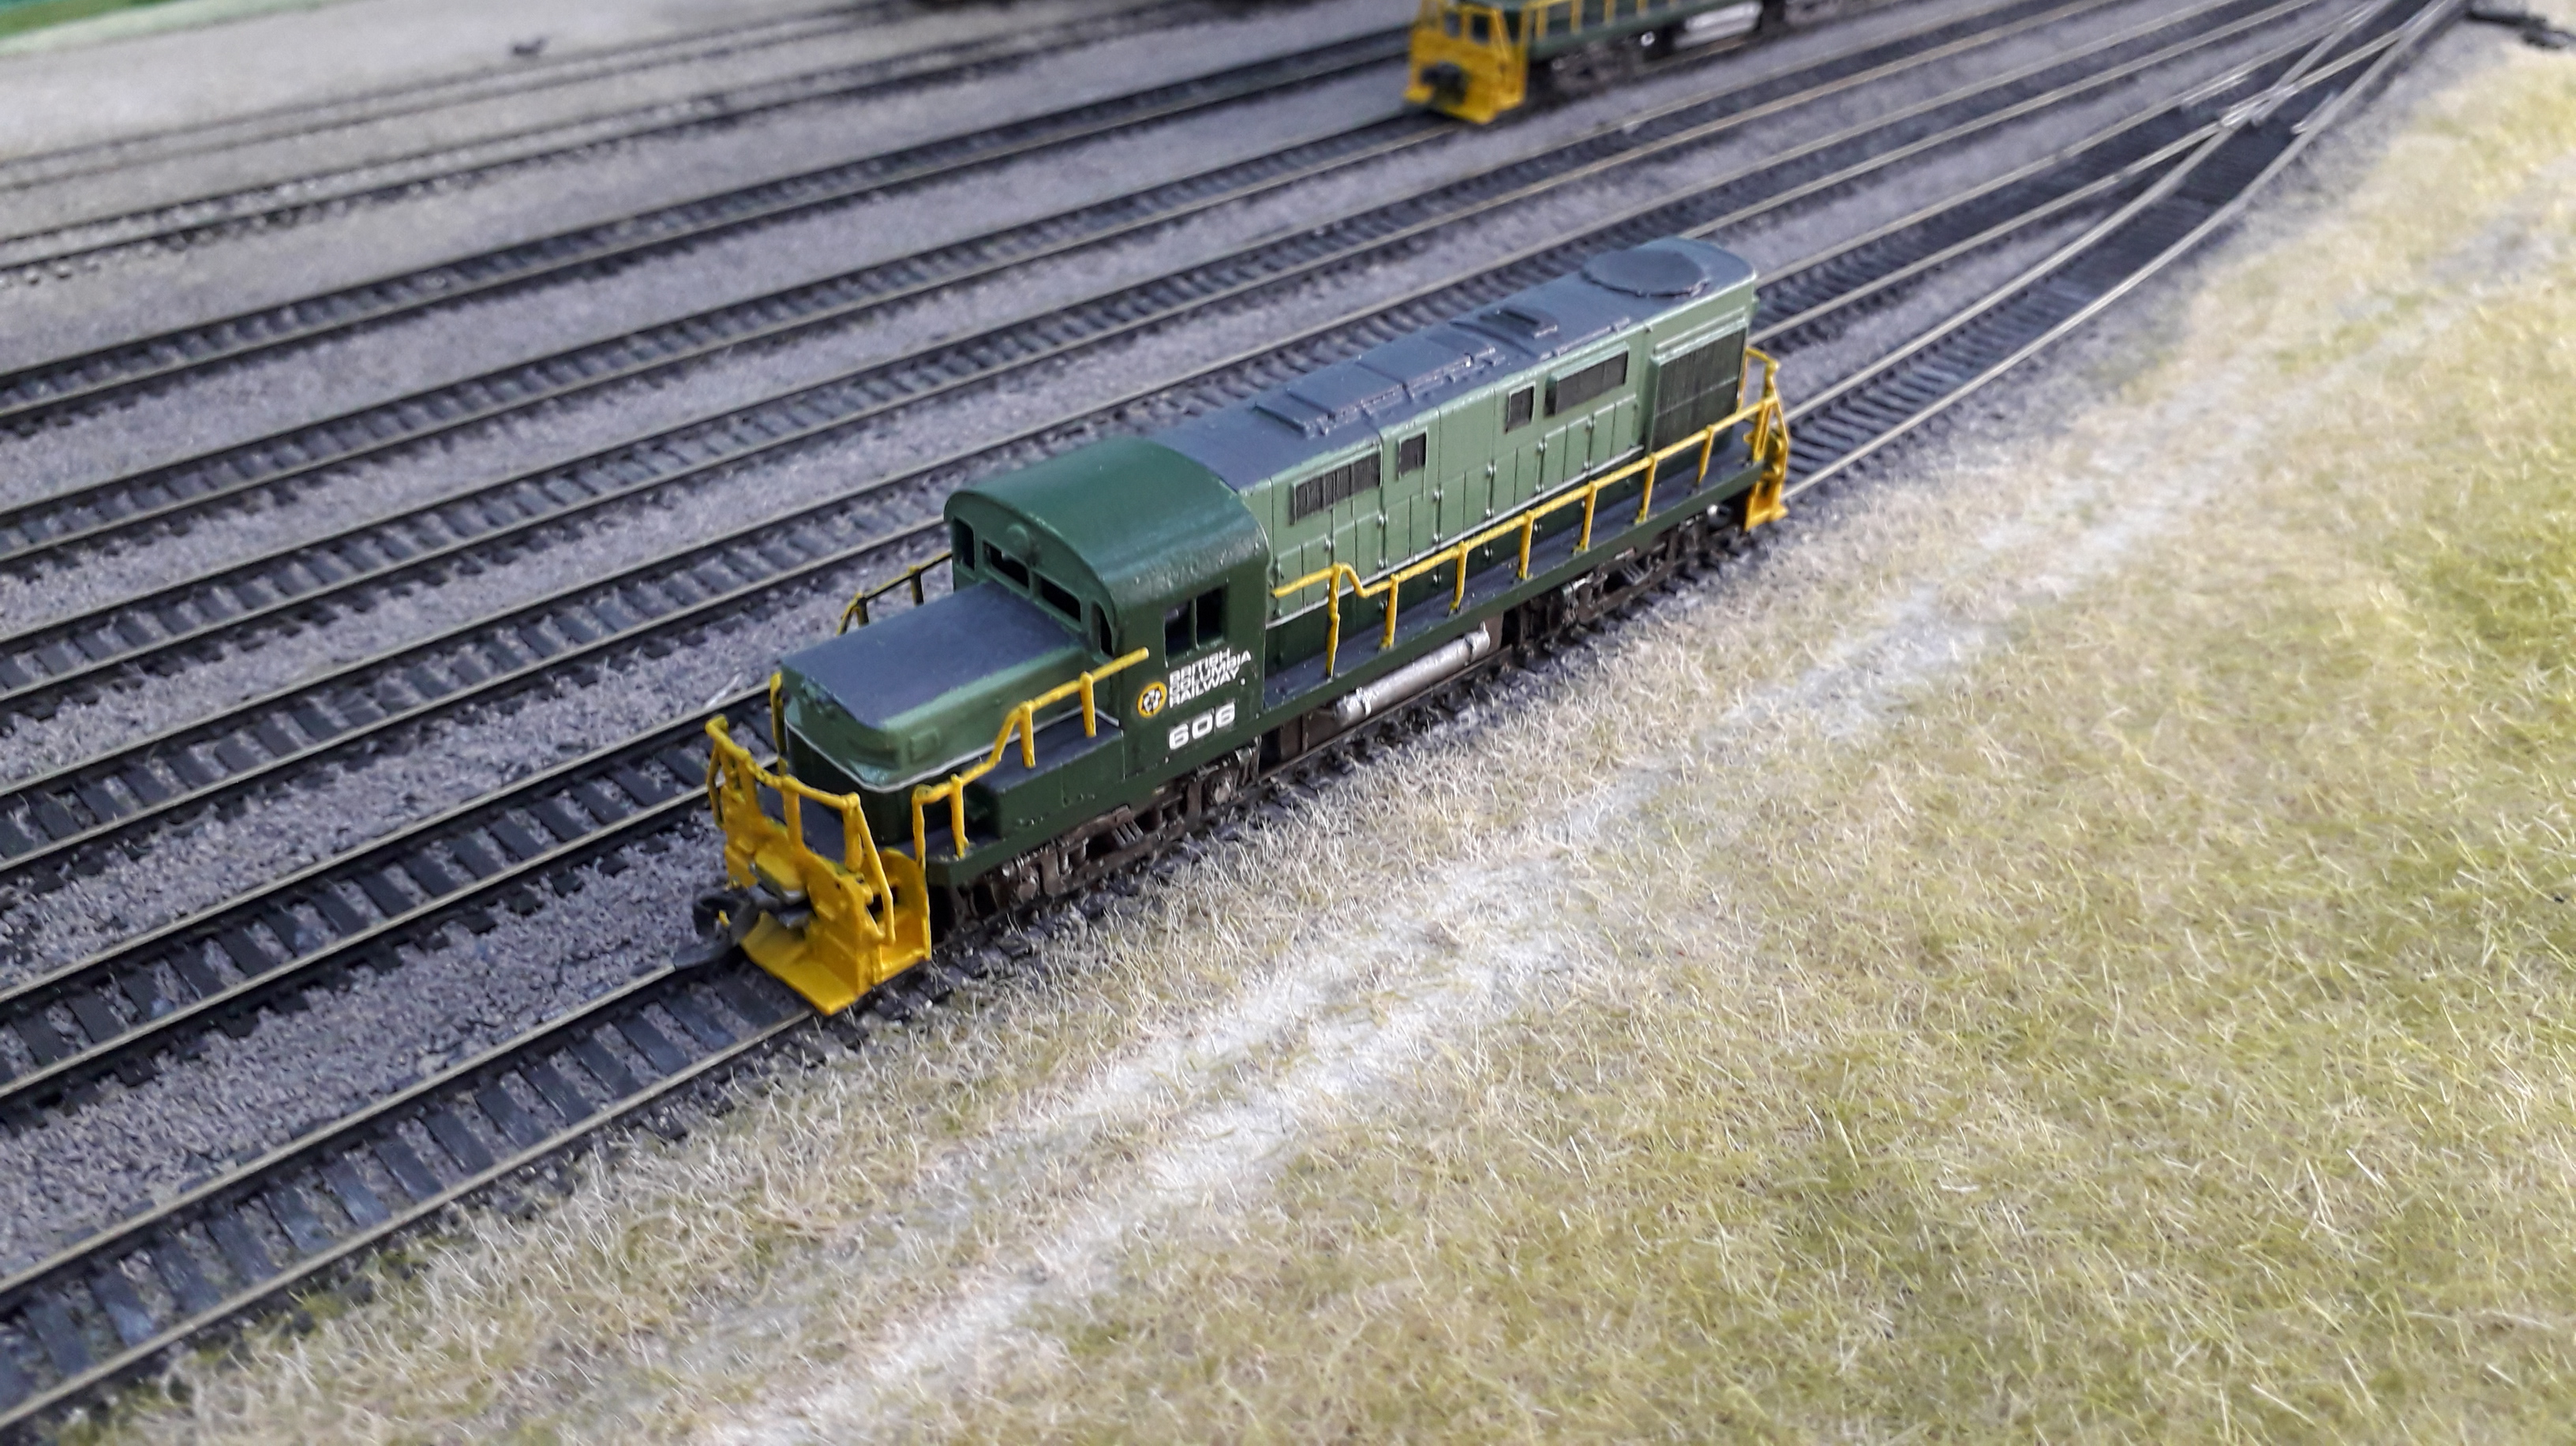
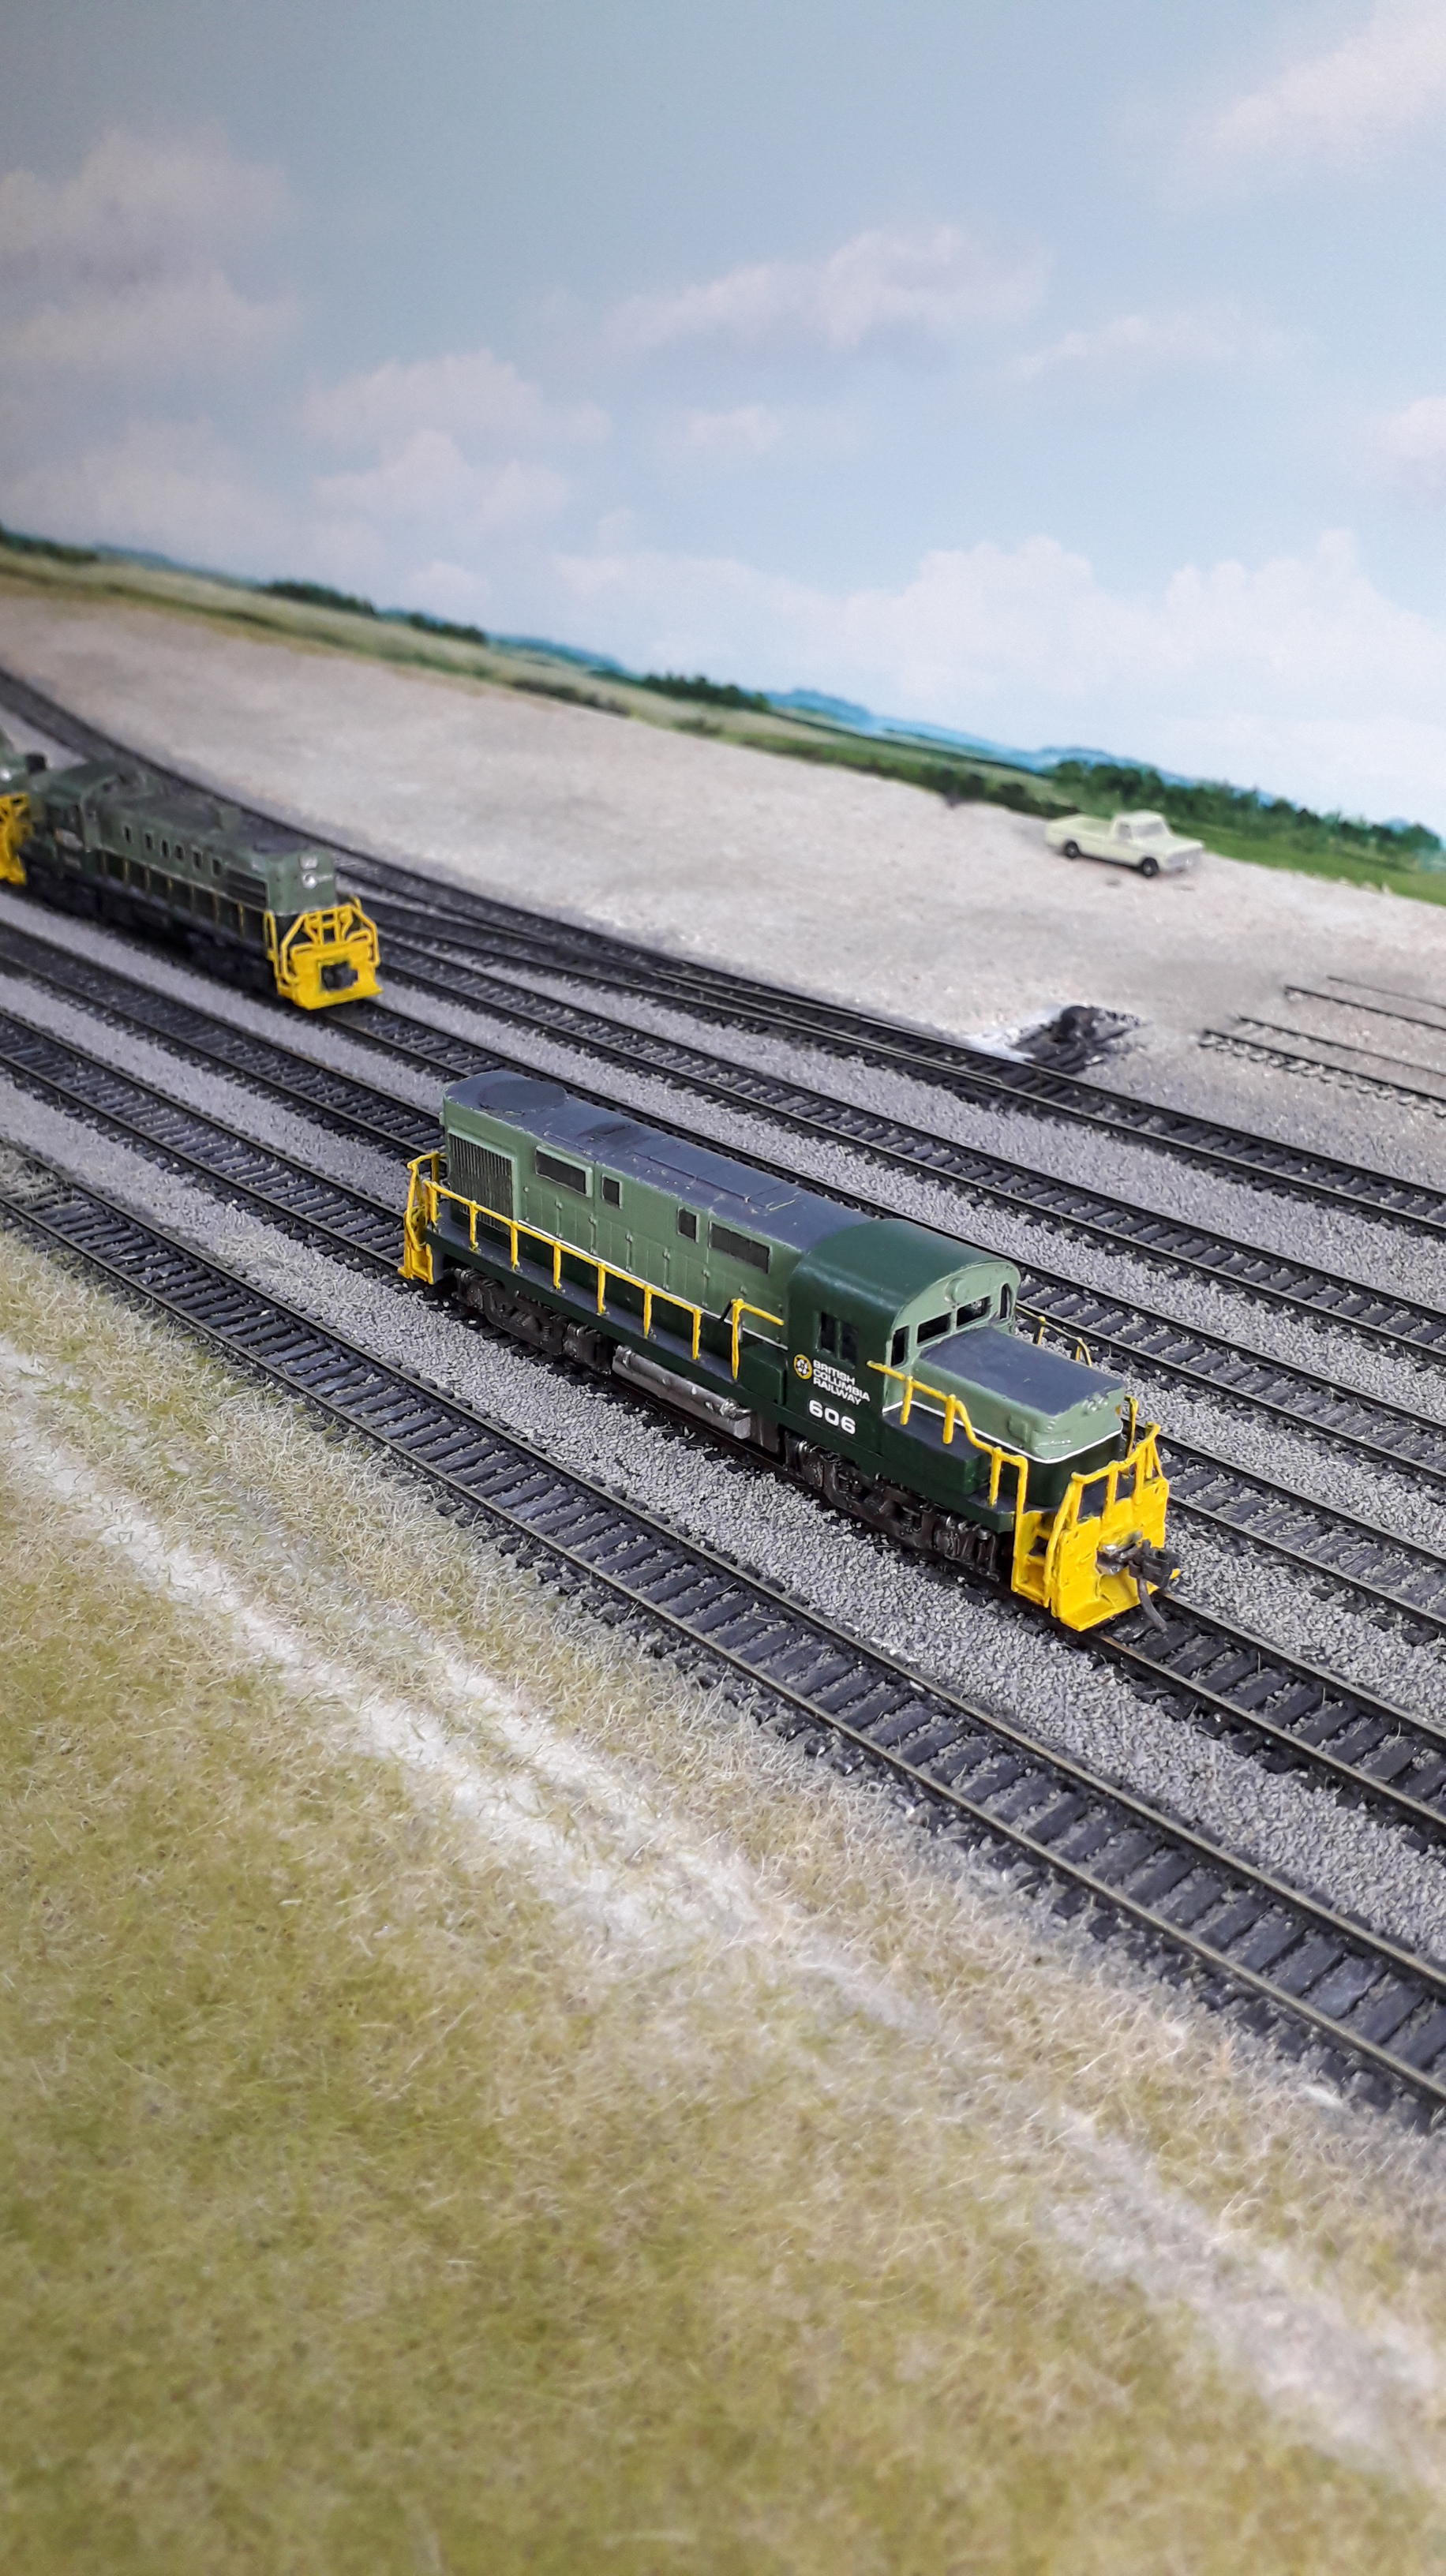
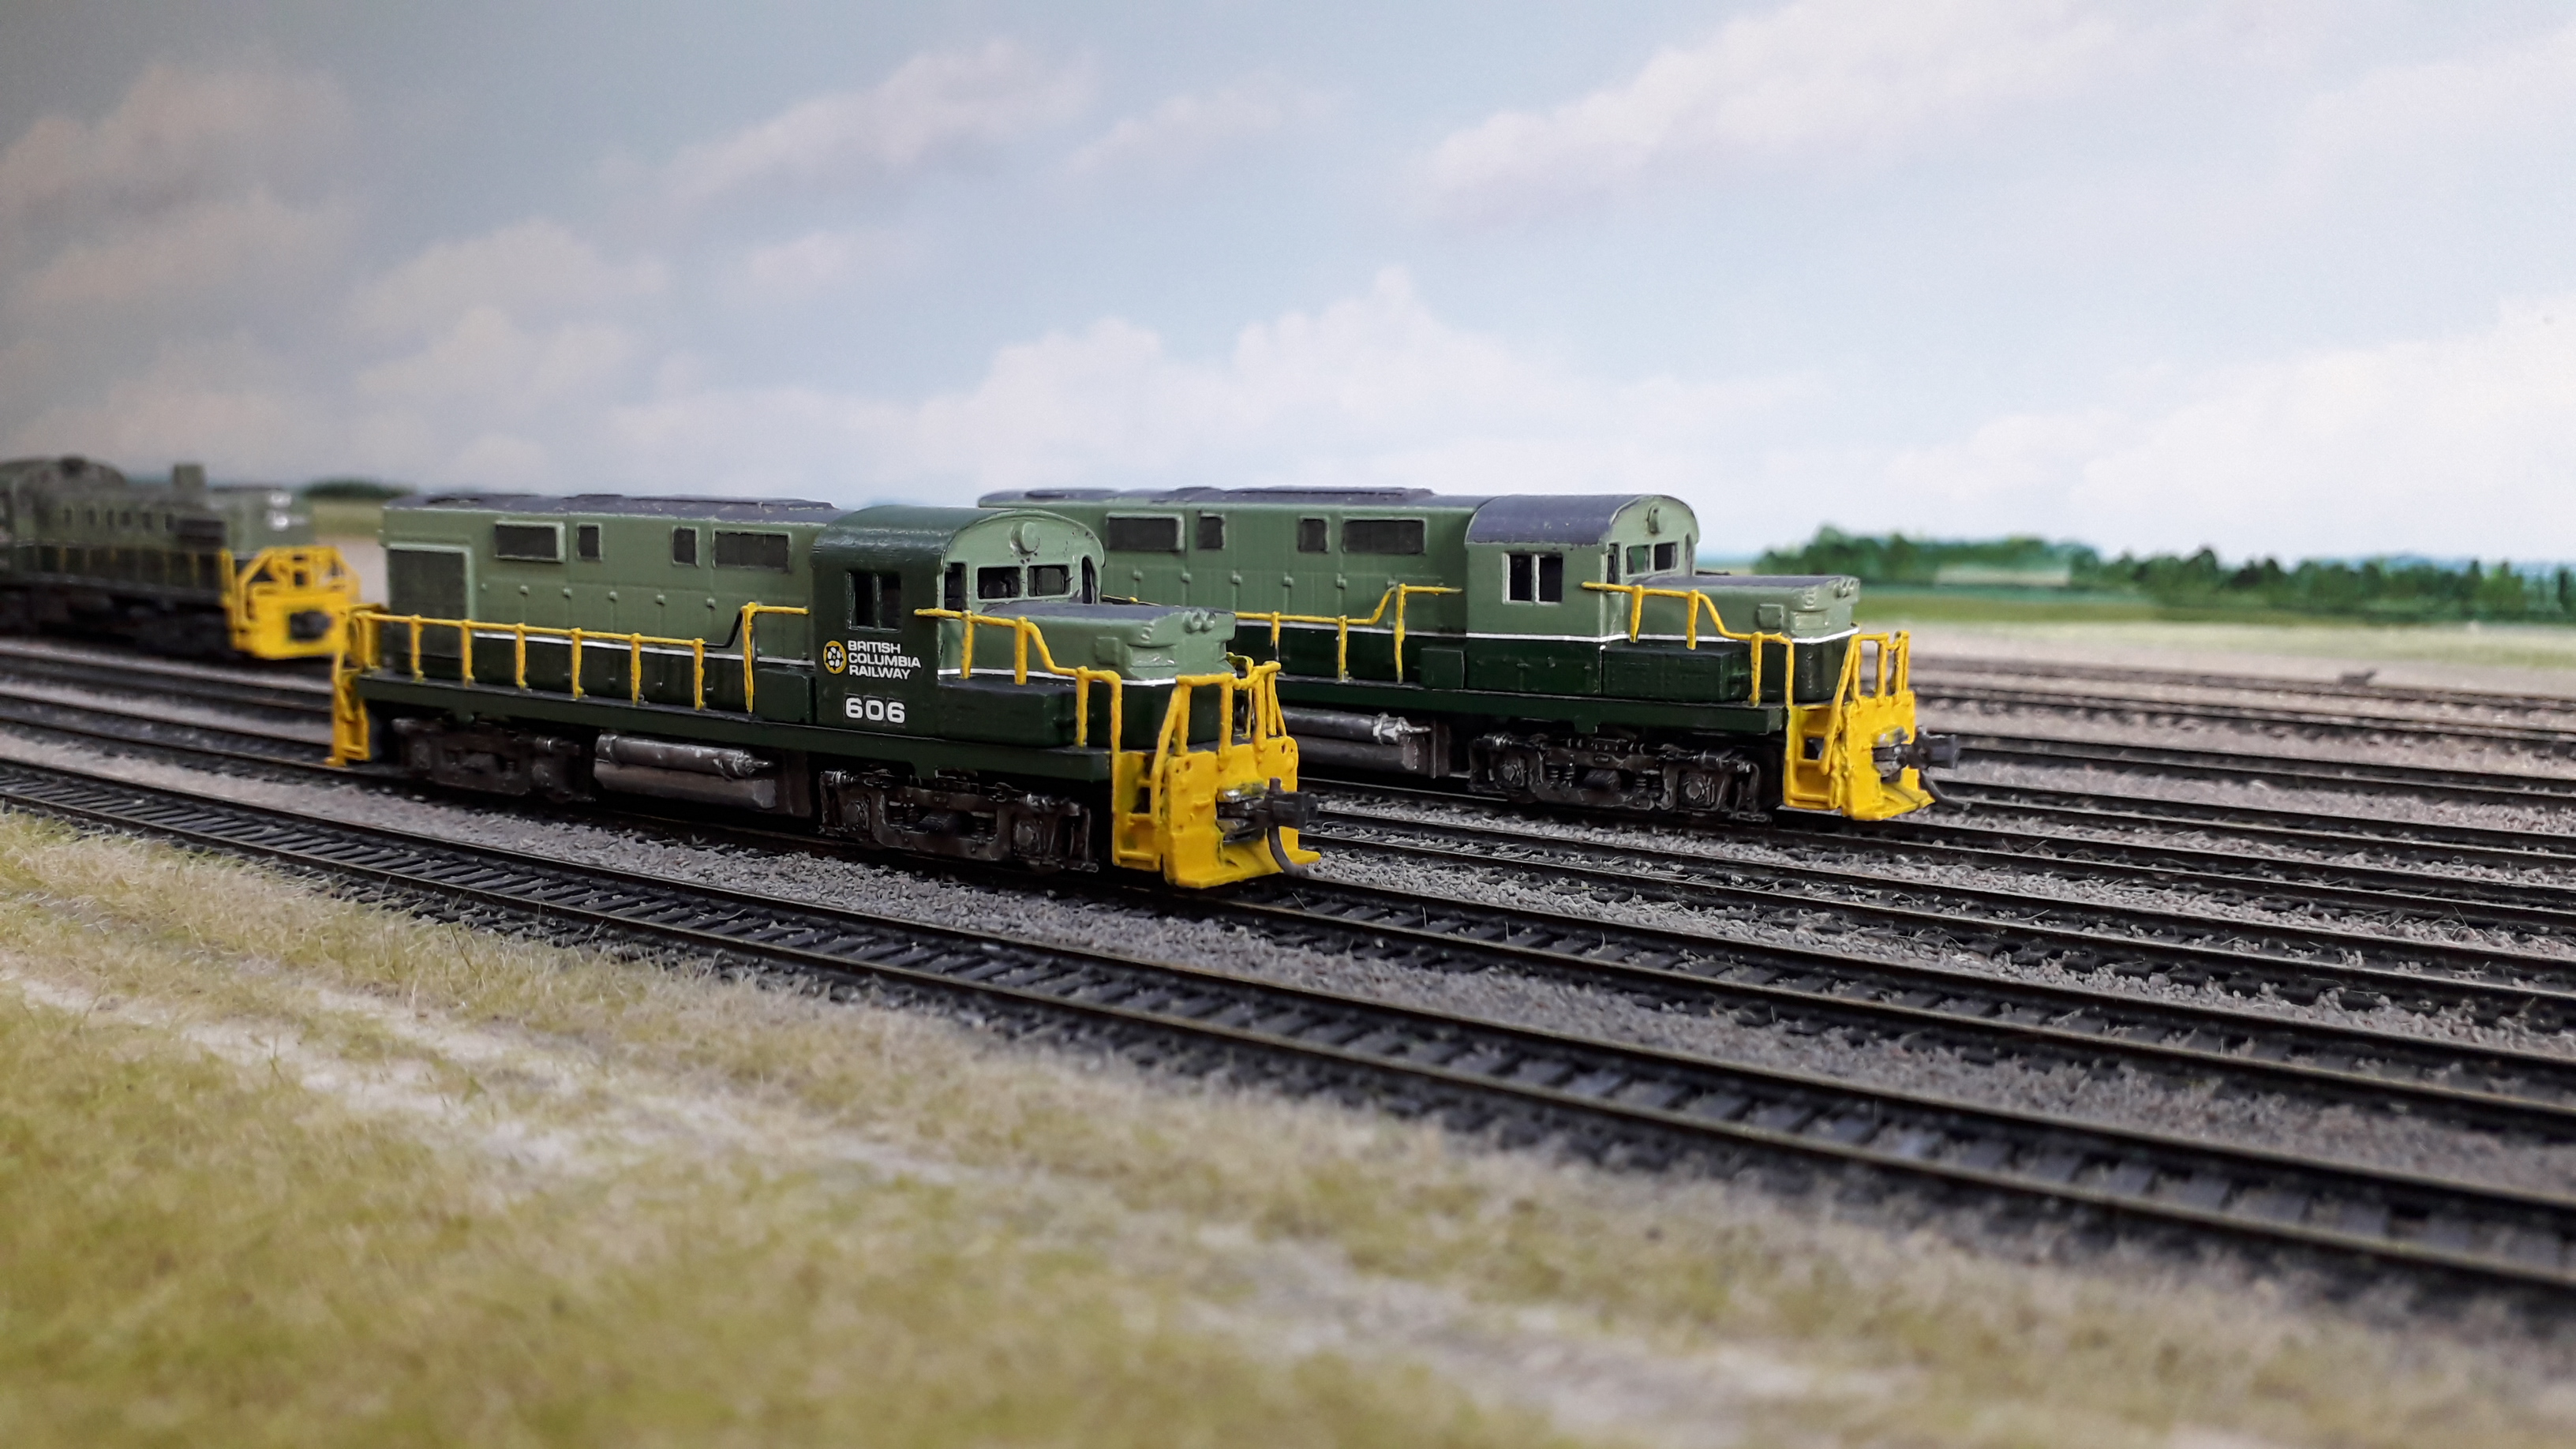
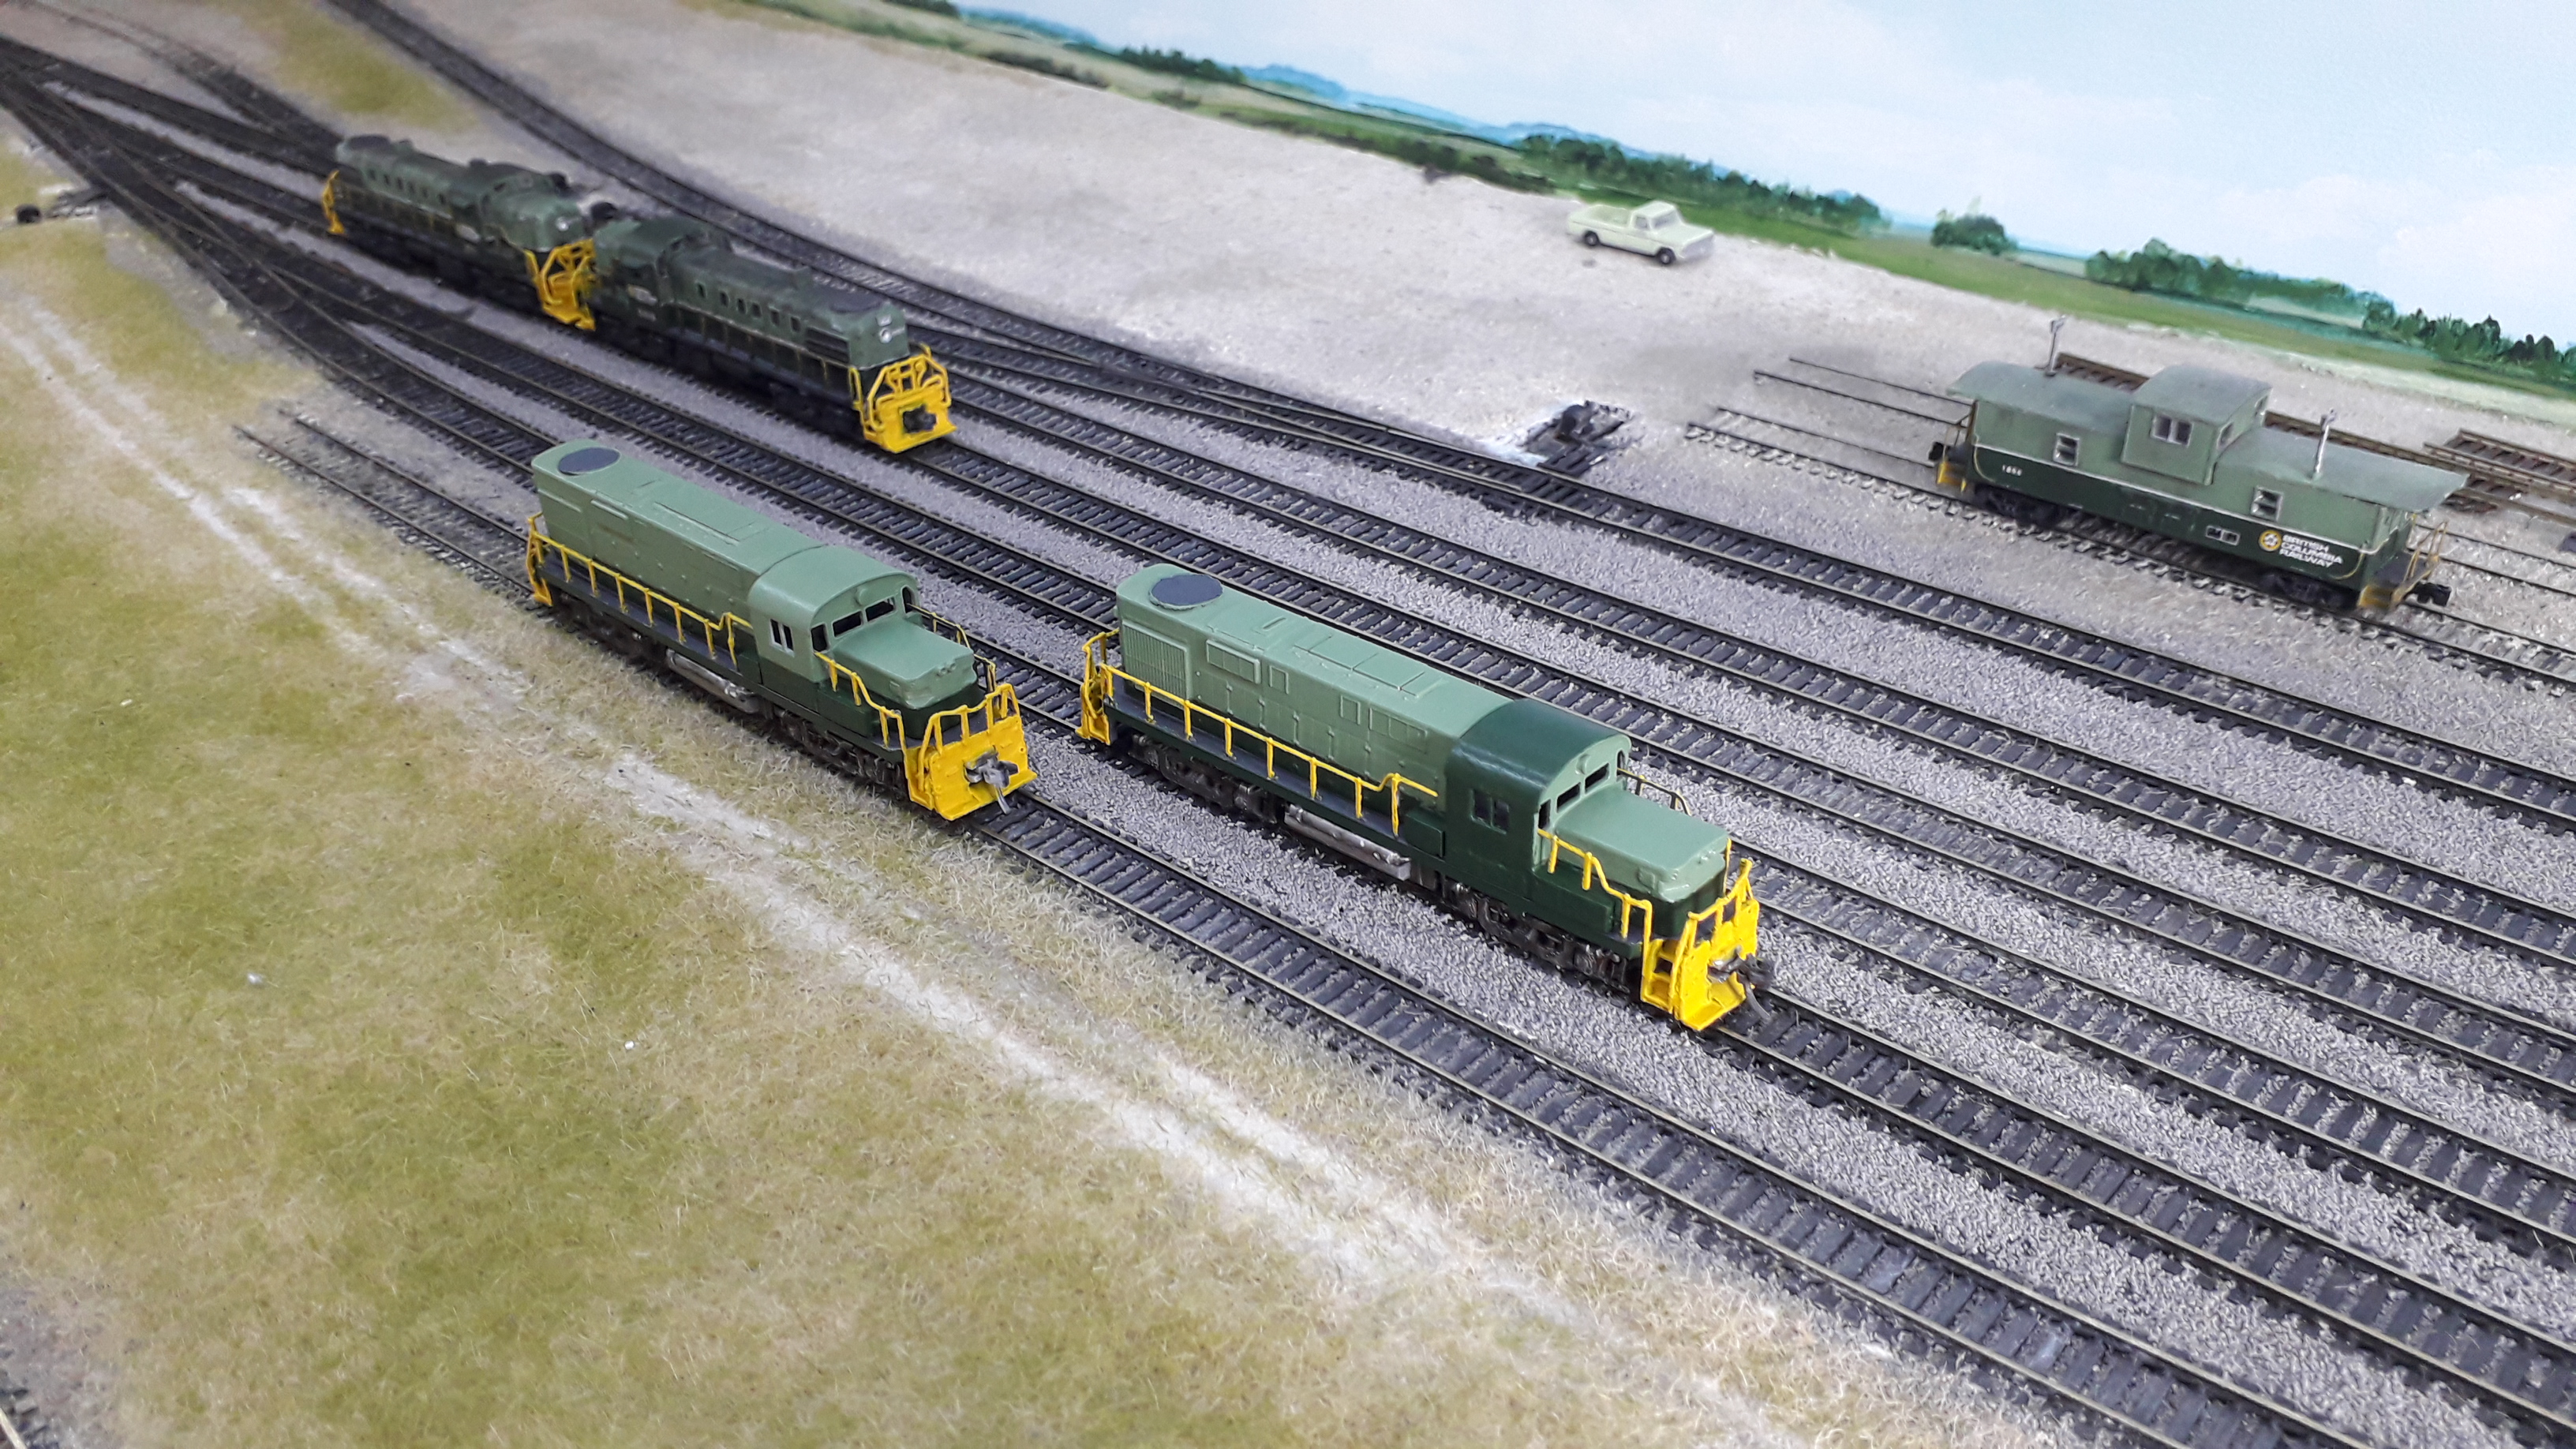
BCOL 606 and PGE 610 now completed bringing the motive power roster to four
This week saw the completion of weathering and final details on both 606 and 610 which (for now) brings this project to a close. PGE 610 still needs custom decals made for the cab side map heralds and both units will need to be upgraded with a modern DCC friendly chassis as the current ones are ancient and their running qualities (under DC) are terrible compared with the RS-3s which use the still-old-but-not-ancient ‘Atlas Classic’ mechanisms
Due to the remoteness of New Zealand and lack of local suppliers, I typically do one big import order a year from North America so this year’s order will likely include replacement chassis for these two units.
Weathering for 606 was done using the same approach as used for 610 but a lighter touch was used as 606 represents a unit that would have been repainted from PGE to BCR branding within the previous 5 or 6 years. As with 610, a mix of washes and weathering powders were used.
Glazing was done using Canopy Glue (this was a suggestion from a local military modelling hobby shop) and it does work quite well for N scale cabs. The glue is applied to window openings with a toothpick and by dragging around the window edges, surface tension will fill the window opening and the glue will dry clear.


I found I needed to do a second application as sometimes the tension would break as the glue dried and create small holes in the glue film. The plastic glazing inserts from an original model will always be preferable but in this case existing parts would only be available for the cab side windows. The canopy glue method is also far less tedious and frustrating than attempting to glue hand-cut squares of clear acetate sheet behind the window openings. This is something I did on 3 resin caboose kits and I would prefer to never do it again!)
Note.. the glazing step must be done after all weathering has been completed and sealed with dullcote (or flat clear equivalent) as applying a flat seal over the canopy glue would likely cause it to fog.
Images below show the completed units from various angles and also include some images of a four unit consist where they have been posed with previously completed RS-3s. Prototype photos from the period show that with regard to consisting, anything seemed to be fair game on the 4-axle north end subdivisions, with various combinations of RS-18s, RS-3s, M420s and C425s all cobbled together in lively lash-ups.


RS-18 Conversion Project – Part 5
December 28, 2020

The last few weeks have seen the completion of decals on both units, the addition of some detail parts and completion of weathering on 610. PGE 610 is still missing the map herald on the sides of the cab as it now looks that these will have to be custom made decals. I had an assortment of PGE map heralds in my decal stash and was optimistic that one of them would fit but they are all much too large unfortunately. For now I am moving ahead without them as it will not be a huge deal to add them later and blend them in to the weathering which has already been completed
The horn and bell cluster on the cab is a very distinctive feature on the RS-18 and fortunately I had some suitable parts available from a previous project. The horns and bells are Miniatures by Eric brass parts which I took from a couple of CRS-20 shells I completed back in 2013. After scraping off the BC rail red from those parts they were mounted on the cab and painted light green. The side cab window sunshades are Gold Medal model parts and were also taken from the CRS-20 shells, stripped of red paint and repurposed.

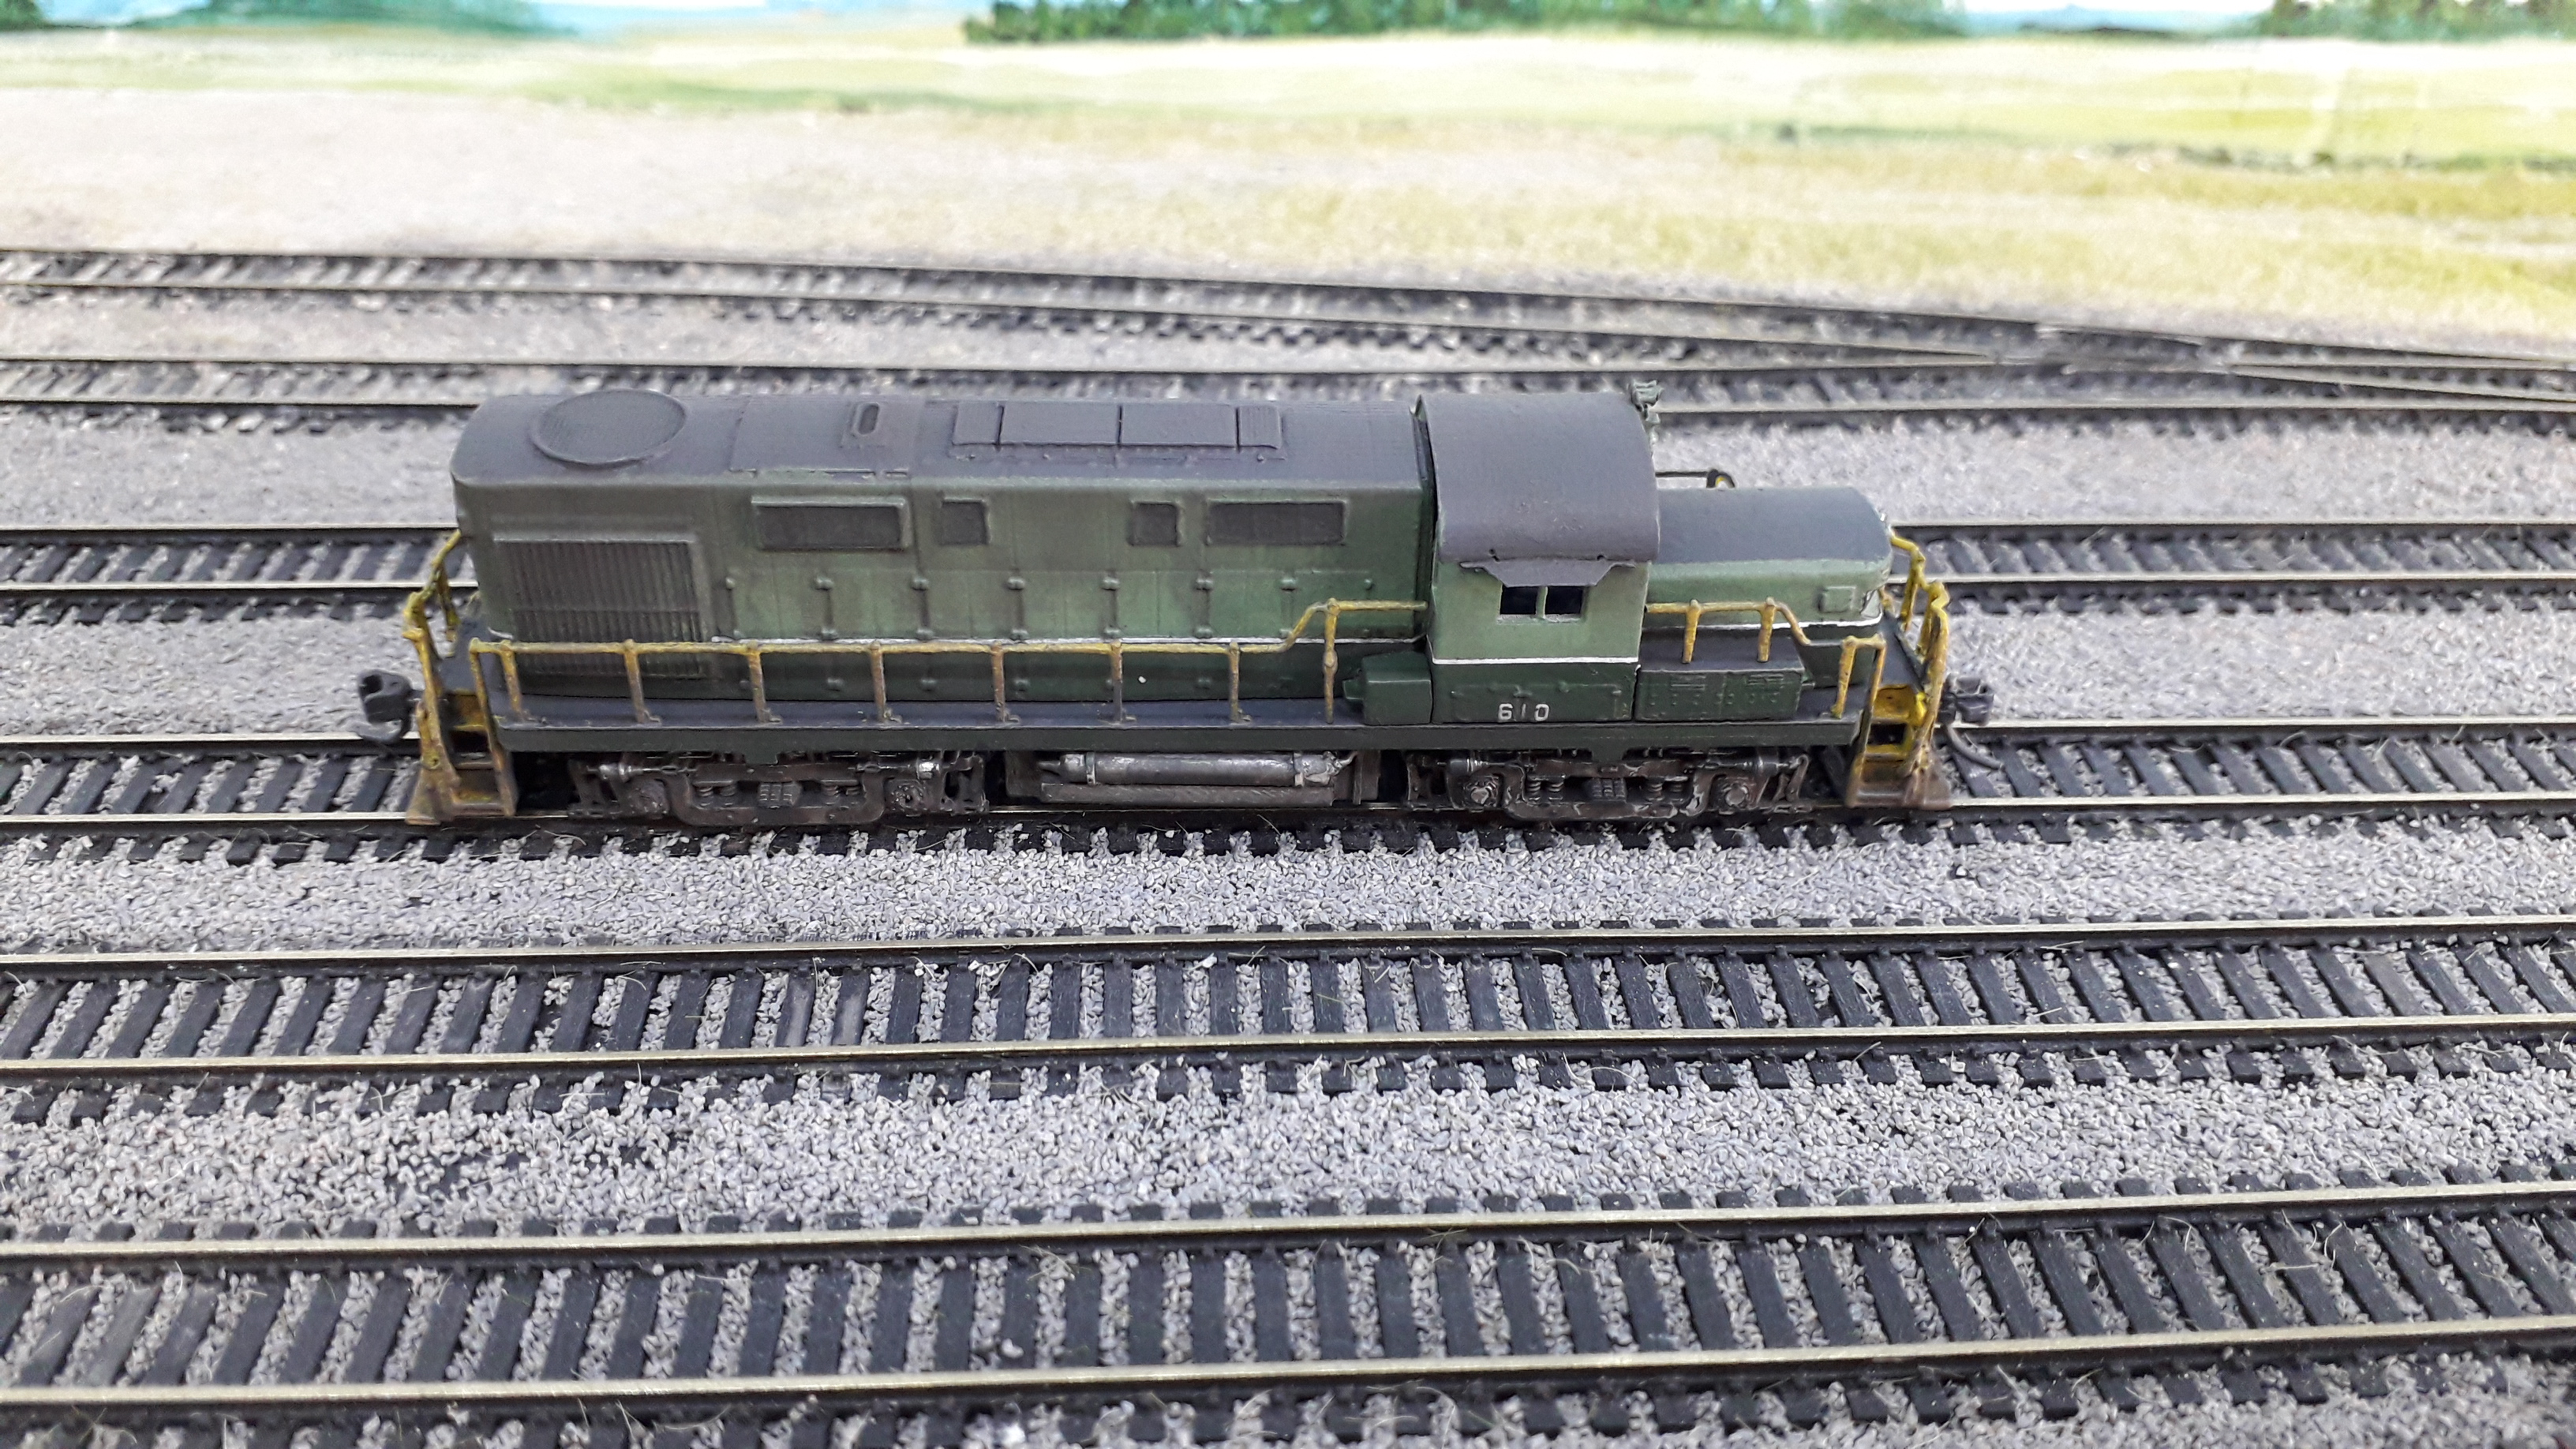
Weathering on 610 was done in a series of stages and I am quite happy with the results. I aimed for a fairly restrained weathering finish but after looking at lots of prototype photos it was obvious that most units ended up in filthy state.
I used a thin black acrylic paint wash to pick out the recessed details and a thin grey wash to dial down the intensity of the yellow on the pilots and handrails. A thicker black wash was used on each side of the vertical handrail stanchions. This has the effect of visually shrinking them and from a normal viewing distance you would almost think they are fine wire details.
Bragdon black weathering powder was applied liberally to the top of the long hood and brushed down over the sides as per prototype photos. A microbrush was used to apply weathering powder in vertical streaks between the carbody side doors as this is quite a distinctive prototype weathering pattern.
Finally, Tamiya Weathering Master powders (Item 87079) were used on the pilots. I used the ‘Mud’ powder primarily. It is slightly less intense than the Bragdon powders and can be built up in very subtle layers. It is also more of a grey/brown colour so it doesn’t overwhelm the yellow pilots like the black does.
The next step will be to weather 606 using the same techniques. 606 will have slightly less severe weathering as it will represent a unit that had been repainted within the last 6 or 7 years, whereas PGE 610 represents a well worn unit by 1978.
Photos below show completed weathering on 610 and it is quite a contrast from the currently pristine 606


RS-18 Conversion Project – Part4
December 11, 2020

BCR 606 Decals largely complete with PGE 610 not far behind
This week saw good progress with additional painting and application of decals to BCR 606 and PGE 610.
Additional painting involved applying a dark grey (Tamiya German Grey) to the top of the long and short hood (and the cab roof of the PGE unit). The application was based on prototype photos and received information on general paint schemes of the time. The prototype roof colour would have been black but I went with a dark grey to simulate paint fading. Liberal application of black weathering powders will give a black appearance eventually anyway.
Additional painting was applied to the carbody filter in the form of several washes of thinned black paint to bring out the details. At this point the two locomotives looked quite smart and the different two tone green treatment on the cab of the BCR and PGE unit adds a nice bit of variety.


Decals were applied using the available Microscale decal set #60-783 (British Columbia Railway Diesels, 1972 -1984). As with the RS-3s completed last year, the white lining was the most challenging but with patience (and use of a magnification visor) I was able to get it on nice and (relatively) straight.
BCR 606 decals are largely complete in these photos. Microscale does not offer the exact PGE map herald and numbering font for RS-18s of this period, but I have a collection of other PGE decals that may be close enough to do the job.

After decals are fully completed there will be some additional detailing applied and some adjustments to the handrails to get them to sit neatly. Then it will be on to the weathering stage which should be fun based on the state of some of these locomotives in prototype photos.
RS 18 Conversion Project – Part 3
November 28, 2020
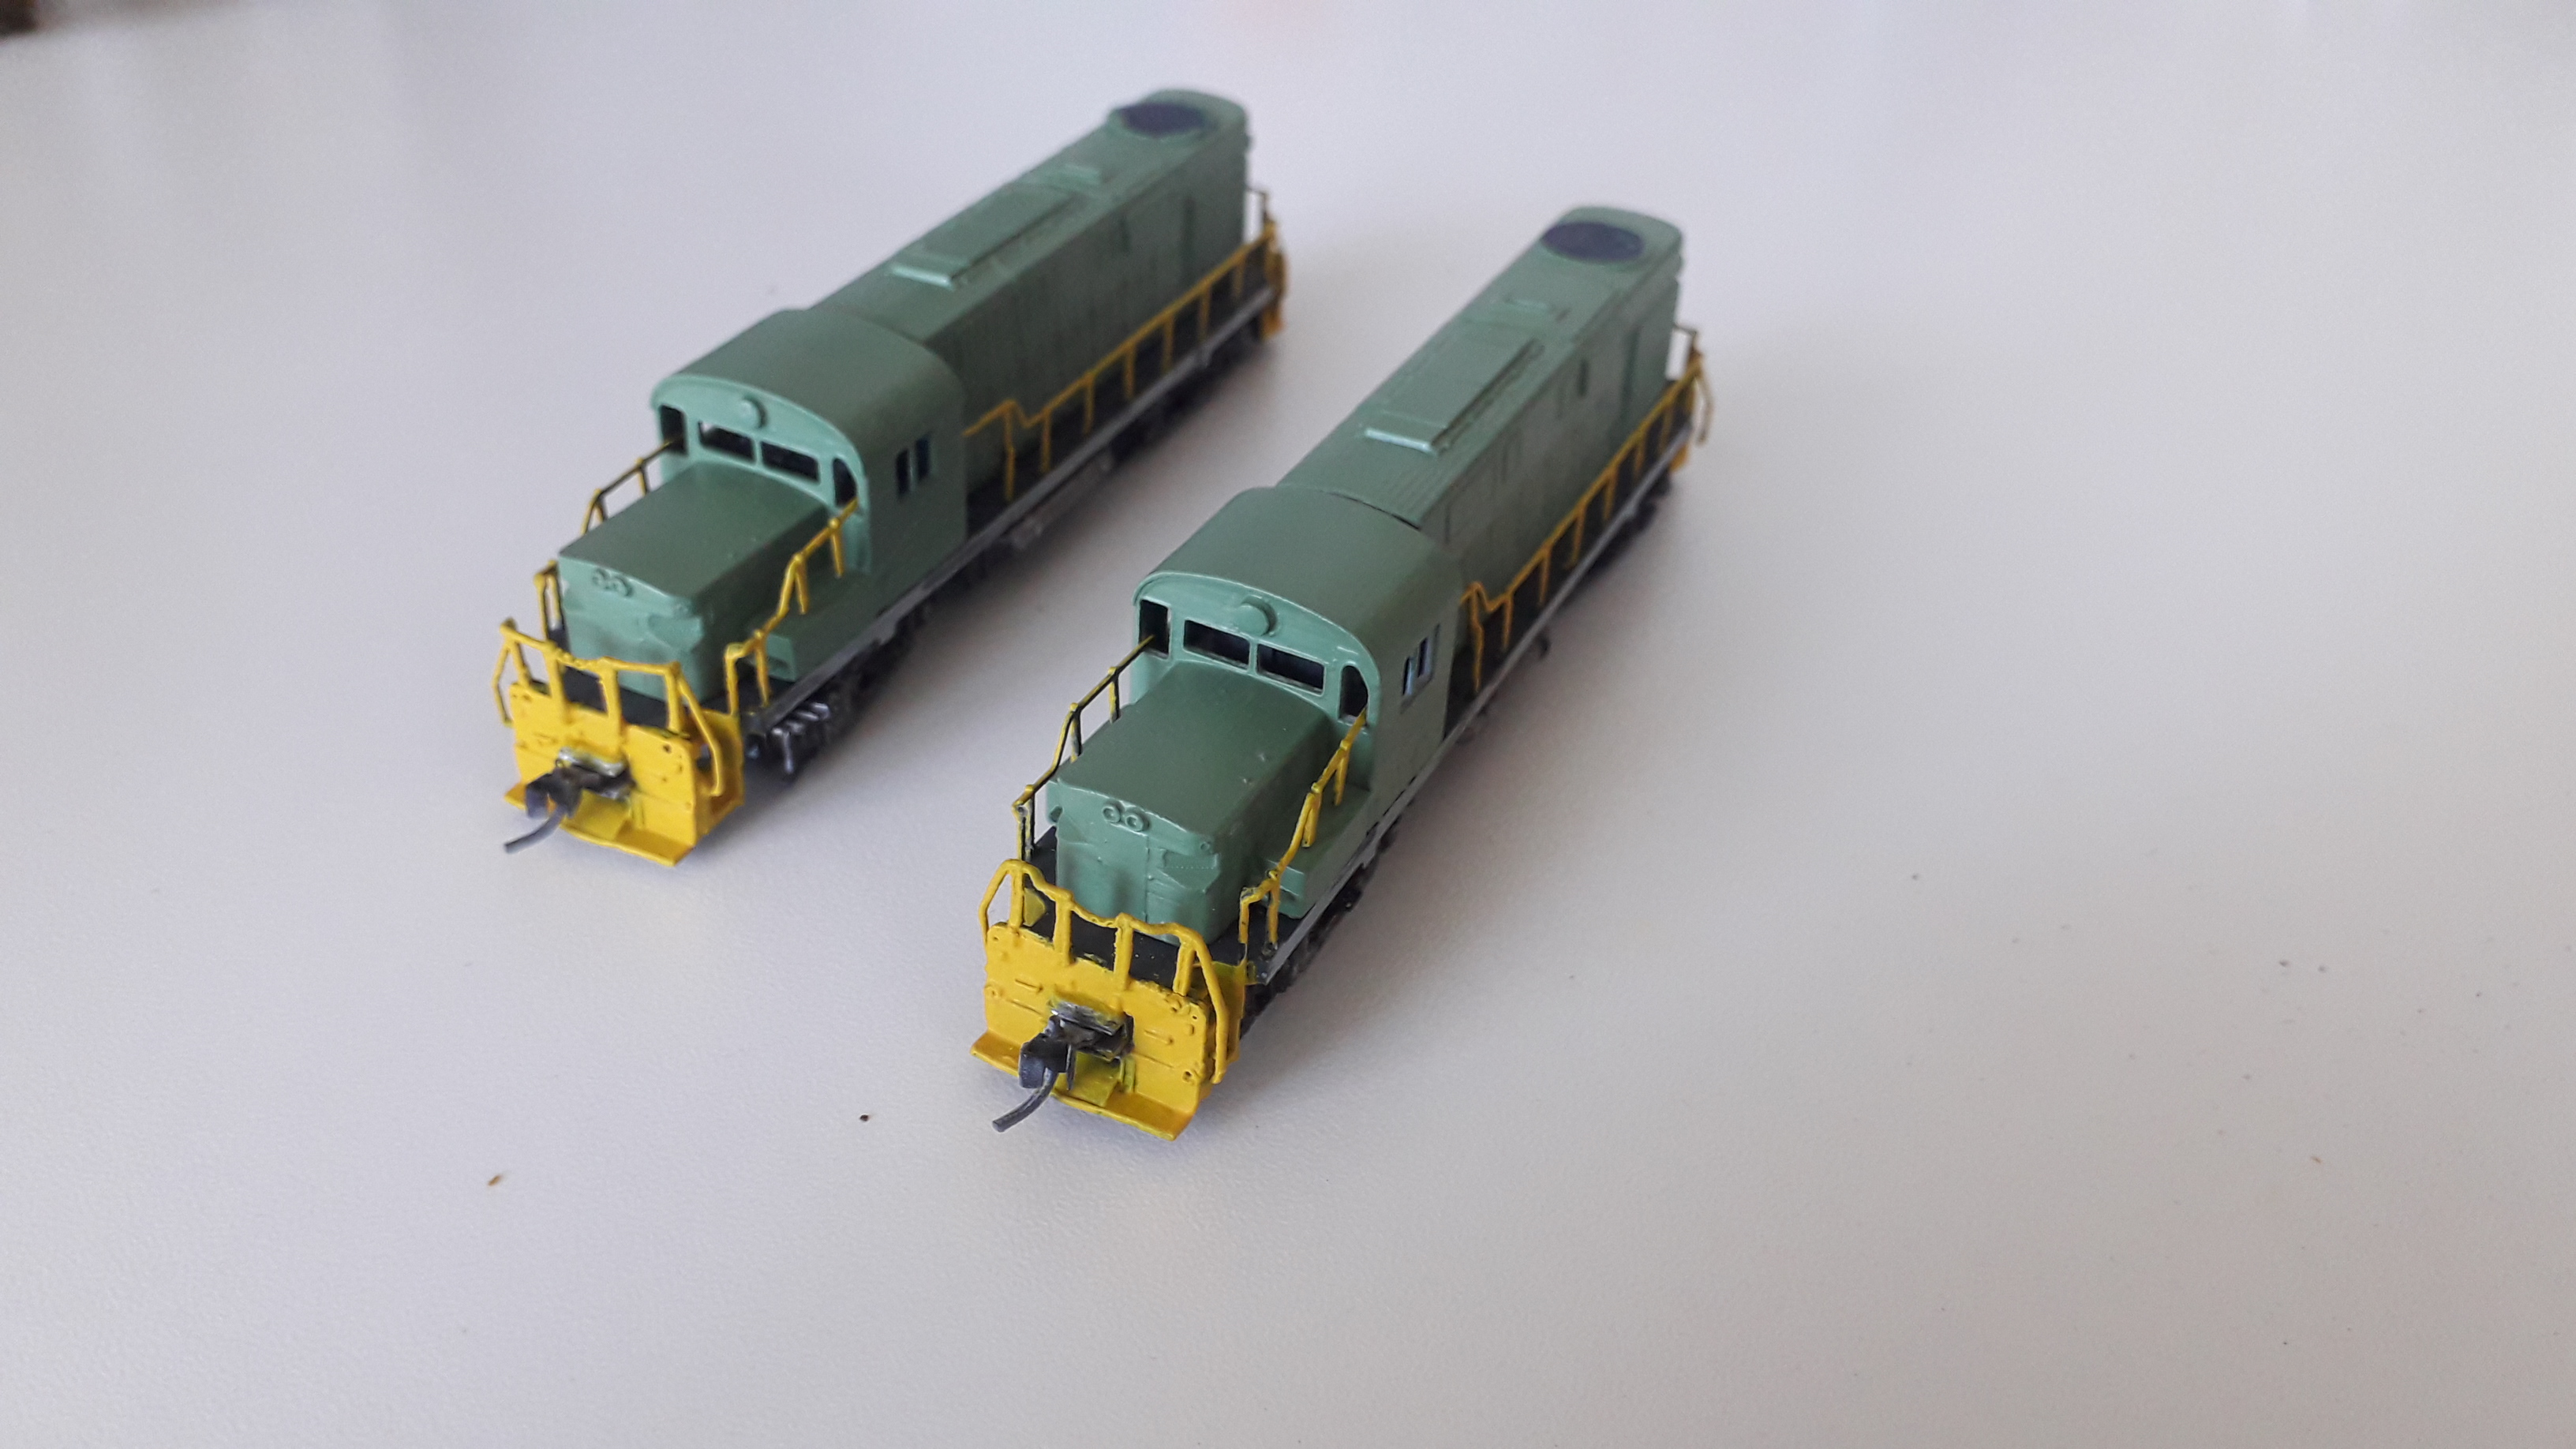
The two RS-18s are progressing nicely and this week saw the initial paint application. A base coat of PGR/BCR light green was applied to all the bodyshell parts, while handrails were finished in yellow and the underframe in a dark grey. Specific paints used were:
True Light Trains BCR/PGE light green #6 (TLT010036) acrylic for the body (4 coats applied over several days)
True Line Trains BCR / PGE Dark Green #7 (TLT 010037) was used and brush painted on in 4 coats over a weekend. Removal of masking tape revealed nice crisp paint lines which was very pleasing. Next steps are decals
Tamiya XF-63 German Grey for the underframe.
Humbrol Matt 154 yellow was used for the handrails.

As with all my painting projects I brush-paint as I am not convinced that the finish quality of airbrushing justifies the expense, mess and equipment needed – especially in N scale where a rattle can finish of dullcoat gives everything an even airbrush-style finish anyway.
The distinctive two-tone green colour scheme requires careful masking but once this is done a few coats of the dark green over the space of a day were all that were needed to bring the locomotives to completion in the painting phase.


RS-18 Conversion Project – Part 2
November 14, 2020
This project has been languishing for almost 18 months so I decided it is time to get it moving again. The delay was mostly due to an accident with one of the brittle resin long hood castings that resulted in it splitting. I was able to source a replacement hood part a few months ago.

The other issue with this project is that the mechanisms just never ran that well. I picked up two undecorated Atlas RS-11s a decade ago for an absolute bargain price and never really considered the elderly age of them at the time. As described in Part 1 of this post, the chassis were used to on a BC Rail CRS-20 project that I worked on back in 2013. Since the hard part of chopping the frame for the low nose had already been done for that project I was obviously keen to repurpose the chassis for the RS18s.
For the CRS-20 project I had replaced the wheels with low profile Northwest Shortline ones but, while the appearance was improved, the running qualities (which weren’t great to begin with) really suffered with the new wheel sets. I have no idea why but they did.

Recently, out of curiosity, I swapped back in the original Atlas wheels and it did seem to make a marked improvement on the running qualities. Once satisfied that these chunky-flanged wheels would negotiate my Atlas Code 55 turnouts I decided to keep them. Several nights of fussing around with pickup wipers and cleaning wheels and disassembling and reassembling the motor I got one unit to run nice and smoothly on DC power. The other one remains troublesome and just does not want to pick up power from one of the trucks no matter what I do.

One solution that does work well is to hard wire the two units together. I did a test by taping wires between the two halves of each chassis and I got flawless running. This is because you essentially get 16 wheel pickup. Combined with powered frogs this might be a good solution for some of those ancient mechanisms that we all seem to have.
The obvious solution is actually to replace these ancient 80s era chassis with more up to date (and DCC friendly) ones. This is something I may do in the future. It is worth noting that my RS-3s run fine as single units and have good reliable pick up from both trucks, even though they are still older Atlas Classic mechanisms.
For now I will forge ahead with painting and decals. The plan is to do one unit as BCR 606 and the other as PGE 610. These units were both known to work around Fort St John in 1978.


